DIMENSIONS
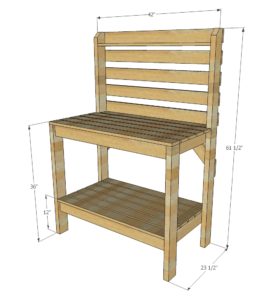
Dimensions are shown above.
PREPARATION
- 8 – 1×4 @ 8 feet long
- 2 – 1×4 @ 10 feet long
- 4 – 2×4 @ 8 feet long
- 2-1/2” and 2” exterior self-tapping screws
- Wood glue
- 2 – 2×4 @ 61-1/2” (back legs)
- 2 – 2×4 @ 35-1/4” (front legs)
- 4 – 2×4 @ 22” (side aprons)
- 10 – 1×4 @ 39” (front aprons, short shelf boards, back shelf)
- 10 – 1×4 @ 42” (long shelf boards, backboards)
- 2 – 1×4 @ 24” both ends cut at 45 degrees, long point to short point measurement (cross support)
INSTRUCTIONS
STEP 1
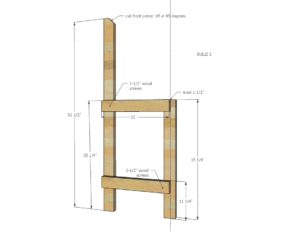
Mark the back legs from the bottom at 11-1/4” and 35-1/4”. Attach with 2-1/2” self-tapping exterior wood screws the 22” long side aprons to the back legs, matching marks with tops of aprons. Then mark the front legs 1-1/2” in from the front edge and also 11-1/4” up from the bottom of the leg. Attach another side of 22” long side aprons to the front legs.
STEP 2
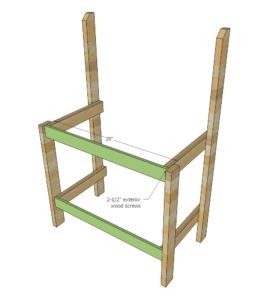
Attach front aprons to the side aprons with 2” wood screws and glue.
STEP 3
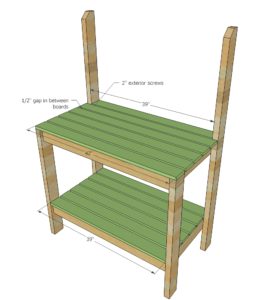
Shelving – Place shelving boards on the bottom shelf. Attach with about a ½” gap in between shelf boards with 2” exterior wood screws. Repeat for top-shelf.
STEP 4
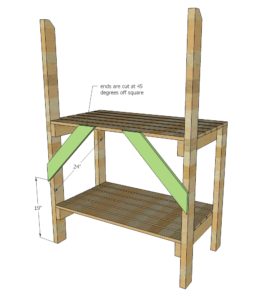
Cross bracing – cut cross bracing at 45-degree angles on ends. Attach to back legs and the back shelf board with 2” exterior wood screws and glue.
STEP 5
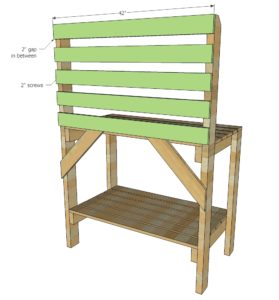
STEP 6
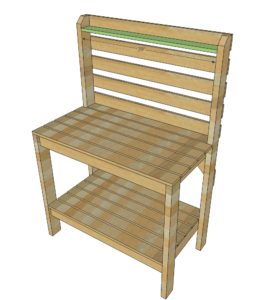
Hutch Shelf – Screw through backboards and back legs into the hutch shelf board sides and back to attach with 2” exterior self-tapping screws.
FINISHING INSTRUCTIONS
ill all holes with wood filler and let dry. Apply additional coats of wood filler as needed. When wood filler is completely dry, sand the project in the direction of the wood grain with 120 grit sandpaper. Vacuum sanded project to remove sanding residue. Remove all sanding residue on work surfaces as well. Wipe project clean with a damp cloth.
It is always recommended to apply a test coat on a hidden area or scrap piece to ensure color evenness and adhesion. Use primer or wood conditioner as needed.
CREDIT ANA WHITE
