You can build this simple panel bed frame (or just the headboard) with just a circular saw and a drill for about $120 in materials. This free tutorial includes video, step by step diagrams, shopping list and a cut list for Twin, Full, Queen, King and California king mattress sizes.
DIMENSIONS
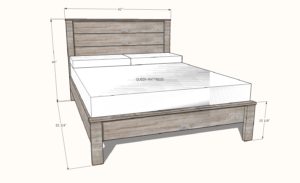
Queen as shown, see size modification PDFs for other sizes.
PREPARATIONS
SHOPPING LIST FOR QUEEN – for other sizes, see the downloaded PDFs above
- 2 – 1×8 @ 10 feet long (can cut in half for transport)
- 2 – 1×8 @ 8 feet long (use on side rails)
- 2 – 1×3 @ 6 feet long
- 11 – 2×4 @ 8 feet long (includes 6 2x4s used for the bed slats)
- 50 – 1-1/4″ brad nails OR 2″ self-tapping wood screws
- 40 – 3″ self-tapping wood screws (can substitute for 2-1/2″ or 2-3/4″ lengths)
CUT LIST FOR QUEEN – for other sizes, see the downloaded PDFs above
- 4 – 1×8 @ 57″ – panel boards
- 2 – 2×4 @ 45-1/4″ – headboard legs
- 2 – 1×3 @ 62-1/2″ – tops
- 2 – 2×4 @ 14-1/2″ – footboard legs
- 2 – 1×8 @ 80-3/4″ – sidrails
- 2 – 2×4 @ 80-3/4″ – siderail cleats
- 1 – 2×4 @ ~57″ – cut to fit – headboard bed frame
- 1 – 2×4 @ 78-1/2″ – bed frame center
- 2 – 2×4 @ 12-1/2″ – bed frame legs
- 18 – 2×4 @ 31-1/2″ – bed frame slats (can also use 1x4s or 1x3s or other materials if less expensive/have on hand).
INSTRUCTIONS
STEP 1
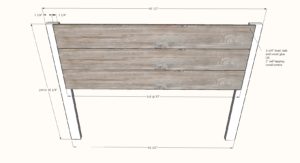
Layout the two headboard legs.
Mark a line all the way down each 2×4 leg, 2-1/4″ in from the outsides.
Dryfit the panel boards for the headboard on the legs.
Then attach the top 1×8 to the legs, with glue and screws or nails.
Repeat, working downward, for all the 1x8s – just make sure you apply a bead of glue between the 1×8 boards as you go.
STEP 2
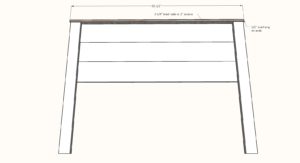
Apply glue to all top edges of the headboard.
Place 1×3 on top, even overhang on ends, flush to the back 1×8 on back.
Nail or screw down – nails are easier to hide, so use if you have a brad nailer.
STEP 3

Repeat steps for footboard, with only one panel board used.
STEP 4
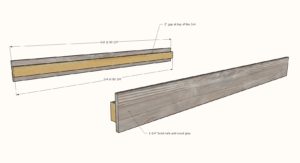
Apply glue to 2×4 cleats and place 1×8 siderail on top. Screw or nails siderail to cleat form outside.
Nails will be easier to hide, so use if you can.
STEP 5
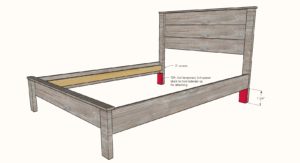
Attach the siderails to the headboard and footboard with 3″ screws.
A spacer block cut from scrap 2x4s will make assembly much easier.
STEP 6
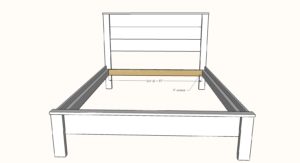
Screw the headboard bed frame piece to the headboard.
STEP 7
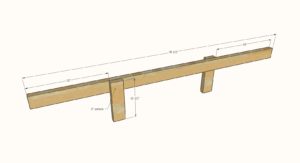
Attach bed frame legs to center bed frame support with 3″ screws.
STEP 8
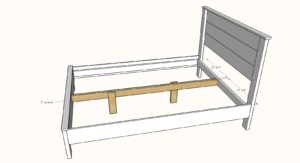
Screw bed frame center to the headboard and footboard with 3″ screws, centered on the bed.
STEP 9
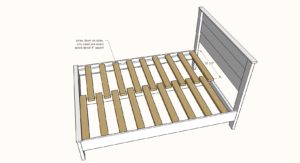
Place slats on bed frame, space about 4″ apart.
Screw down using the 3″ screws.
CREDIT ANA WHITE
