Build your own rustic bookshelf with our free plans. Features four large shelves and x detailing on the ends. Step by step plans.
DIMENSIONS
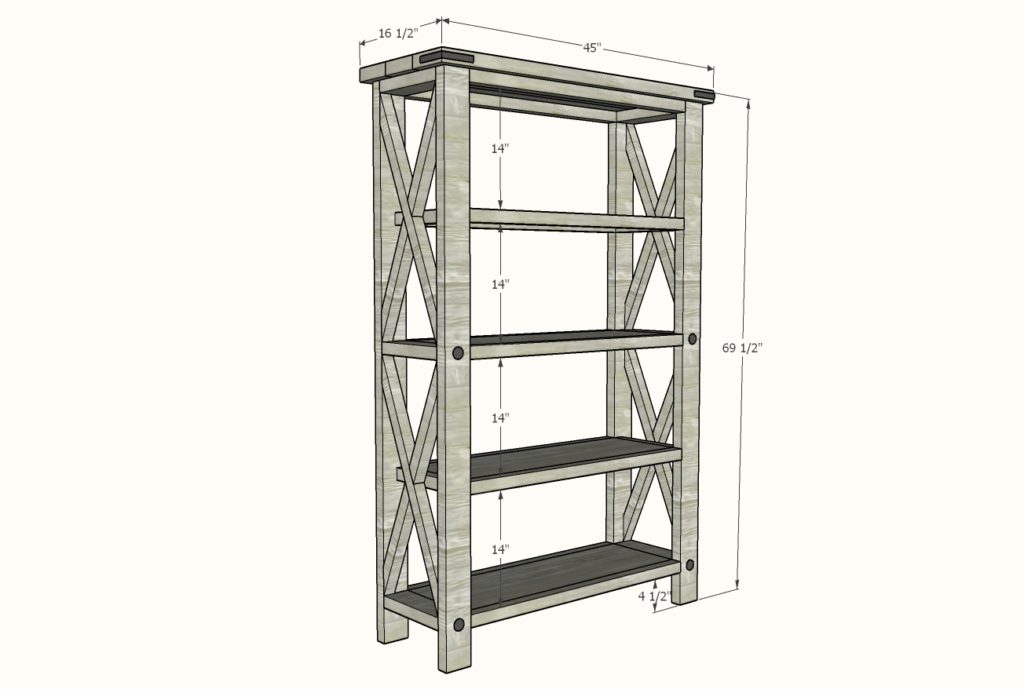
Dimensions shown above.
PREPARATIONS
- 8 – 2×2 @ 8 feet long
- 4 – 1×12 @ 6 feet long
- 4 – 2×4 @ 8 feet long or stud length
- 1 – 2×6 @ 12 feet long (can be cut down to 8 feet for transport)
- 1-1/4″ Pocket Hole Screws
- 2-1/2″ Pocket Hole Screws
- 4 – 2×4 @ 68″
- 10 – 2×2 @ 35-1/2″
- 6 – 2×4 @ 11-1/4″ – matches width of 1x12s
- 4 – 2×2 @ 11-1/4″ – matches width of 1x12s
- 4 – 1×12 @ 35-1/2″
- 3 – 2×6 @ 45″
- 2×2 X detailing should be cut to fit
INSTRUCTIONS
STEP 1
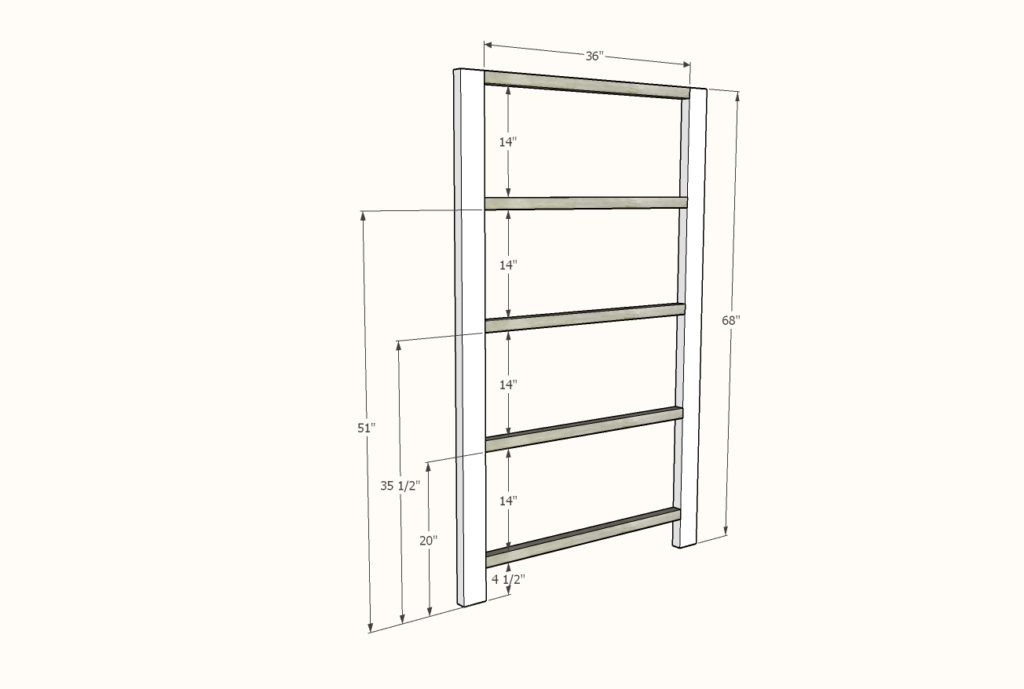
TIP: You may wish to drill all the 3/4″ pocket holes on the 1x12s in step 3 first, then set your Kreg Jig to the 1-1/2″ setting for all remaining pocket holes, so you don’t have to reset your Kreg Jig.
Drill a pocket hole on each end of the 2×2 @ 36″ on the 1-1/2″ setting.
Attach to 2×4 legs, clamping while you join, with 2-1/2″ pocket hole screws and wood glue.
Build two identical frames.
STEP 2
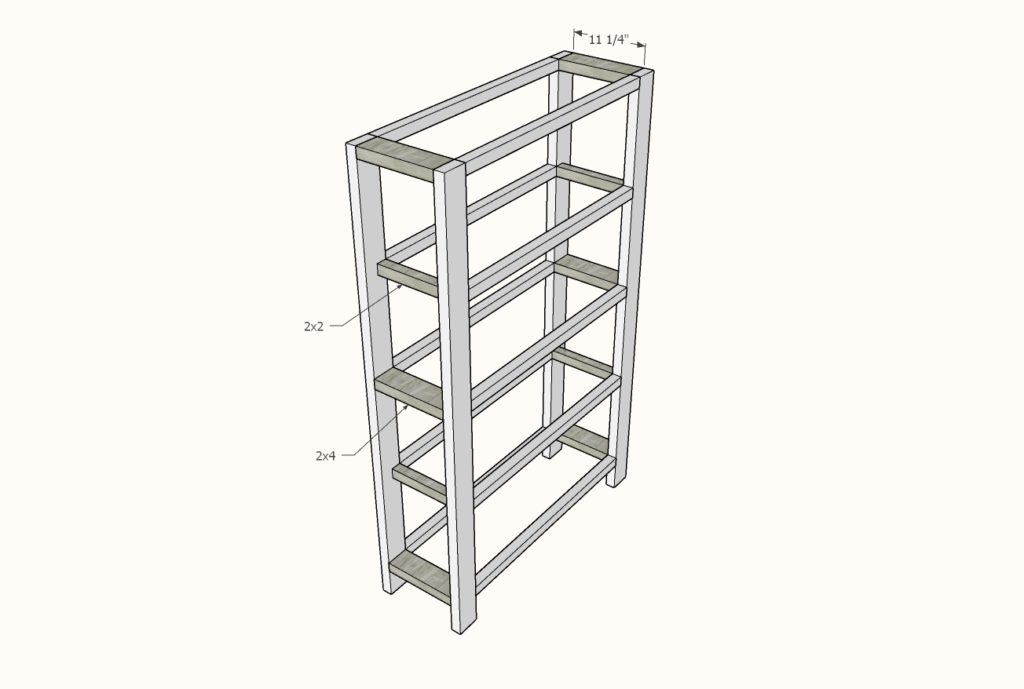
Measure the width of your 1x12s. They should be 11-1/4″ wide.
Cut the 2x4s and 2x2s to match this width.
Drill two pocket holes on ends of 2x4s, one on ends of 2x2s.
Attach to the frames with 2-1/2″ pocket hole screws and wood glue.
STEP 3
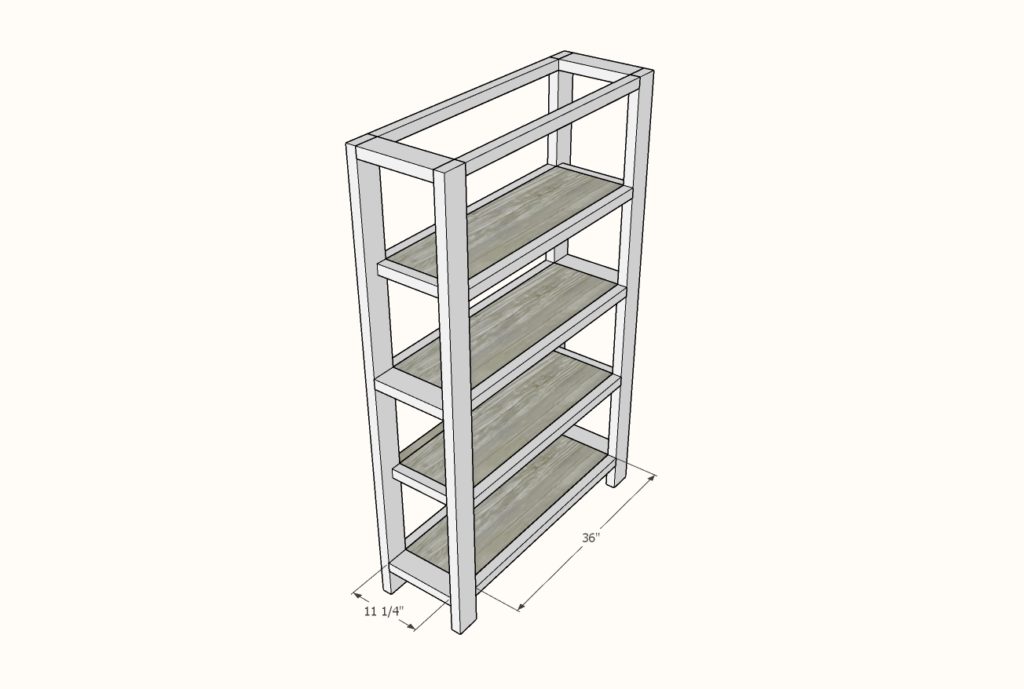
Drill 3/4″ pocket holes, two per ends, and three along long edges, of the 1×12 shelves.
Attach with 1-1/4″ pocket hole screws inside the bookshelf.
STEP 4
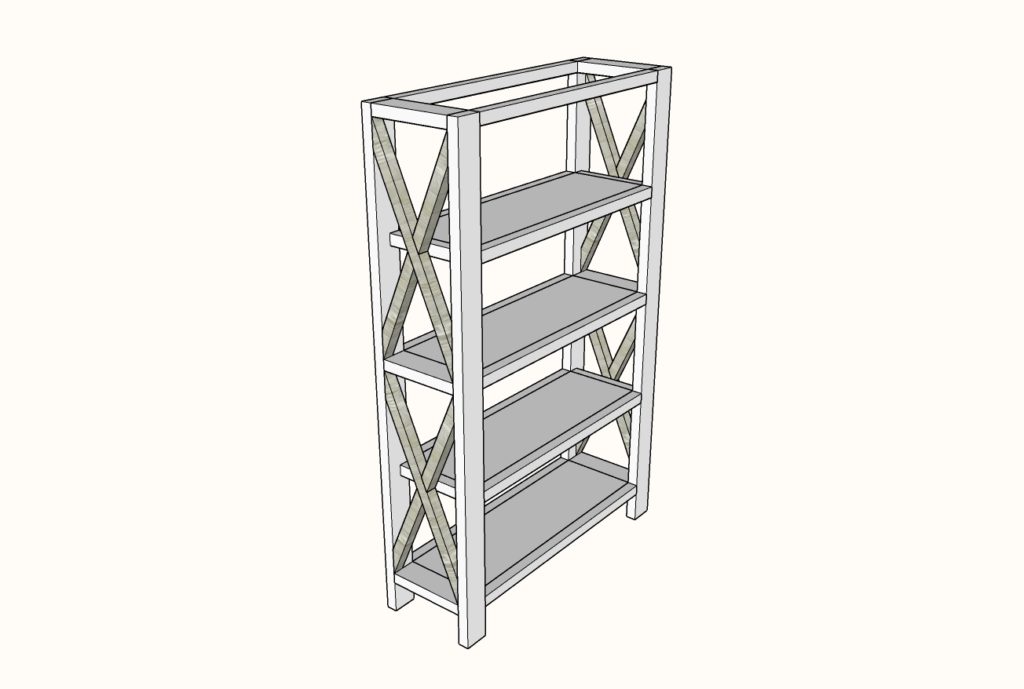
The best way to do the Xs is place 2x2s alongside where you want them to go, and trace the angles, and then cut the angles with a circular saw.
I recommend attaching the shorter X pieces to the longer X piece before attaching the entire X inside the bookshelf.
To see how I do this, you can watch this video.
STEP 5
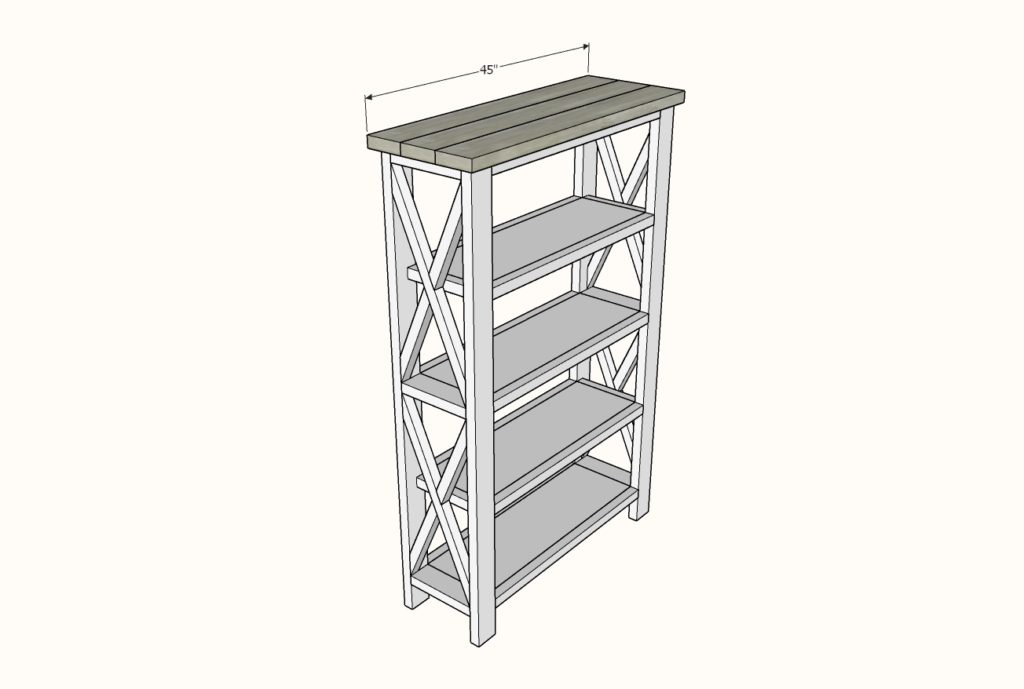
Lay the 2x6s on top of the bookshelf, with even overhangs on all sides.
Mark where the 2x6s cross the top 2×4 on your shelf ends.
Remove and attach the 2x6s together, inside where you marked, so the pocket holes will be hidden. Apply glue all the way down the joint.
Attach the entire top to the top of your bookshelf with 2-1/2″ screws (you can use pocket hole screws, but they are more expensive than regular self-tapping wood screws).
FINISHING INSTRUCTIONS
It is always recommended to apply a test coat on a hidden area or scrap piece to ensure color evenness and adhesion. Use primer or wood conditioner as needed.
