DIMENSIONS

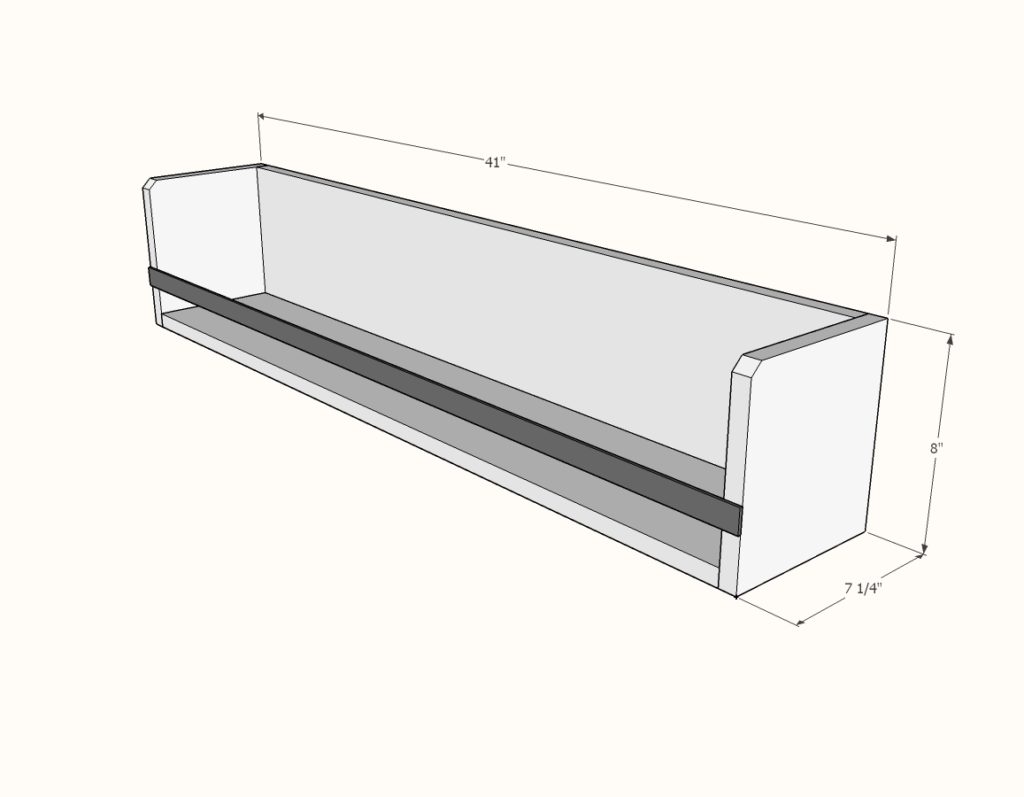
Dimensions shown above. Can be easily customized to different lengths. NOTE: I ended up using a 1×6 on the back of my shelves because that’s what I had in the scrap pile.
PREPARATION
SHOPPING LIST
-
1 – 1×8 @ 8 foot long
-
1 – 3/4″ wide flat metal stock, 41″ long (can be cut with a jigsaw with metal blade)
-
1-1/4″ brad nails
-
2″ self tapping wood screws (try SPAX or similar) OR 1-1/4″ pocket hole screws (to use with Kreg Jig)
-
Also need screws for hanging, this should be determined by your wall type. For a typical wall stud framed with 1/2″ drywall, 2-1/2″ screws would be great. Use a stud finder to locate studs and simply screw through back of shelf.
- 2 – 1×8 @ 39-1/2″
- 2 – 1×8 @ 8″
- 1 – 3/4″ flat metal stock @ 41″
INSTRUCTIONS
STEP 1

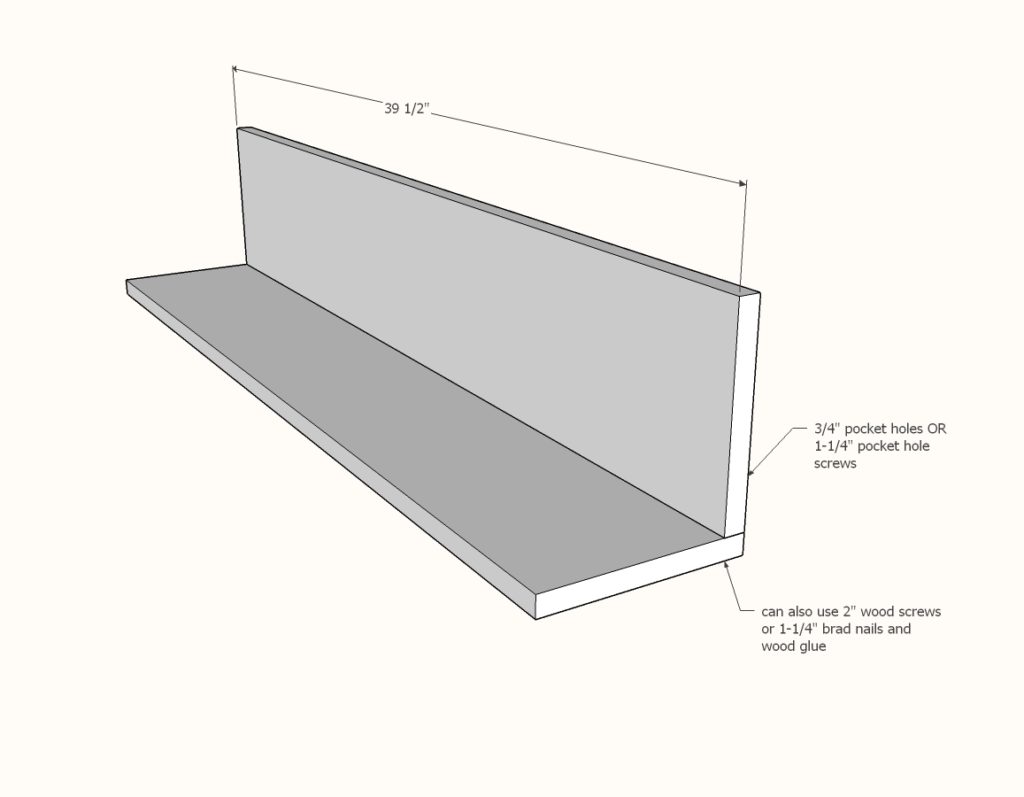
Attach the two 1x8s together with screws – either the pocket hole screw or the 2″ self tapping screws. Place screws about 6-8″ apart.
STEP 2

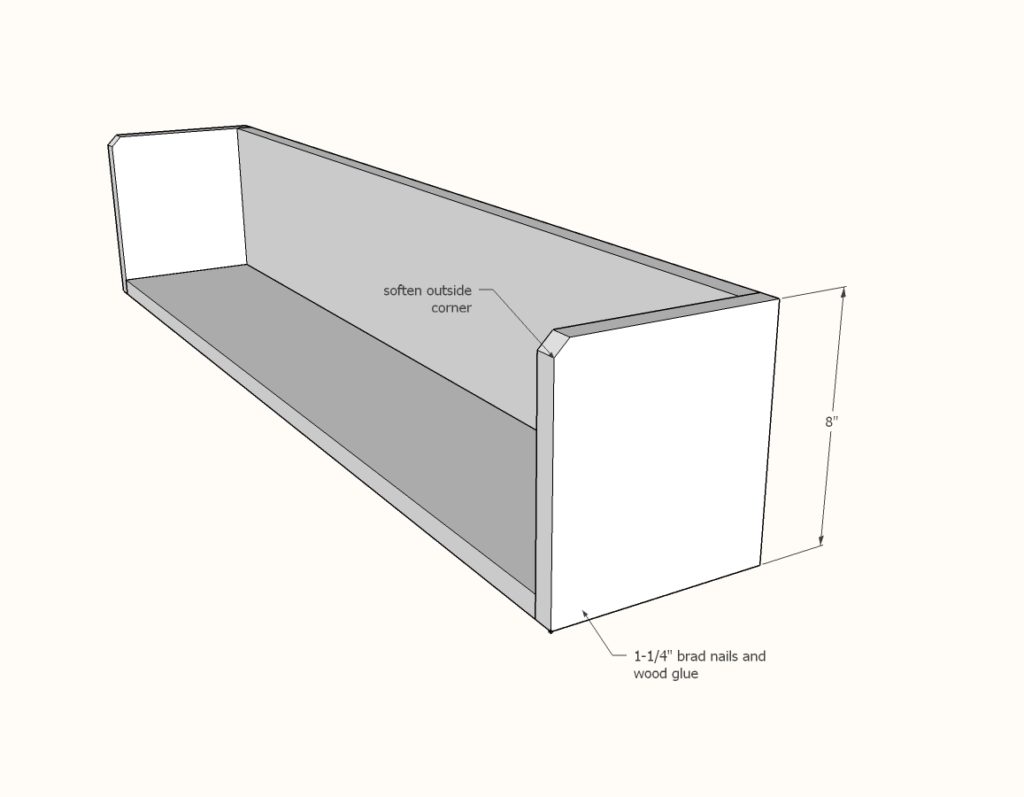
Nail and glue sides to bottom/back. The sides are very structural, so these pieces are important.
STEP 3

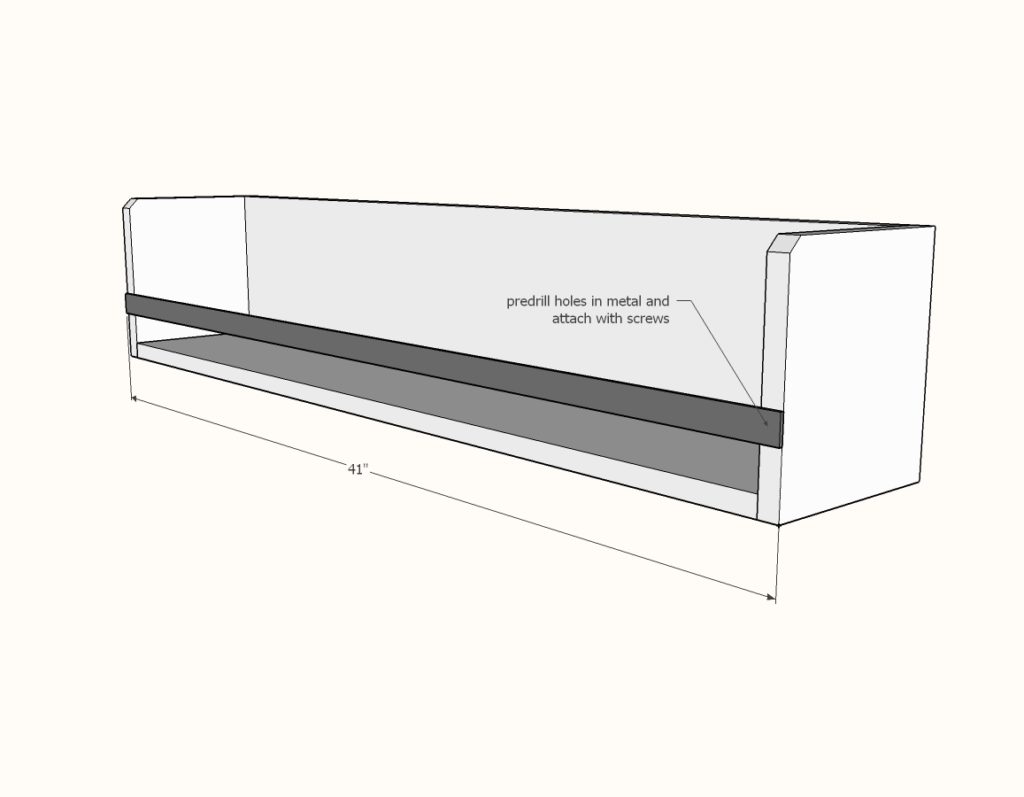
Cut the flat metal stock with a jigsaw with metal blade – use safety glasses. Predrill with metal drill bit and attach to front of shelves. You won’t need much for screws – I actually used a 1-1/4″ Kreg Jig screw.
NOTE: The metal piece just keeps things from falling off the shelf and won’t be super sturdy. This is fine.
CREDIT ANA WHITE
