DIMENSIONS
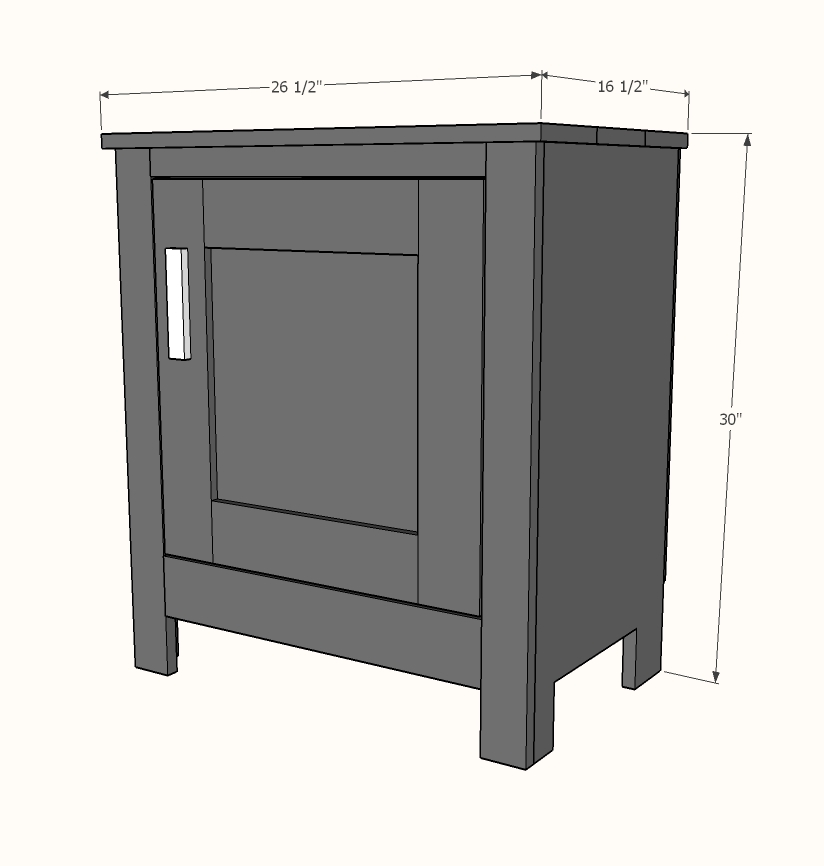
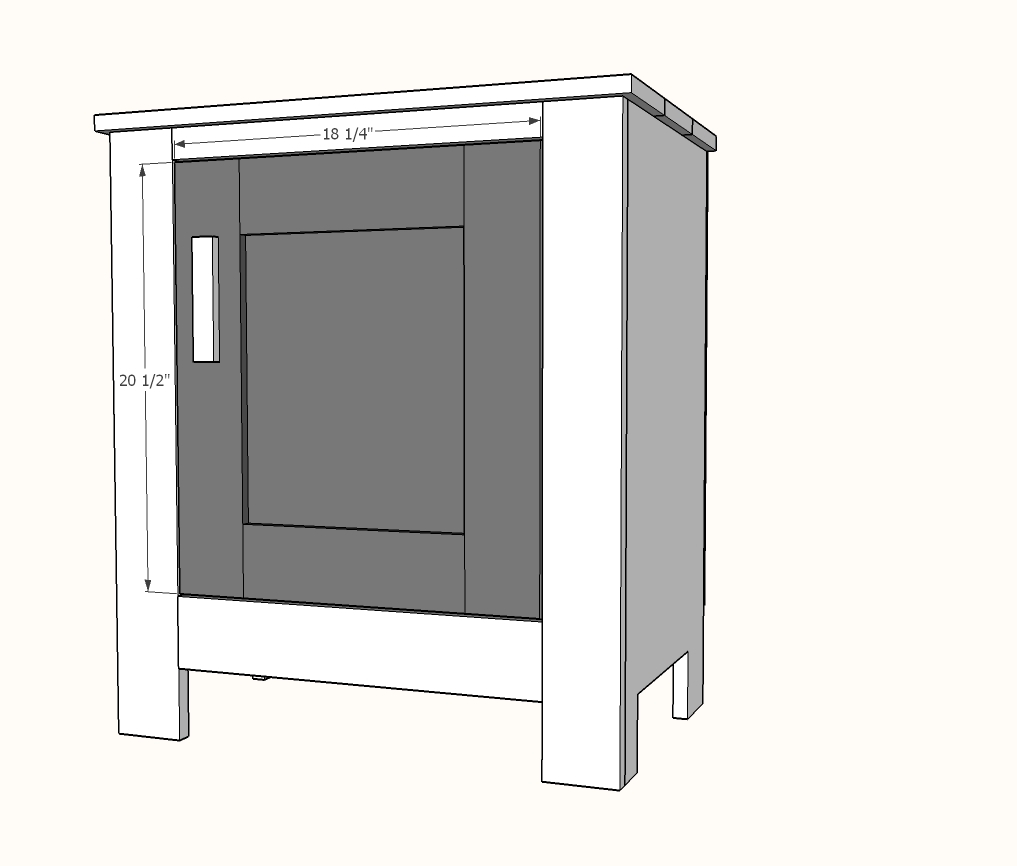
Dimensions shown above – this nightstand is VERY large.
PREPARATION
- 48″ x 48″ piece of 3/4″ thick plywood – I used paint grade birch
- 24″ x 48″ piece of 1/4″ thick plywood
- 2 – 1×4 @ 8 feet long
- 1 – 1×2 @ 4 feet long
- 1 – 1×6 @ 8 feet long
- Set of hinges
- Knob or handle
- Magnetic clasp or hasp
- 3/4 inch finish nails
- 1 1/4 inch finish nails
- 1-1/4″ Pocket Hole Screws
- Elmer’s Wood Glue
- 2 – 3/4″ plywood @ 15-1/4″ x 29-1/4″ – Sides
- 1 – 3/4″ plywood @ 15-1/4″ x 24″ – Bottom
- 2 – 1×4 @ 29-1/4″ – Face Frame Legs
- 1 – 1×4 @ 18-1/2″ – Face Frame Bottom
- 1 – 1×2 @ 18-1/2″ – Face Frame Top
- 2 – 1×2 @ 24″ – Back Supports
- 1 – 1/4″ plywood @ 25-1/2″ x 24″ – Back
- 3 – 1×6 @ 26-1/2″ – Top
- 2 – 1×4 @ ~20-1/2″ – Door Frame Stiles – measure and cut to fit
- 2 – 1×4 @ ~11-1/4″ – Door Frame Rails – measure and cut to fit
- 1 – 1/4″ plywood @ 13″ x 15″ – measure and cut to fit, about 1″ larger than frame opening
INSTRUCTIONS
STEP 1
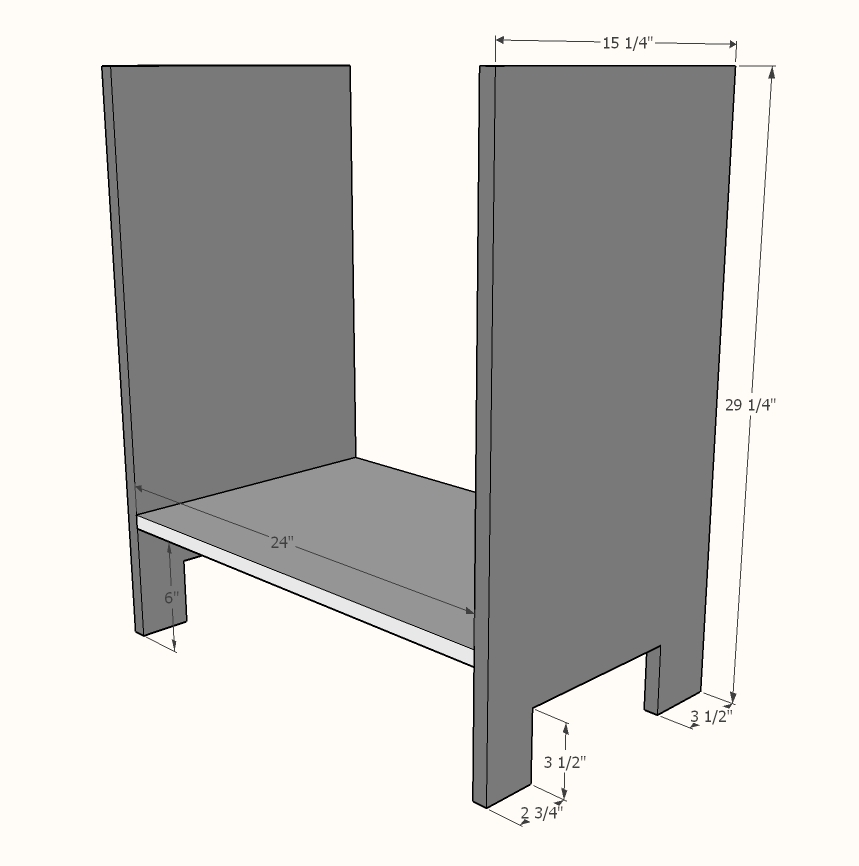
Cut sides and bottom from 3/4″ plywood.
Use a jigsaw to cut out sides to look like legs.
Drill three 3/4″ pocket holes on ends of bottom shelf. Attach to sides with 1-1/4″ pocket hole screws.
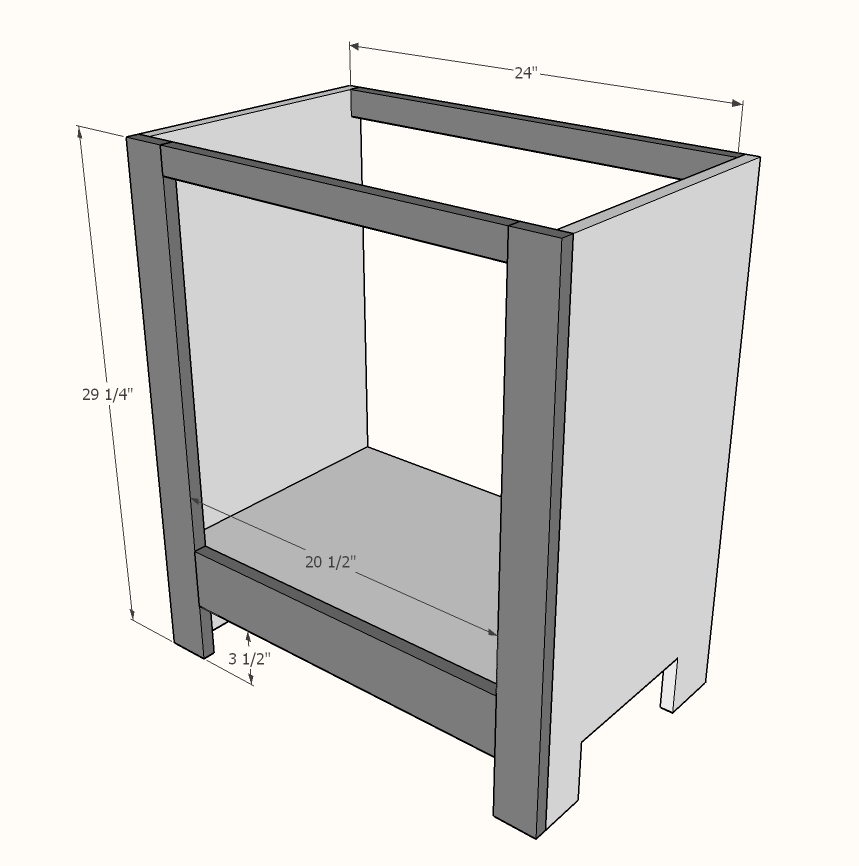
Cut all 1x boards on miter saw. Build face frame with 3/4″ pocket holes and 1-1/4″ pocket hole screws first. Attach face frame to plywood with 1-1/4″ brad nails and wood glue.
Note top and bottom board length should be 18-1/2”
Drill 3/4″ pocket holes on ends of 1×2 back support. Attach at top back corner with 1-1/4″ pocket hole screws and glue.
STEP 3
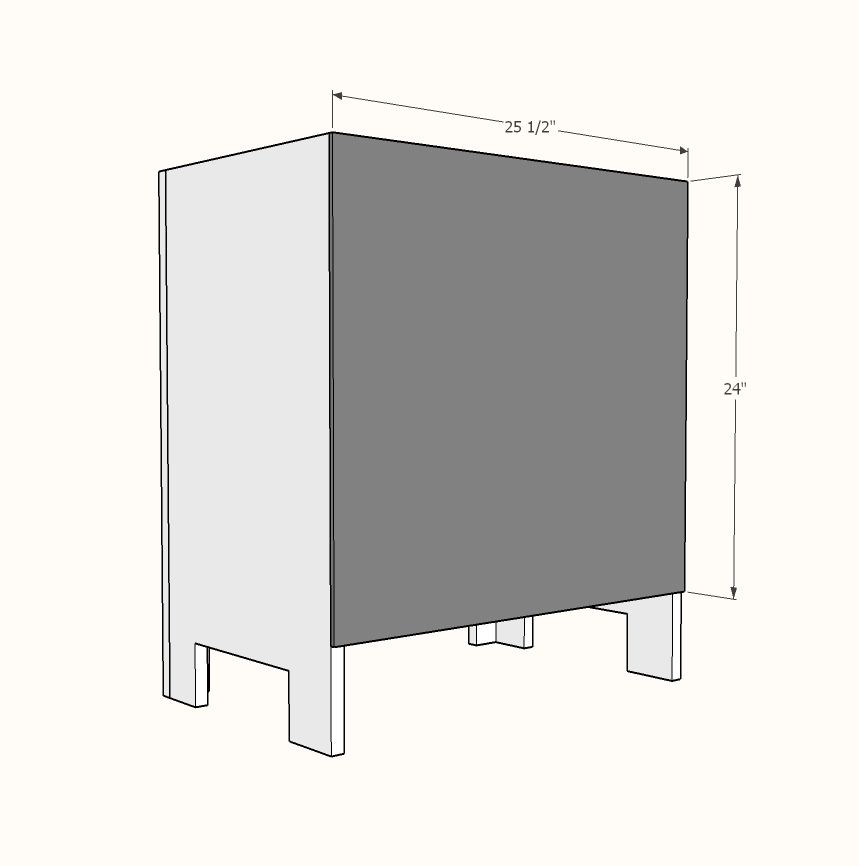
Cut back plywood with circular saw or table saw. Nail on with 3/4″ brads and wood glue.
STEP 4
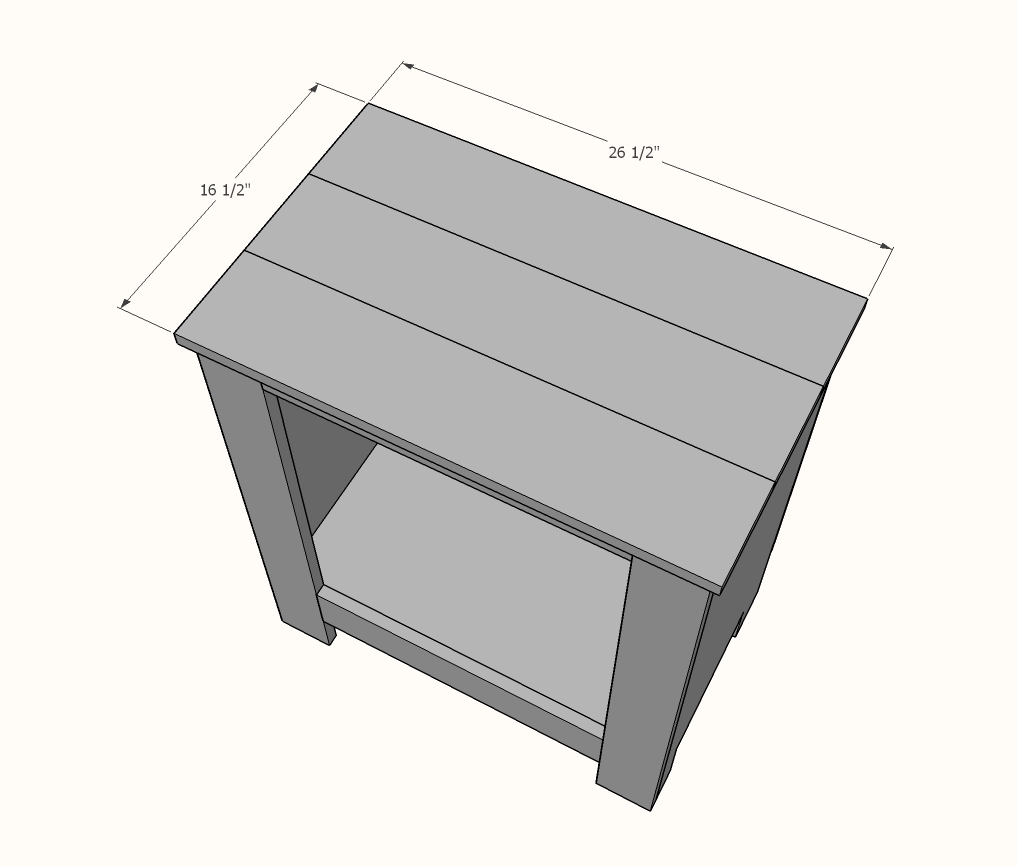
Build top with 1x6s pocket holed together at edges. Attach to top with 1-1/4″ brad nails and wood glue.
STEP 5
CREDIT ANA WHITE
