DIMENSIONS

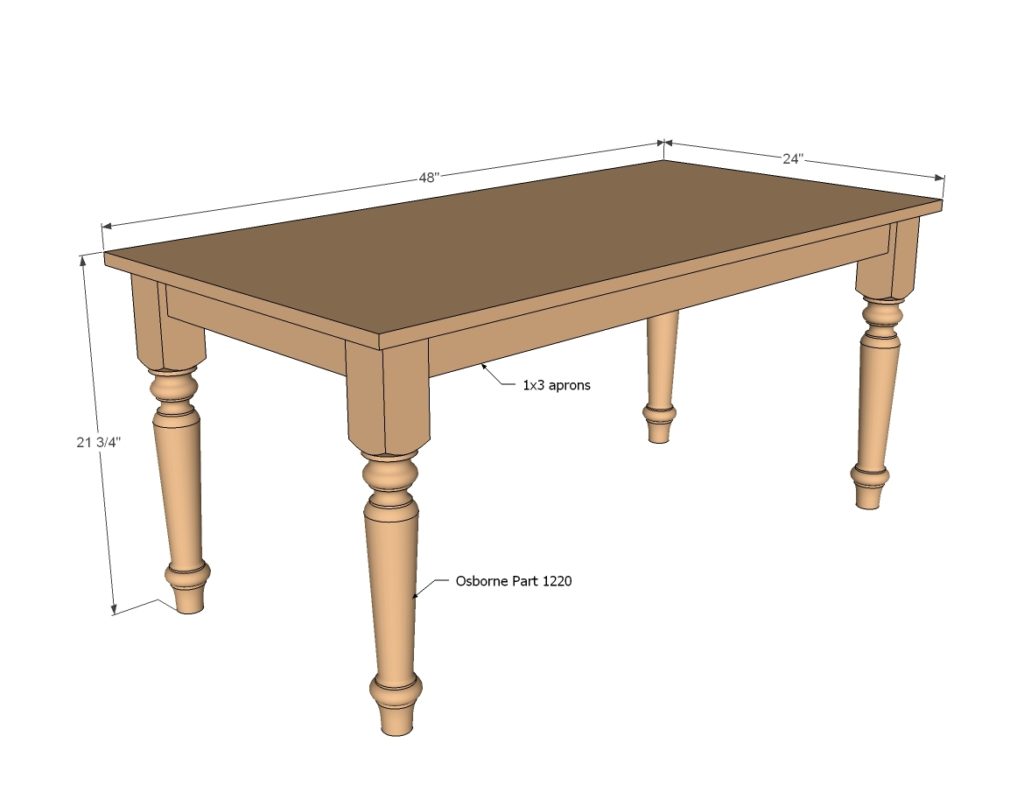
Dimensions shown above.
PREPARATION
- 4 end table legs (we used these ones from Osborne Wood)
- 2 – 1×3 @ 16-1/2″
- 2 – 1×3 @ 40-1/2″
- 1 – premade project panel 24″ x 48″
- 1-1/4″ pocket hole screws
- 2 – 1×3 @ 16-1/2″
- 2 – 1×3 @ 40-1/2″
INSTRUCTIONS
STEP 1

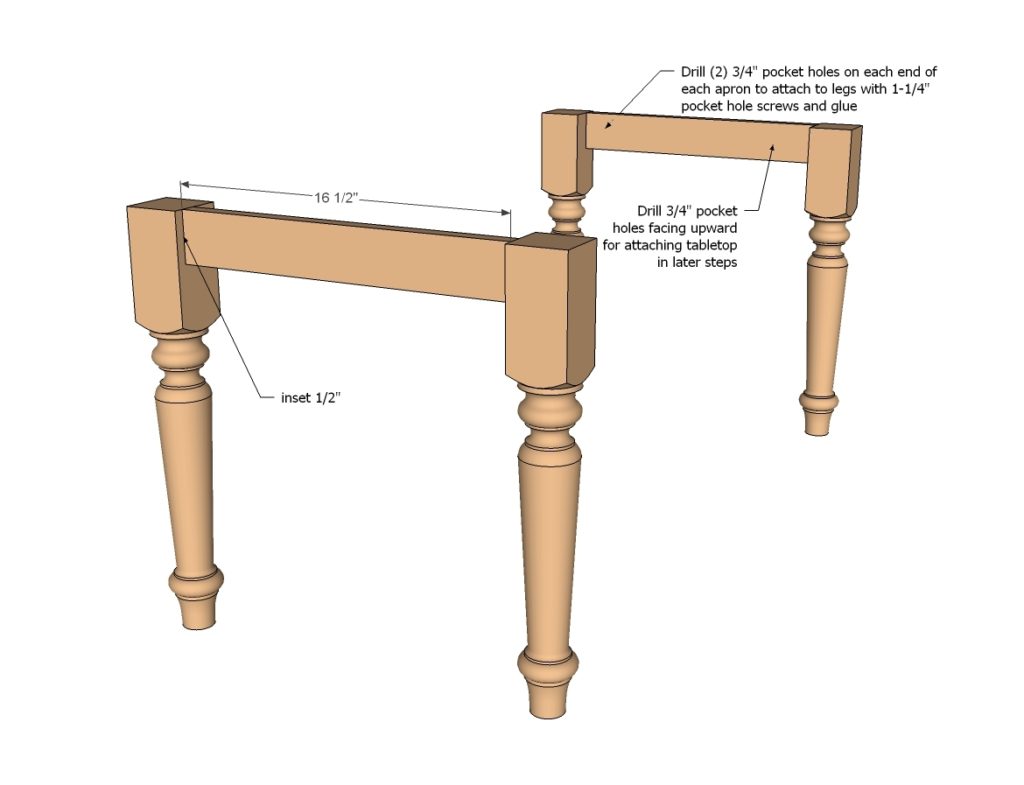
Attach the smaller aprons to two of the legs. Make sure the pocket holes for attaching the tabletop in later steps are facing upward and are on the insides.
STEP 2

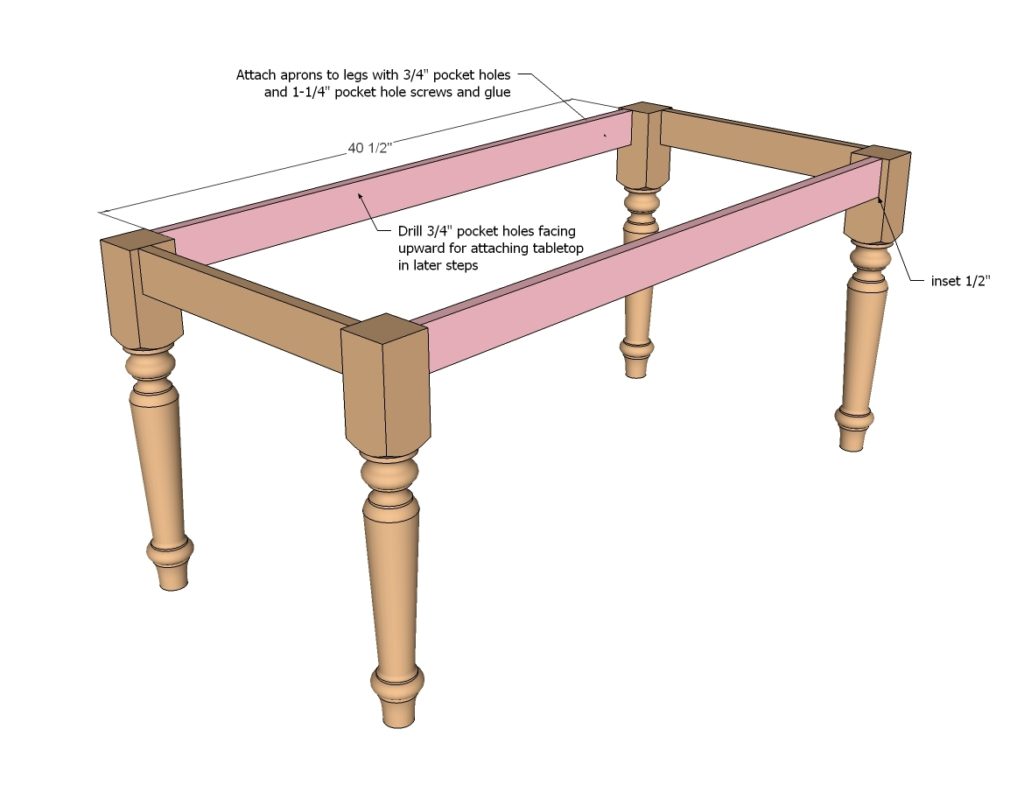
Then attach the longer aprons to the two leg sets.
STEP 3

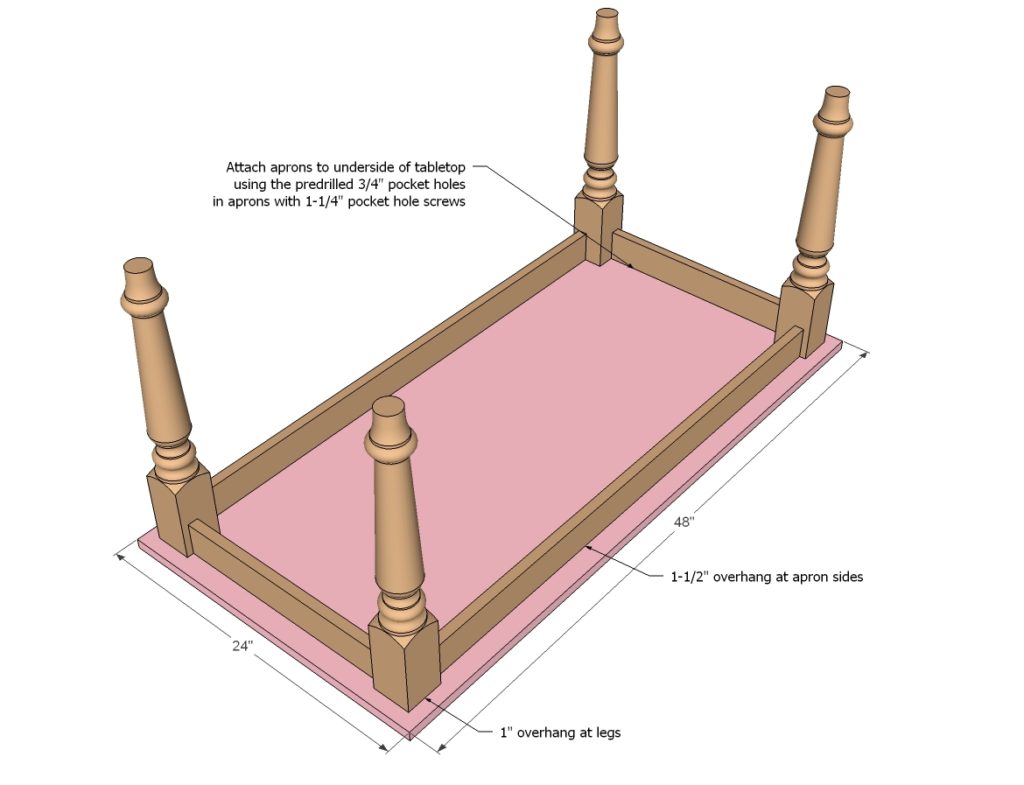
Center the base on the underside of the tabletop and attach from underside.
FINISHING INSTRUCTIONS
It is always recommended to apply a test coat on a hidden area or scrap piece to ensure color evenness and adhesion. Use primer or wood conditioner as needed.
