A rolling cart featuring a angled top book shelf perfect for keeping books in place, and a large bottom shelf perfect for baskets or bins. Sized for children.
DIMENSIONS
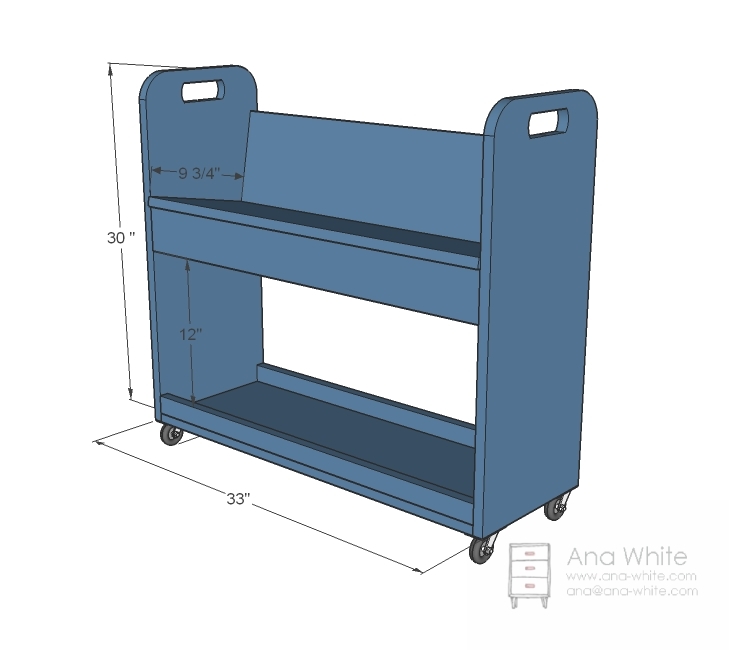
Dimensions shown above.
PREPARATION
- 1 – 1×12, 10 feet long
- 1 – 1×2, 6 feet long
- 1 – 1×4, 3 feet long
- 1 – 1×8, 3 feet long
- 2″ Screws OR 1 1/4″ Pocket Hole Screws for a Pocket Hole System
- Wood filler, glue and finishing supplies
- 2 – 1×12 @ 28″ (Sides)
- 2 – 1×12 @ 31 1/2″ (Shelves)
- 1 – 1×4 @ 31 1/2″ (Top Shelf Support)
- 2 – 1×2 @ 31 1/2″ (Bottom Shelf Trim)
- 1 – 1×8 @ 31 1/2″ Top Back)
INSTRUCTIONS
STEP 1
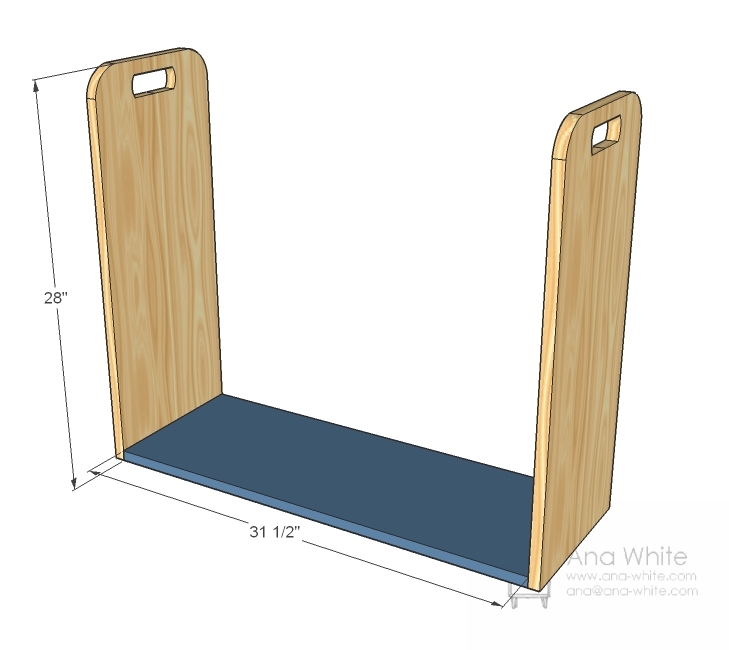
Box
Just build a box as you would in any other plan. Super simple. Predrill holes and use 2″ screws and glue.
STEP 2
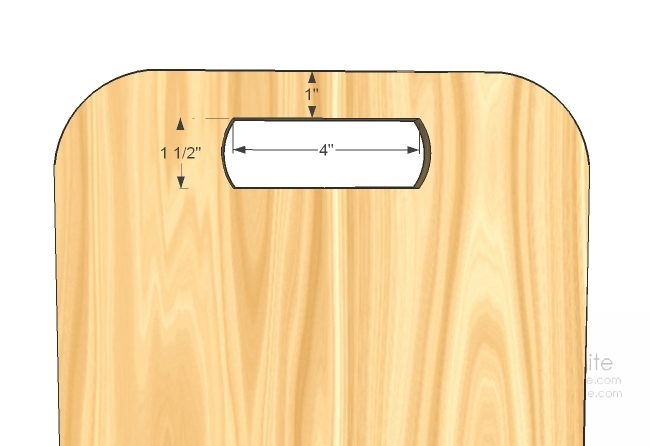
Sides
If you want, you can add handles and round the corners. The handles are actually quite useful if you want to transport the shelf (I did from the garage to the house and found them much more than just decorative). Corners are rounded 2″ down and 2″ in from the outside corners with a jigsaw.
STEP 3
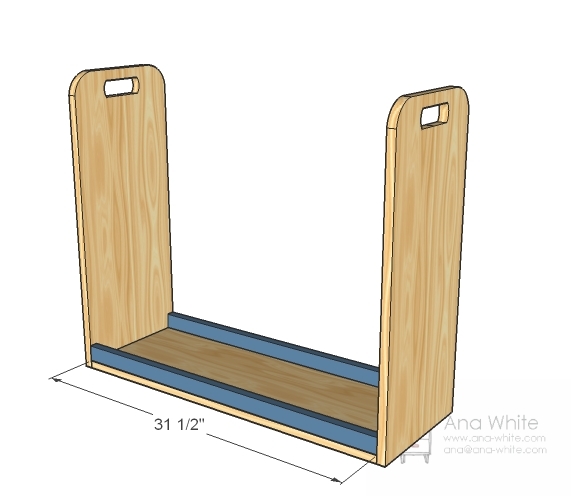
Bottom Shelf Trim
Add bottom shelf trim with screws from the underside and outside. Don’t forget your glue.
STEP 4
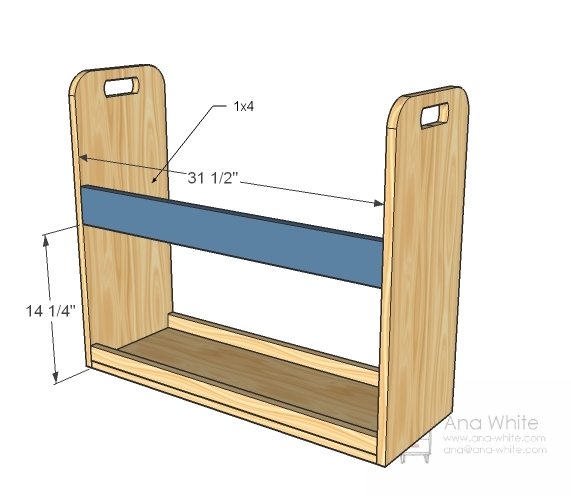
Top Shelf Support
Measure and mark out the location for the top shelf support as shown in the diagram above. Predrill holes and attach the top shelf trim to the front side of the library book cart.
STEP 5
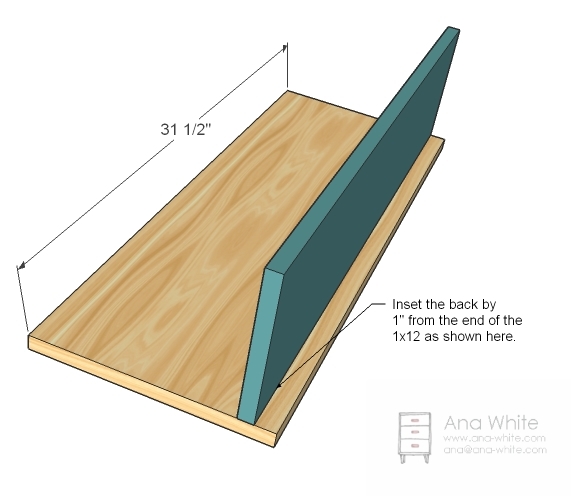
STEP 6
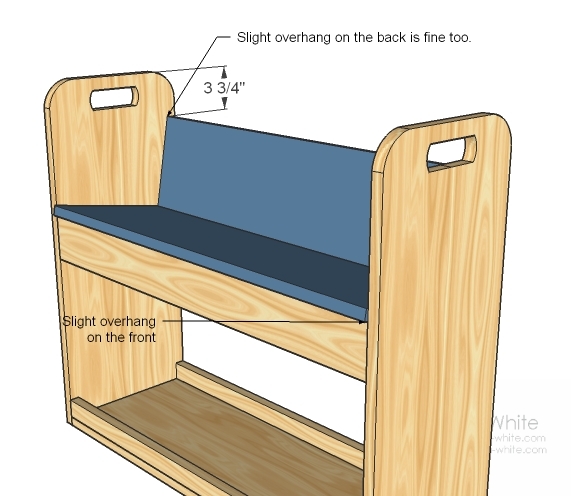
Top Shelf
Place top shelf on top of top shelf support. Mark and screw in place with 2″ screws and glue.
STEP 7
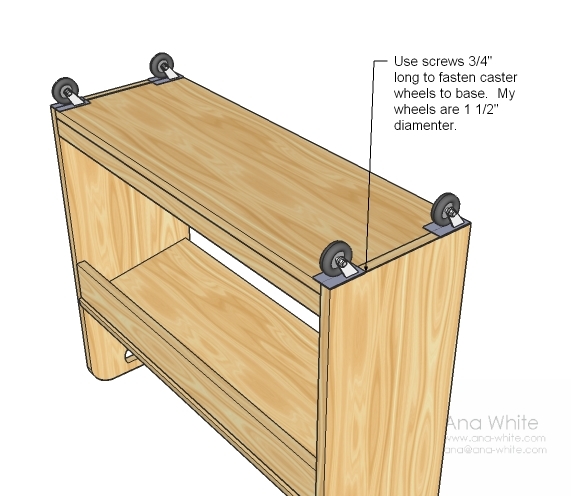
Wheels
A library cart has gotta have caster wheels. Mine are 1 1/2″ diameter, but a 2″ diameter would be a better choice (or even 2 1/2″) if you have carpet or floor differences.
CREDIT ANA WHITE
