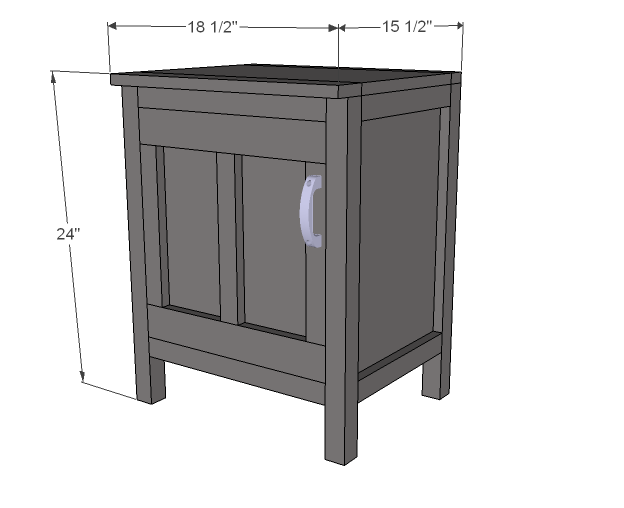
These little guys can be both a nightstand or side bases to form an entire media wall. Features large interior with optional shelf, open base for air circulation, ideal for storing just about anything.
DIMENSIONS
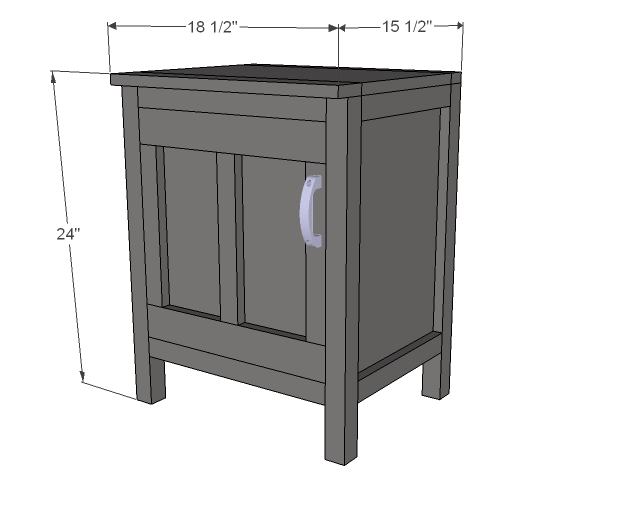
Dimensions are shown above.
PREPARATION
Shopping List (for ONE nightstand/side base cabinet)
- 1×12 @ 8 feet long
- 2 – 2×2 @ 8 feet long
- 1 – 1×2 @ 6 feet long
- 1 – 1×3 @ 8 feet long
- 1/4″ up to 3/4″ plywood scrap, (1×16 scrap would be great) 16 3/8″ long
- 1 set of euro style inset hinges OR basic hinges
- handle or nob
- 2 1/2″ screws, 1 1/4″ finish nails or screws or pocket hole screws
- finishing supplies including wood glue and wood filler, paint and primer, or stain
- Elmer’s Wood Glue
- Elmer’s Wood Filler
- 120 grit sandpaper
- primer
- wood conditioner
- paint
- paintbrush
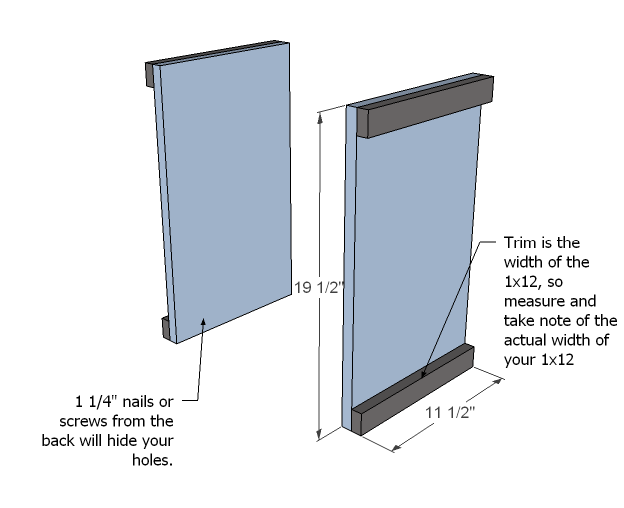
- 2 – 1×12 @ 19 1/2″ (Sides)
- 4 – 1×2 @ 11 1/2″ (Side Trim – cut to the width of your 1x12s)
- 4 – 2×2 @ 23 1/4″ (legs)
- 2 – 1×12 @ 15 1/2″ (Shelf)
- 4 – 2×2 @ 15 1/2″ (Front/Back Trim)
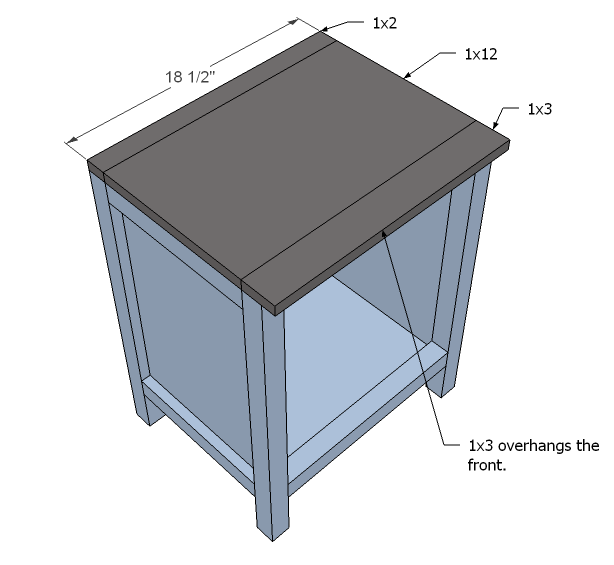
- 1 – 1×2 @ 18 1/2″ (Top)
- 1 – 1×12 @ 18 1/2″ (Top)
- 1 – 1×3 @ 18 1/2″ (Top)
- 2 – 1×3 @ 15 3/8″ (Door)
- 3 – 1×2 @ 11 3/8″ (Door)
- 1/4 – to 1/2″ plywood @ 15 3/8″ x 16 3/8″ (door back)
INSTRUCTIONS
STEP 1
Side Trim
Attach the side trim to the outsides of the sides as shown above.
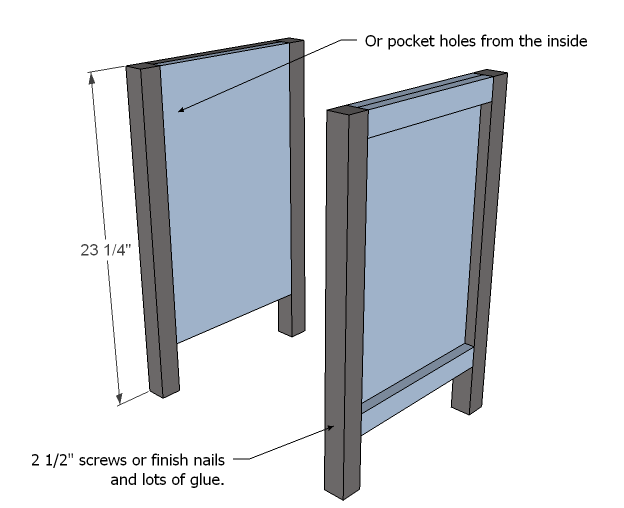
Legs
Keeping the legs flush with the top, attach legs to the sides as shown above. Predrill holes if you are using screws.
STEP 3
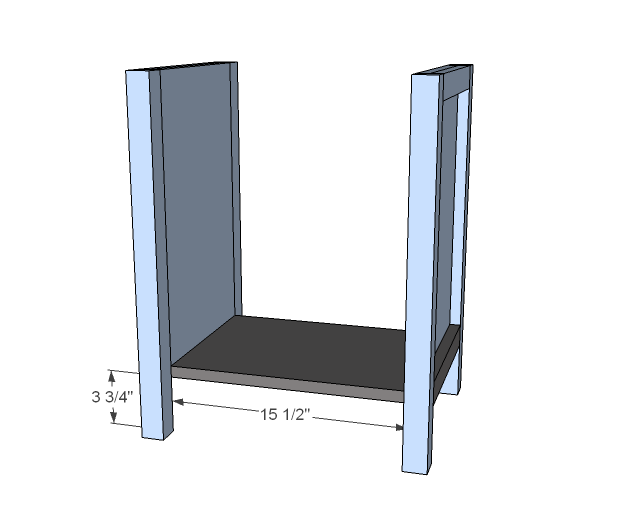
Shelves
The bottom shelf sits flush to the bottom. You can either add a second shelf or drill holes for shelf pins for an adjustable shelf. Glue and screw with either pocket hole screws or 2 1/2″ screws.
STEP 4
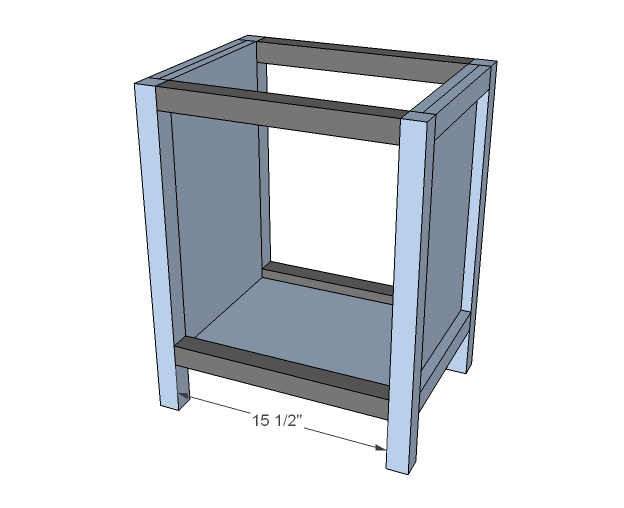
Front/Back Trim
2 1/2″ screws and glue.
STEP 5
STEP 6
Doors
When you cut your boards, make sure you measure the exact opening of your door, and leave 1/8 gap for a tight fit, 1/4″ (total gap, so that’s 1/8″ all the way around) for a roomier door. If you have a pocket hole system, build the door frame as shown above. You can use a countersink bit or wood dowels to build the door frame too. Otherwise, glue and nail to the back plywood. Keep in mind the allowance need for your hinges. Depending on the type of hinge that you are using, you may need to cut the plywood out around the hinge.
STEP 7
Finishing
Fill holes with wood filler and sand and finish as desired. Attach door with hinges followed by a handle.
CREDIT ANA WHITE

