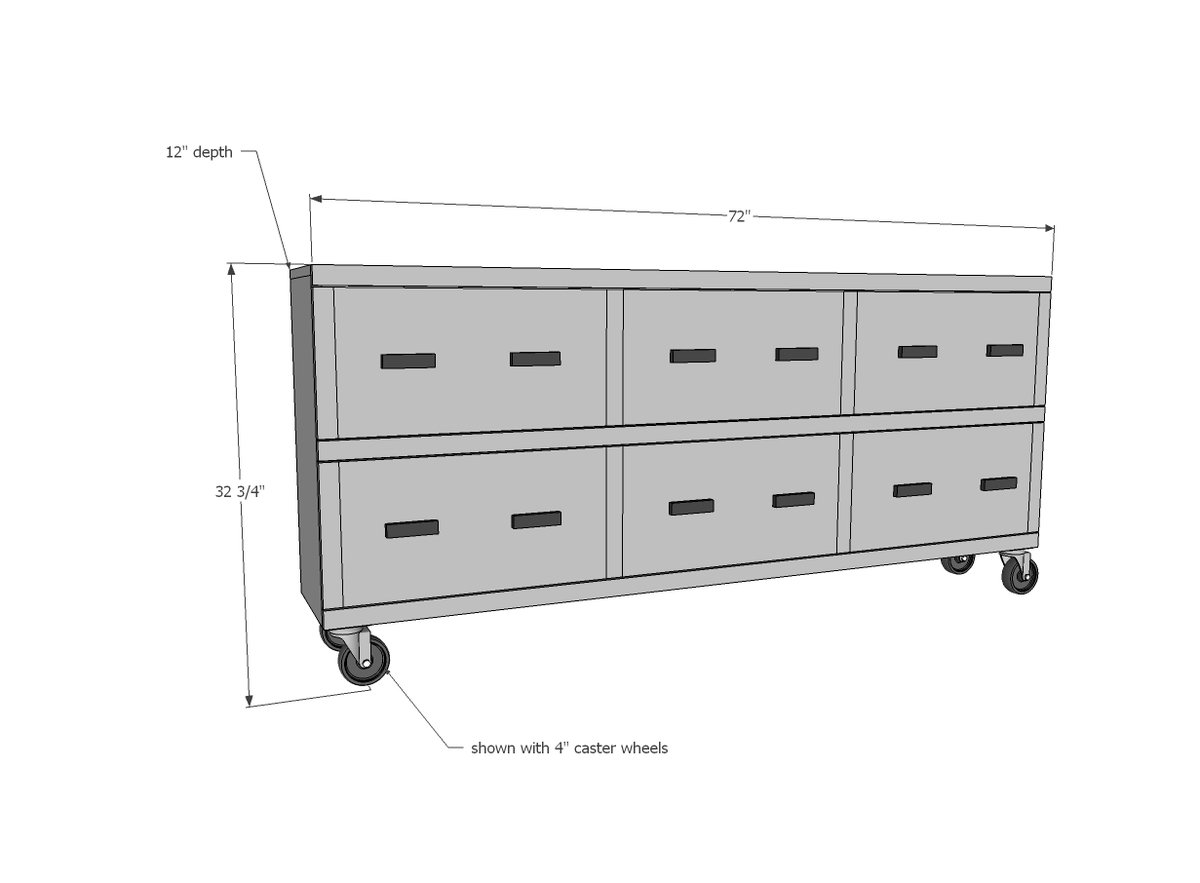
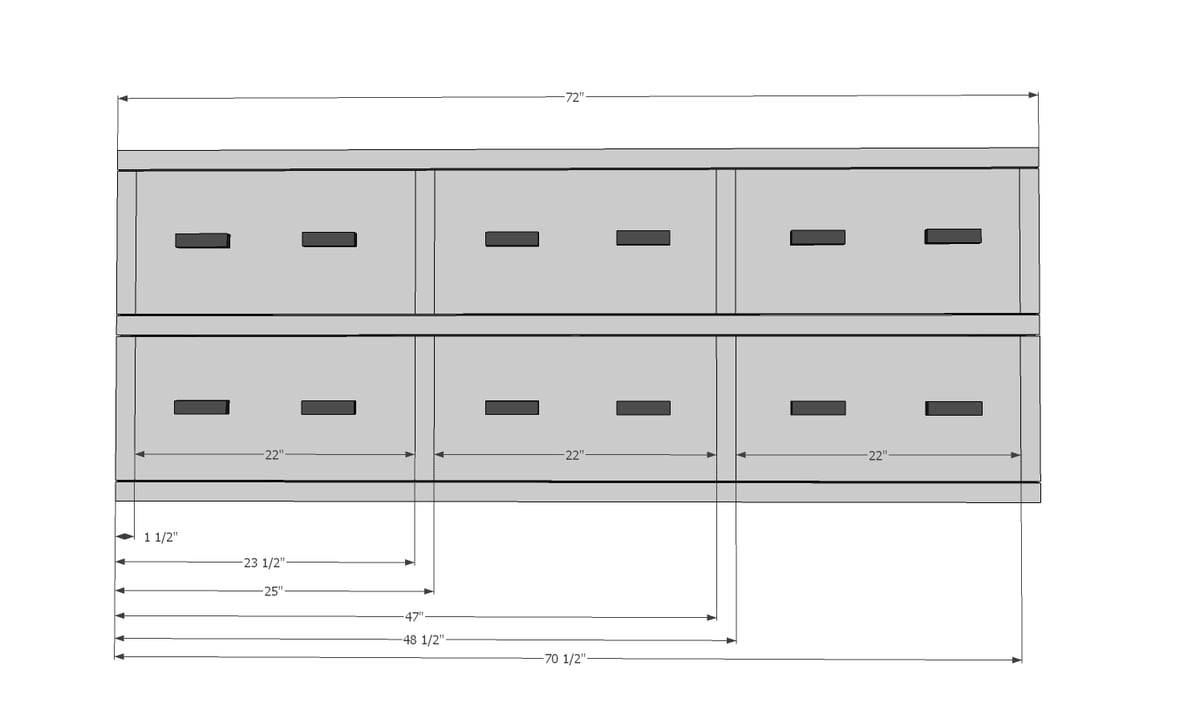
DIMENSIONS

- 7 – 1×12 @ 6 feet long
- 1 – 1×12 @ 8 feet long
- 3 – 1×2 @ 6 feet long
- 6 – hinges like these https://www.dlawlesshardware.com/wrhinoha1.html
- 6 – magnetic clasps – https://www.dlawlesshardware.com/alcasmagcatc.html
- 12 knobs
- 4 caster wheels and screws for installing (NOTE: My sister opted for 2×2 legs instead of caster wheels)
- 1 1/4 inch finish nails
- 1-1/4″ Pocket Hole Screws
- Elmer’s Wood Glue
- 4 – 1×12 @ 72″
- 3 – 1×12 @ 26″
- 2 – 1×12 @ 34-7/8″
- 3 – 1×2 @ 72″
Build the storage box out of 1x12s. I recommend using 3/4″ pocket holes and 1-1/4″ pocket hole screws to secure everything, hiding pocket holes on insides. You can alternatively use 2″ self tapping screws or 2″ brad nails and glue.
STEP 2
Make sure project is square before this step.
Attach 1×2 front face frame boards with 1-1/4″ brad nails and glue.
NOTE: To minimize front tipping, also attach 1x2s at top back for securing media center center to wall.
STEP 3
Set circular saw blade depth to about 1/4″. Mark lines in 1×12 door faces. Make false cuts in 1x12s. TIP: Clamping a straight guide to the 1×12 will help you cut straighter.
Attach hardware, hinges and magnetic clasps.
Attach caster wheels to base.
An optional 1/4″ back can be added, nail on with 3/4″ brad nails and wood glue.
CREDIT ANA WHITE


