A simple, inexpensive outdoor table with modern styling that you can build in an afternoon. Seats four and features a slatted top and bottom stretcher.

DIMENSIONS
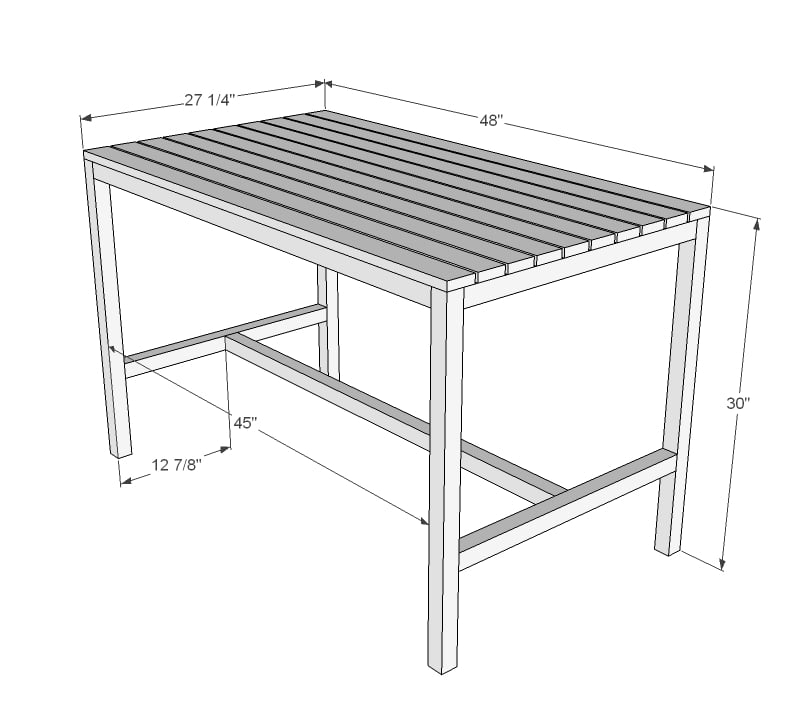
Dimensions are shown above. Seats four.
 
PREPARATION
SHOPPING LIST
  • 5 – 1×3 Boards, 8 feet long
  • 5 – 2×2, 8 feet long
  • 2 1/2″ screws or 2 1/2″ pocket hole screws
  • 2″ screws
COMMON MATERIALS
  • Elmer’s Wood Glue
  • Elmer’s Wood Filler
  • 120 grit sandpaper
  • primer
  • wood conditioner
  • paint
  • paintbrush
CUT LIST
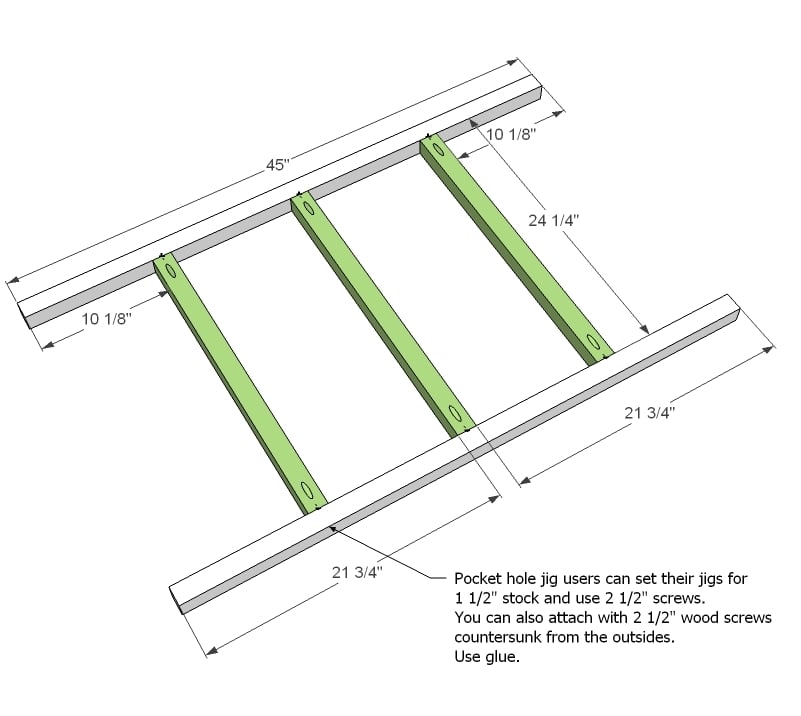
  • 7 – 2×2 @ 24 1/2″ (Ends/Supports)
  • 3 – 2×2 @ 44 3/4″ (Sides/Stretcher)
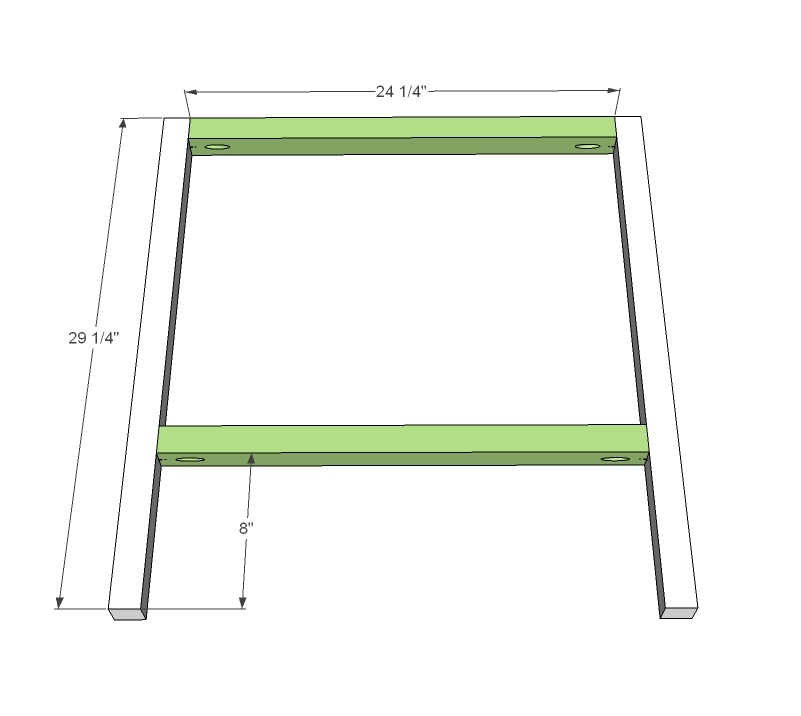
  • 4 – 2×2 @ 29 1/4″ (Legs)
  • 10 – 1×3 @ 47 3/4″ (Decking)

INSTRUCTIONS

STEP 1

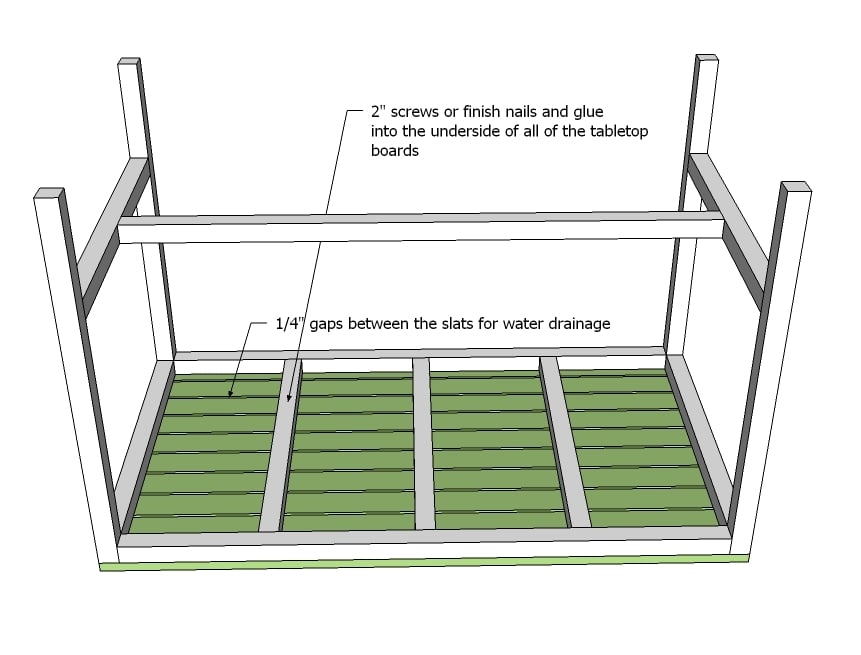
Begin by building your tabletop frame as shown above. Mark the placement of all joints and either uses the Kreg Jig to drill pocket holes or a countersink bit to drill holes from the outside. Attach with 2 1/2″ screws and wood glue.

 
Check for square, and set aside.
 
STEP 2

Now the legs . . . build two of these in the same manner as the tabletop. If you are using the Kreg Jig, remember to keep your pocket holes to the bottom, as water could pool in exposed pocket holes, and potentially destroy your table.

STEP 3

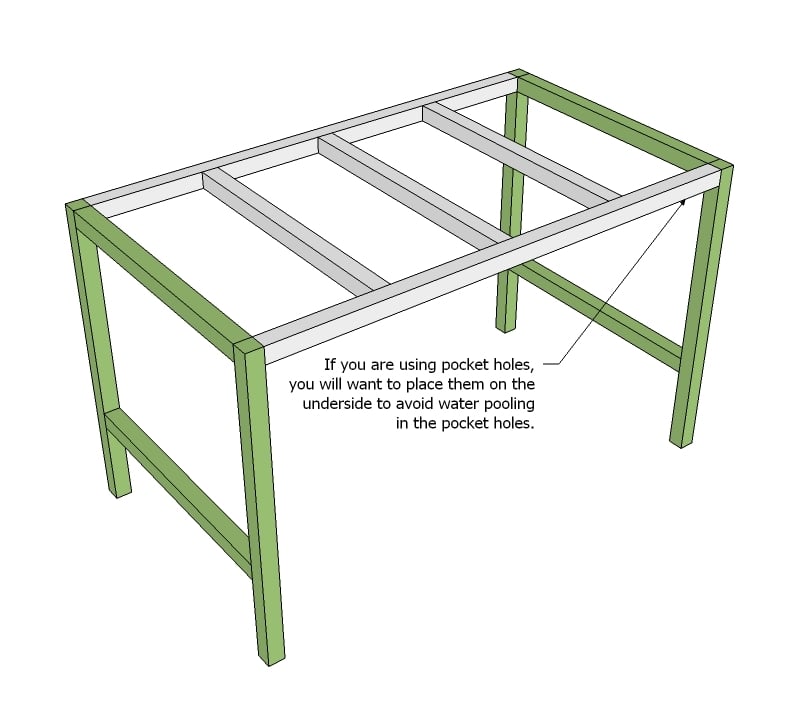
Now simply attach the tabletop frame to the legs. I just turned the whole thing upside down and got my drill out :) Use glue and 2 1/2″ screws.

STEP 4

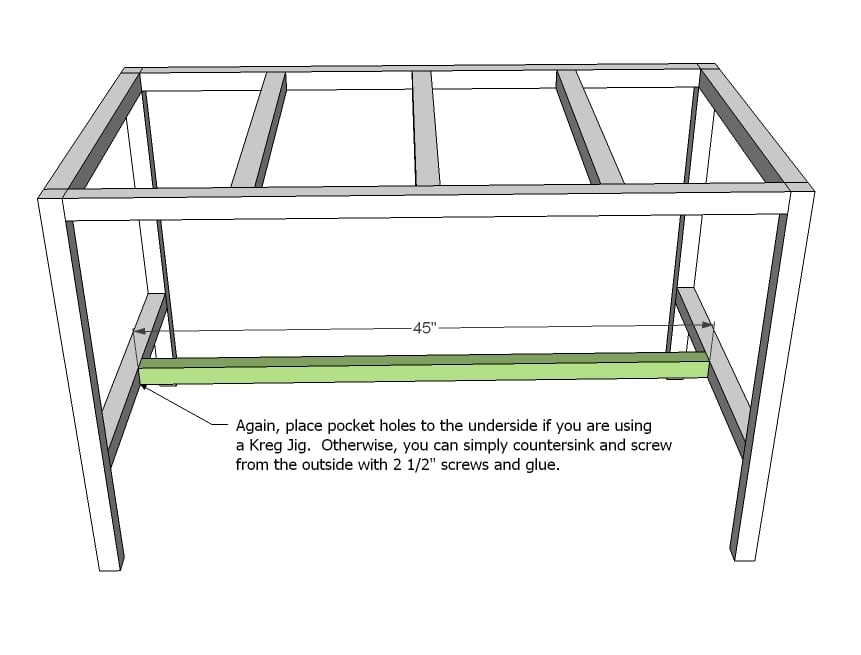
The stretcher really helps to keep the base square, and to keep the legs stable. Center the stretcher on the end boards and attach with screws and glue. Check out the dimensions diagram for center measurements – it’s 12 7/8″ from the outsides.

STEP 5

FINISHING INSTRUCTIONS
Fill all holes with wood filler and let dry. Apply additional coats of wood filler as needed. When wood filler is completely dry, sand the project in the direction of the wood grain with 120 grit sandpaper. Vacuum sanded project to remove sanding residue. Remove all sanding residue on work surfaces as well. Wipe project clean with a damp cloth.

It is always recommended to apply a test coat on a hidden area or scrap piece to ensure color evenness and adhesion. Use primer or wood conditioner as needed.

Finish Used
For a modern style table, make sure you fill every imperfection and knot with wood filler. Sand well.

We primed and sprayed High Gloss Enamel Ultra Pure White by Valspar on, two coats. If you do not have a sprayer, you may consider painting your boards – decking especially – before assembly, as it is very difficult to get a pretty paint job on a slatted design such as this.

 
CREDIT ANA WHITE


Share This Story, Choose Your Platform!