DIMENSIONS
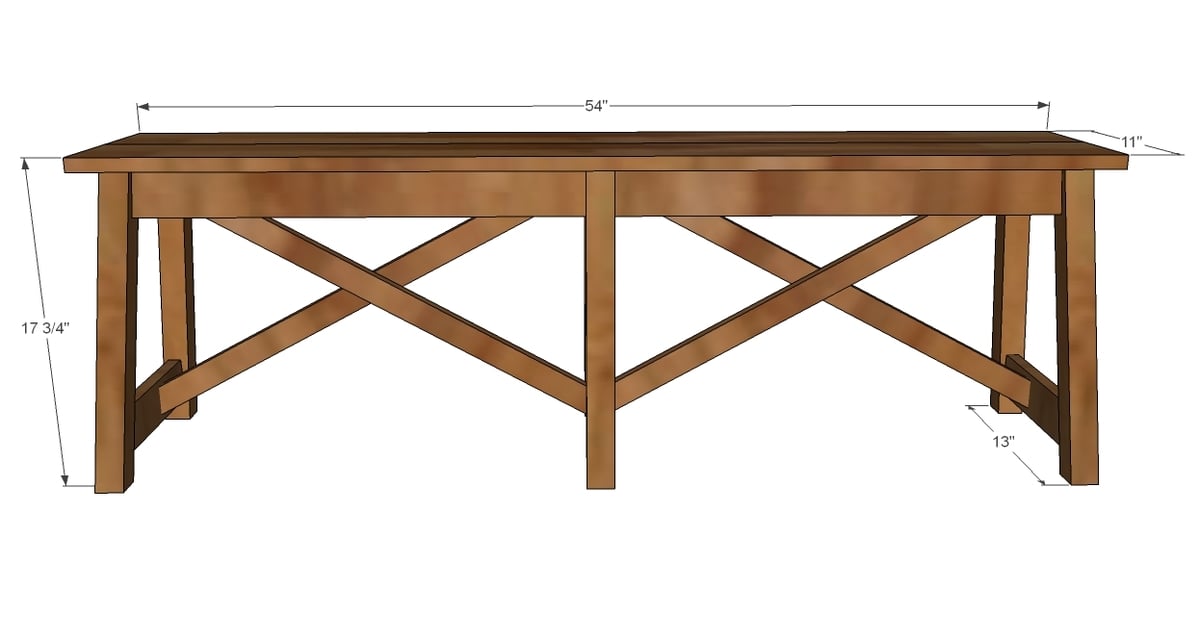
- 1 – 2×2 12 feet long
- 3 – 1×3 @ 8 feet long
- 2 – 1×2 @ 8 feet long
- 1 – 1×6 @ 10 feet long
- 2 inch finish nails
- 1-1/4″ Pocket Hole Screws
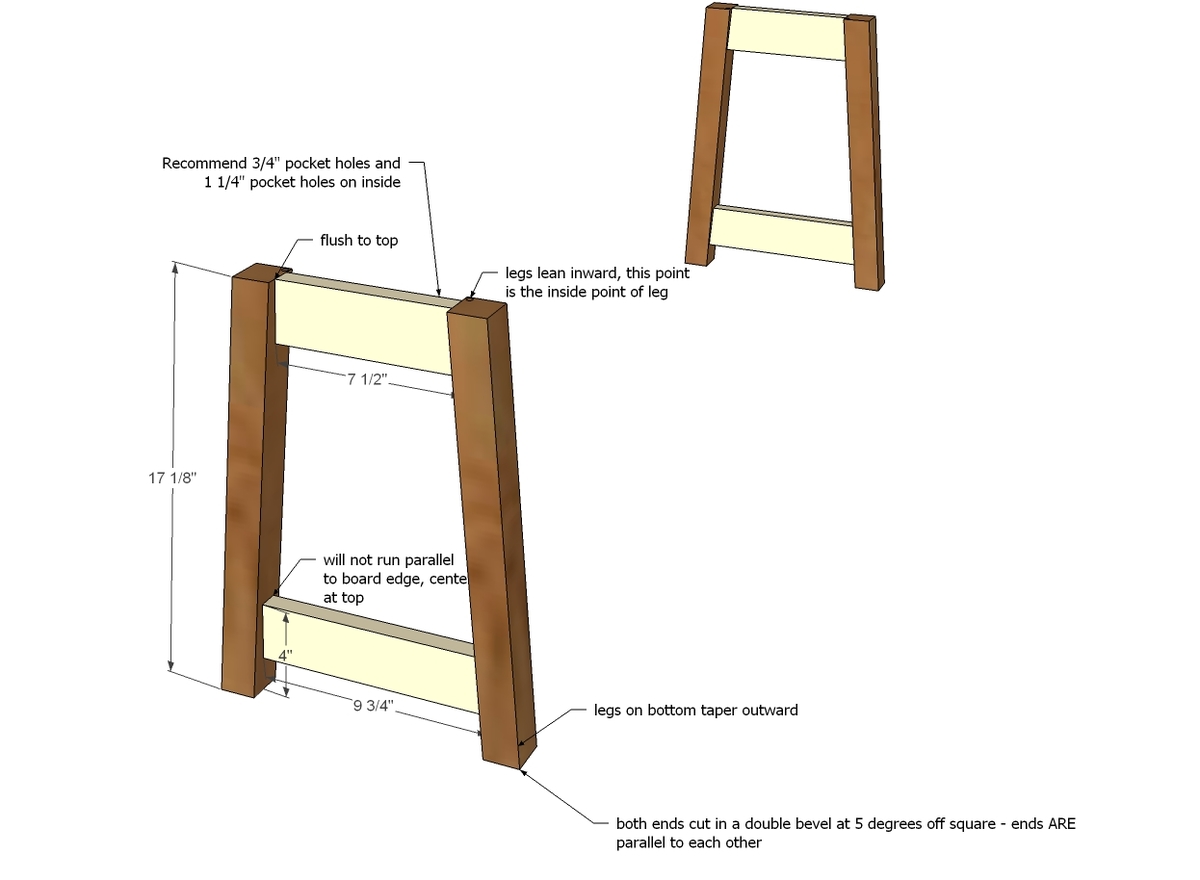
- 4 – 2×2 @ 17 1/8″ long – Outside Legs (both ends cut at 5 degrees double bevel off square, ends ARE parallel to each other)
- 2 – 2×2 @ 17 1/8″ long – Inside Legs (both ends cut at 5 degrees off square, ends ARE parallel to each other)
- 3 – 1×3 @ 7 1/2″ long – End Aprons (both ends cut at 5 degrees off square, longest point measurement, ends NOT parallel)
- 3 – 1×3 @ 9 3/4″ long – Stretchers (both ends cut at 5 degrees off square, longest point measurement, ends NOT parallel)
- 4 – 1×3 @ 23 1/2″ long – Side Aprons (ONE end cut at 5 degrees off square, longest point measurement)
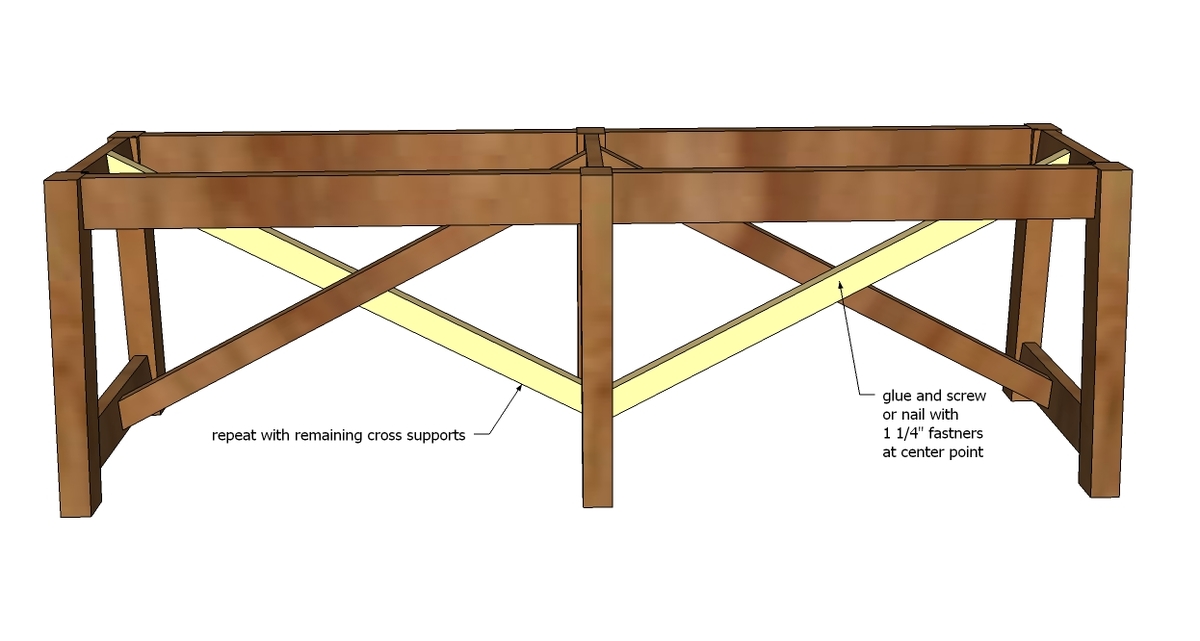
- 1×2 cross supports cut to fit
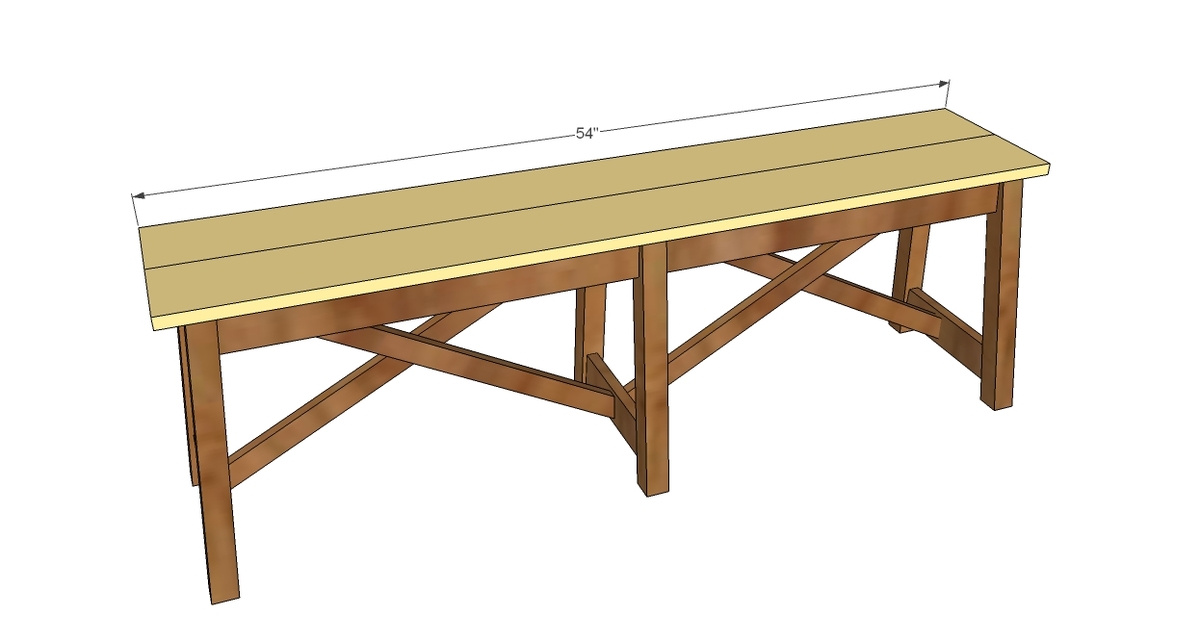
- 2 – 1×6 @ 54″ long – Tops
INSTRUCTIONS
STEP 1
Since the 5 degree double bevels are so slight, I’d recommend marking each of your double bevel outside legs like this before assembly:
And then you can move on to attaching legs to aprons and stretchers.
TIP: Drill 3/4″ pocket holes facing upward for later attaching top in aprons.
STEP 2
The center legs are only single bevels, but same construction as the outside legs.
TIP: Drill 3/4″ pocket holes facing upward for later attaching top in aprons.
STEP 3
Then attach the side aprons – note that the straight end of each apron is attached to the center legs. When you drill your pocket holes, note this, so your pocket holes can be hidden on the inside (it does matter).
TIP: Drill 3/4″ pocket holes facing upward for later attaching top in aprons.
STEP 4
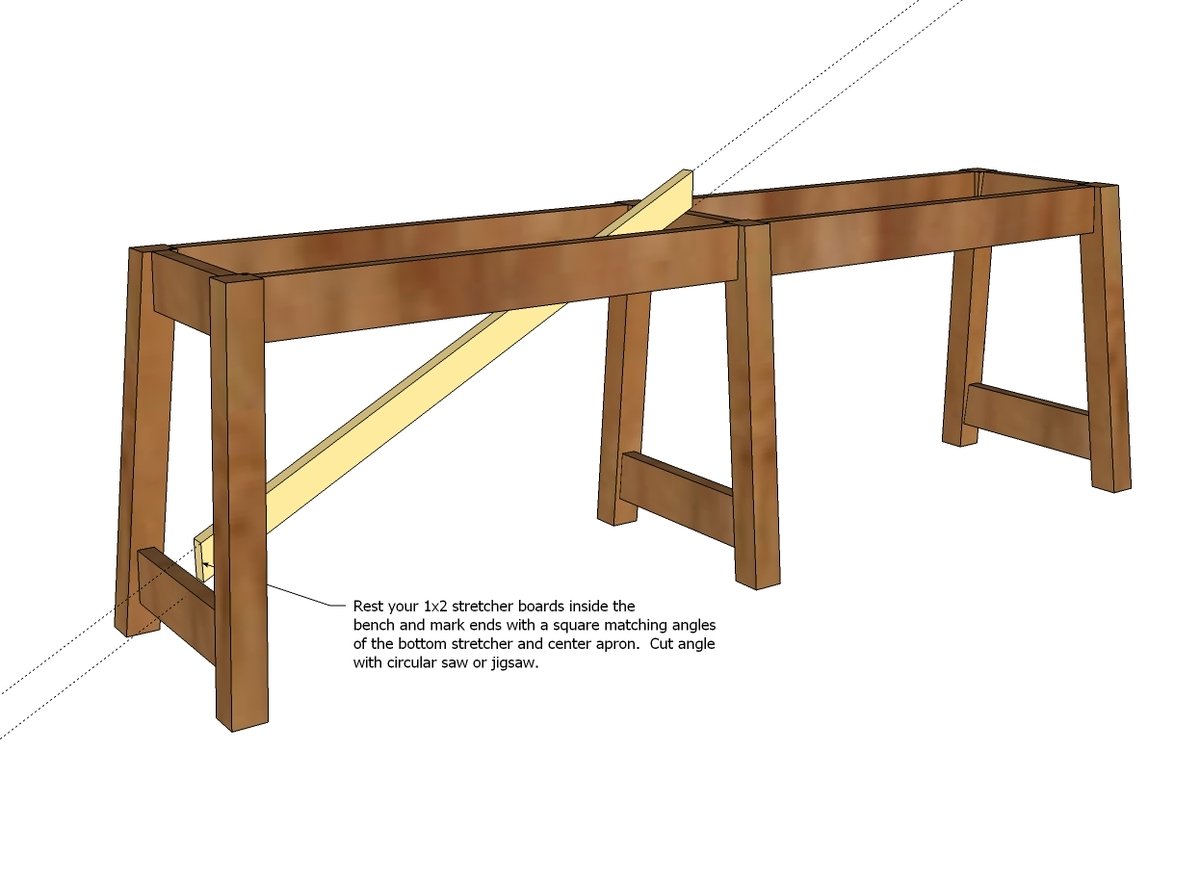
The easiest way to do the cross supports is to mark with a square or straight edge and cut with a circular saw or jigsaw.
STEP 5
STEP 6
I recommend building top first with a row of 3/4″ pocket holes down center and attaching the 1x6s together with 1 1/4″ pocket hole screws. Then attach through predrilled holes in aprons with 1 1/4″ pocket hole screws.
FINISHING INSTRUCTIONS
Fill all holes with wood filler and let dry. Apply additional coats of wood filler as needed. When wood filler is completely dry, sand the project in the direction of the wood grain with 120 grit sandpaper. Vacuum sanded project to remove sanding residue. Remove all sanding residue on work surfaces as well. Wipe project clean with damp cloth.
It is always recommended to apply a test coat on a hidden area or scrap piece to ensure color evenness and adhesion. Use primer or wood conditioner as needed.
CREDIT ANA WHITE

