Please read through the entire plan and all comments before beginning this project. It is also advisable to review the Getting Started Section. Take all necessary precautions to build safely and smartly. Work on a clean level surface, free of imperfections or debris. Always use straight boards. Check for square after each step. Always predrill holes before attaching with screws. Use glue with finish nails for a stronger hold. Wipe excess glue off bare wood for stained projects, as dried glue will not take stain. Be safe, have fun, and ask for help if you need it. Good luck!
Instructions
STEP 1
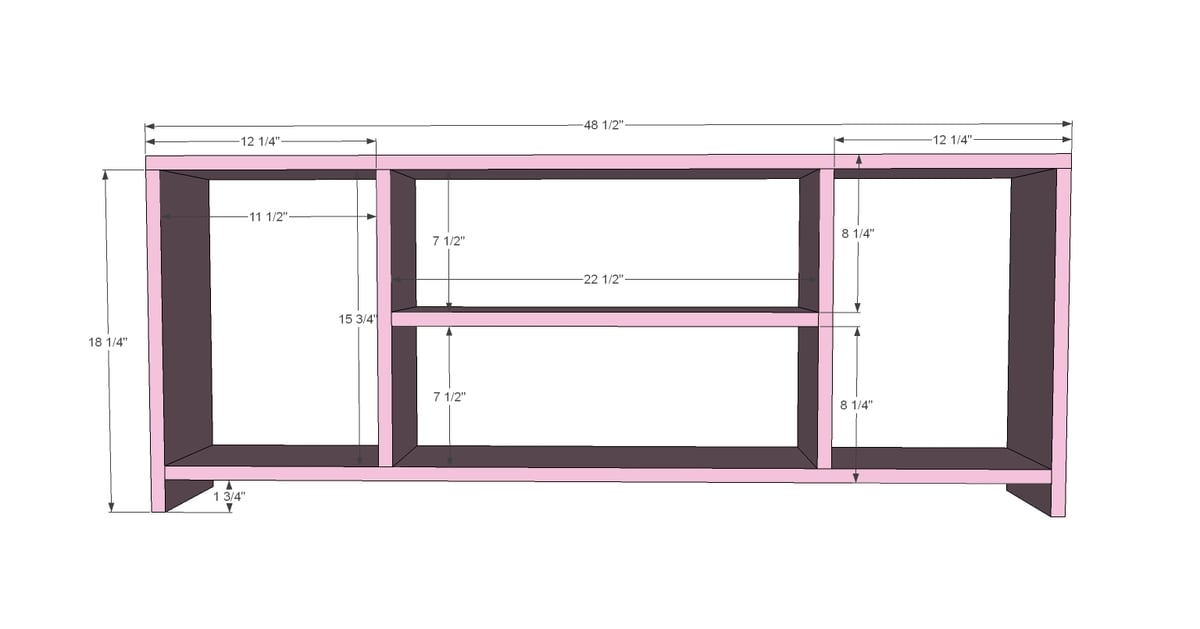
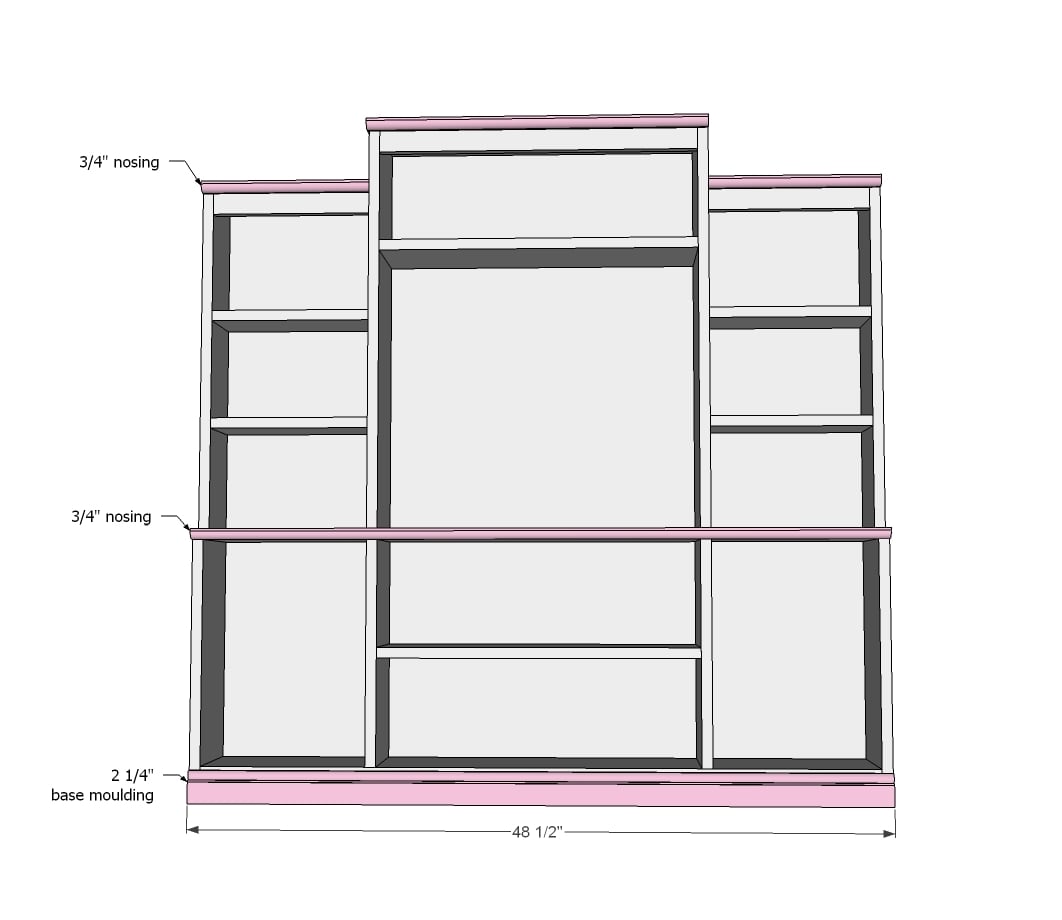
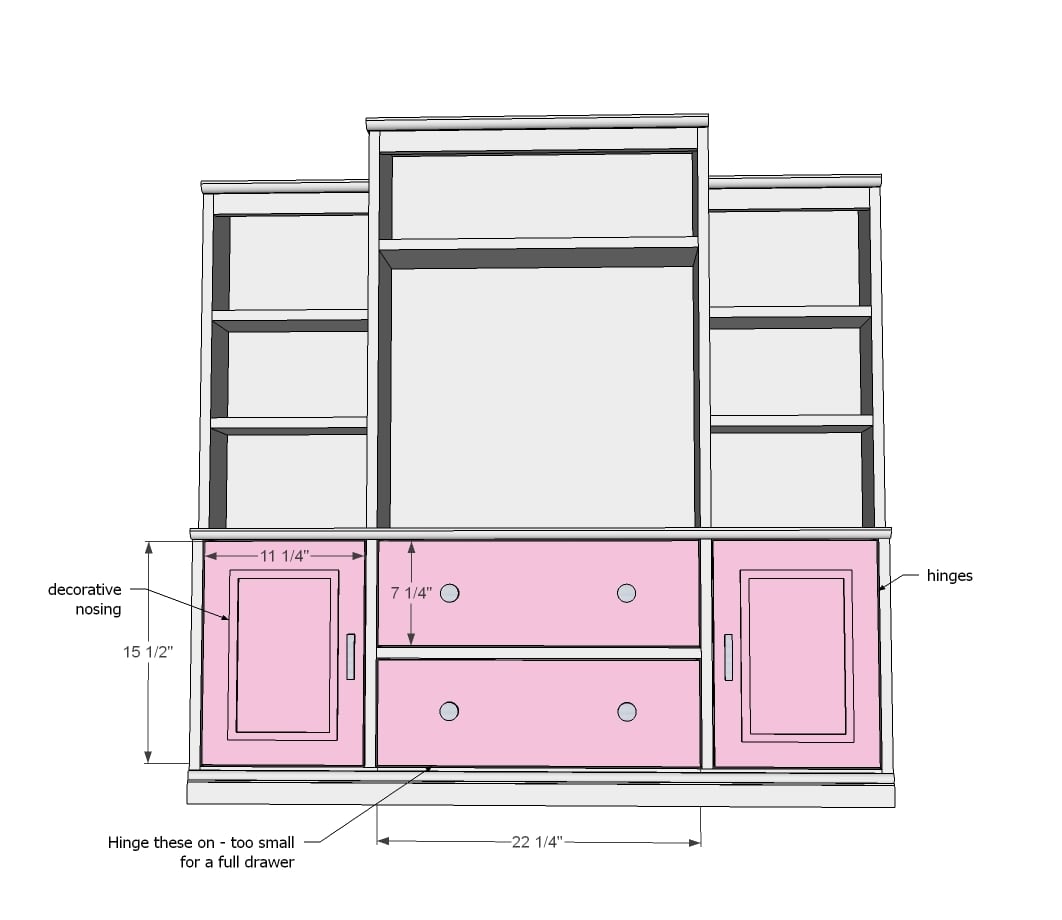
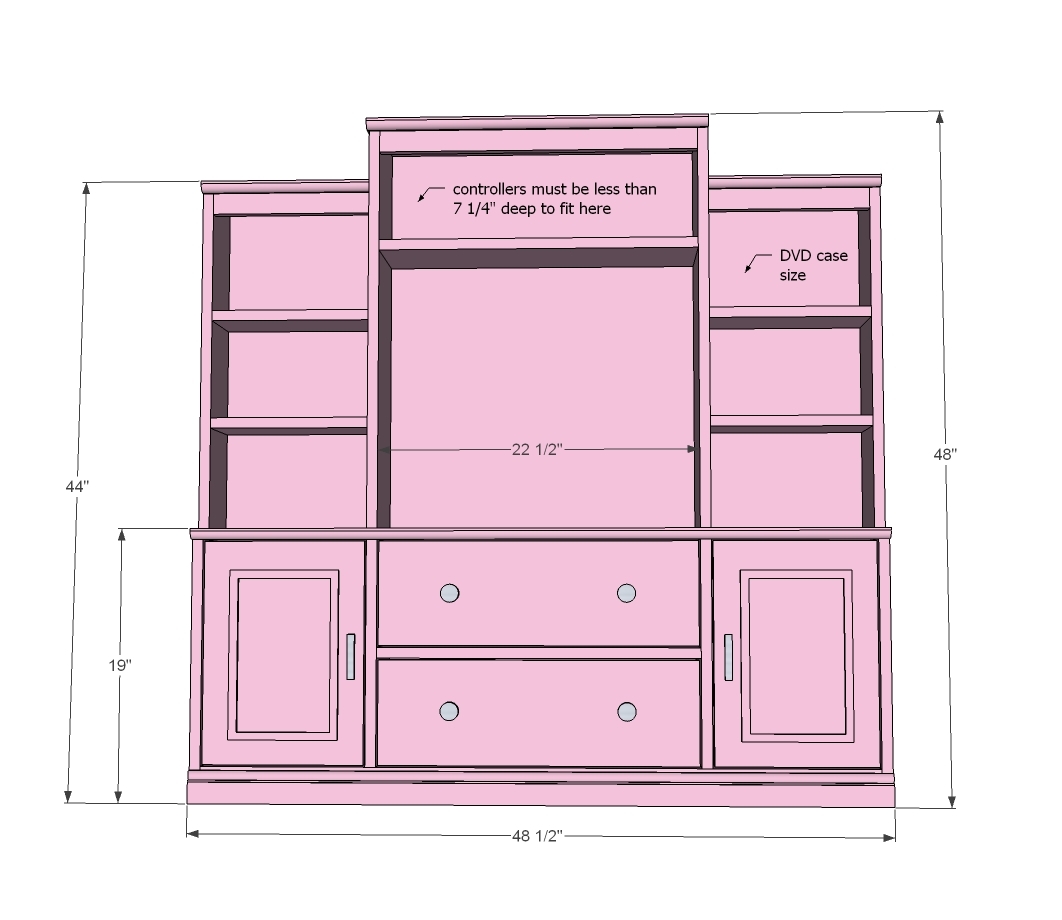
First, put the console part together. I used 3/4″ pocket holes and 1 1/4″ pocket hole screws. This part went together pretty fast, just following along the diagram. One thing to note, the console is designed for 1×8 and 1×12 door faces that measure 11 1/4″ and 7 1/4″ wide, with an 1/8″ gap all the way around. If your 1x8s and 1x12s differ in width, you may need to adjust the console.
STEP 2
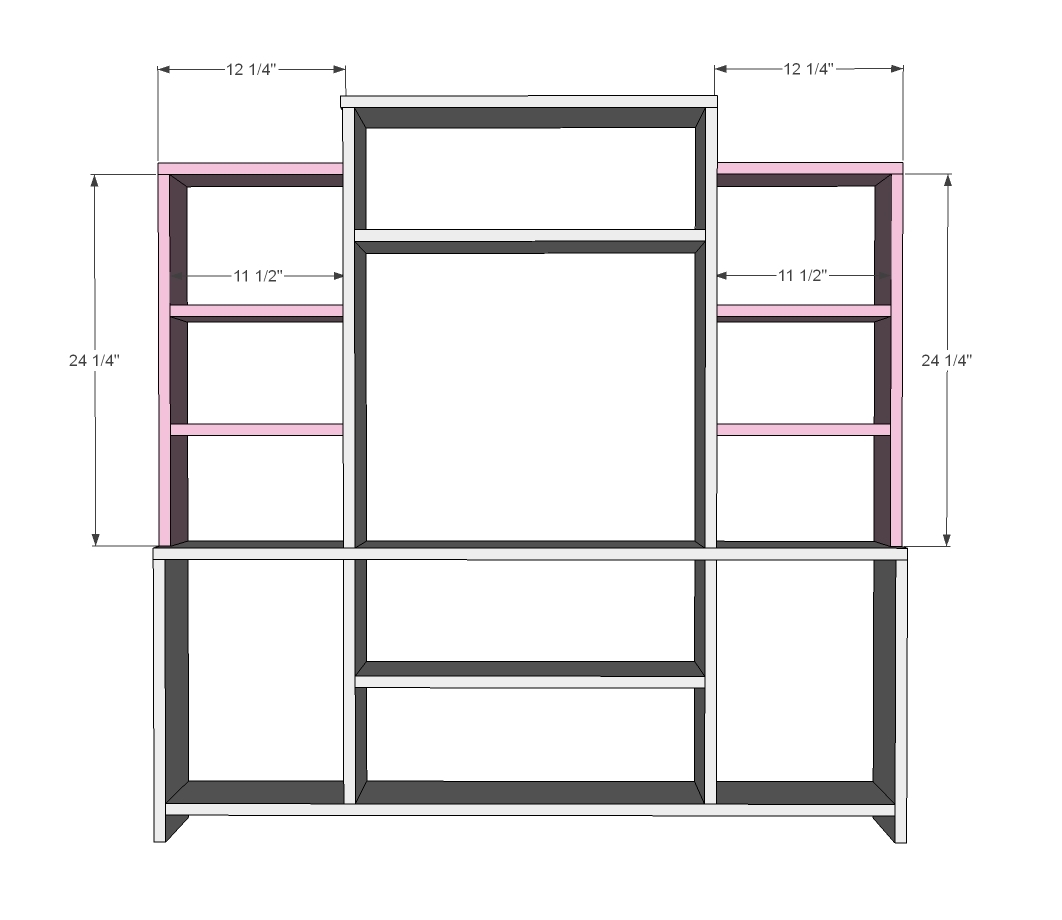
STEP 3
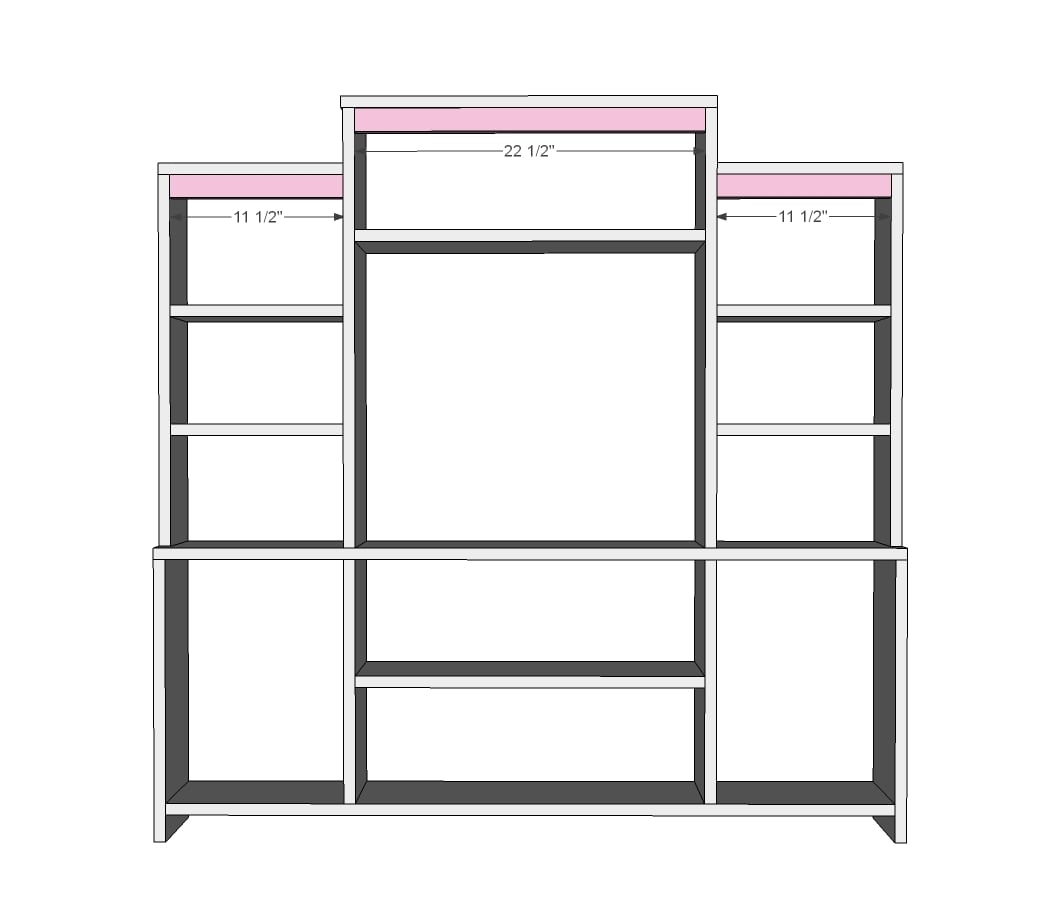
STEP 6
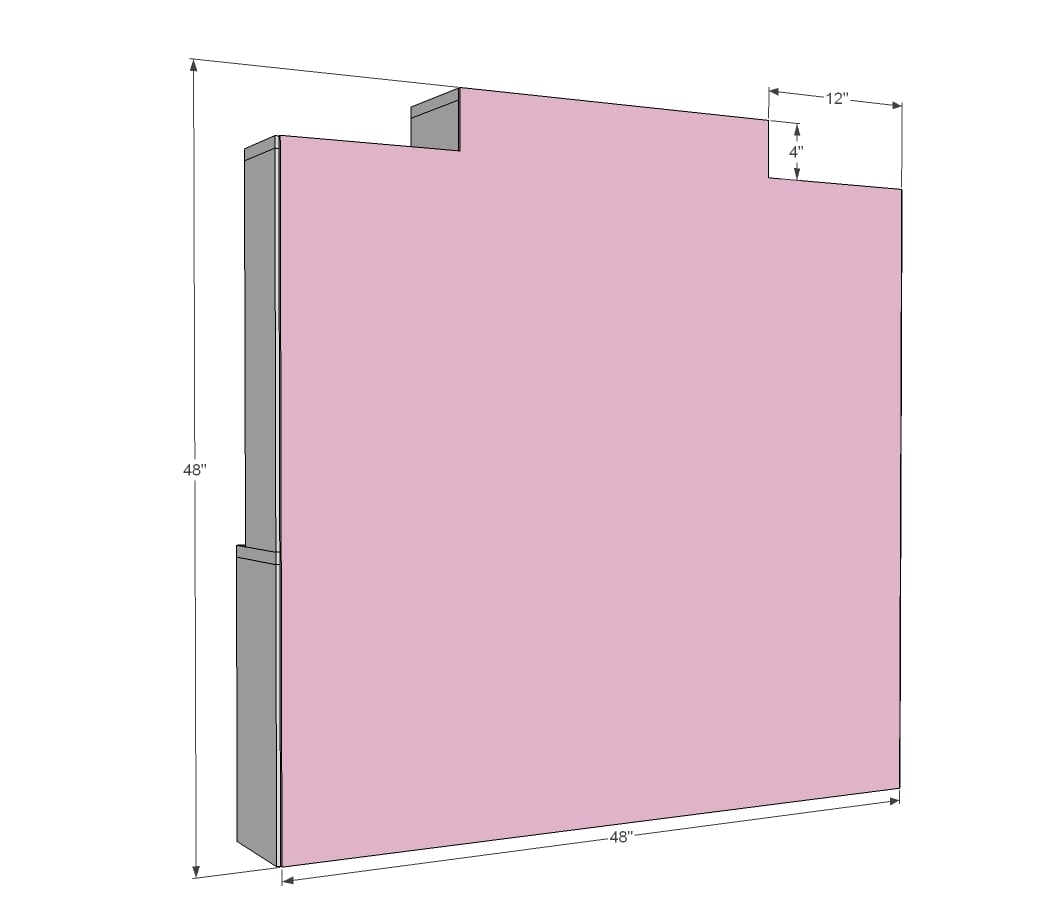
STEP 7
It is always recommended to apply a test coat on a hidden area or scrap piece to ensure color evenness and adhesion. Use primer or wood conditioner as needed.
We apologize if there was an error in this plan. Please help us out and report any errors here
4 – 1×8 @ 8 feet long
2 – 1×6 @ 8 feet long
1 – 1×12 @ 3 feet long (for doors)
1 – 1×2 @ 8 feet long
1 – 2 1/4” base moulding 6 feet long
2 – ¾” nosing 6 feet long
4 sets narrow profile hinges (smallest ones you can find)
6 knobs or handles
½ sheet ¼” plywood or beadboard for back
1 – 1×8 @ 48 ½”
2 – 1×8 @ 18 ¼”
1 – 1×8 @ 47”
2 – 1×8 @ 15 ¾”
3 – 1×8 @ 22 ½”
2 – 1×8 @ 28 ¼”
1 – 1×8 @ 24”
2 – 1×6 @ 24 ¼”
4 – 1×6 @ 11 ½”
2 – 1×6 @ 12 ¼”
2 – 1×2 @ 11 ½”
1 – 1×2 @ 22 ½”
2 – 1×12 @ 15 ½”
2 – 1×8 @ 22 ¼”
2 1/4” moulding cut to fit
¾” nosing cut to fit

