DIMENSIONS
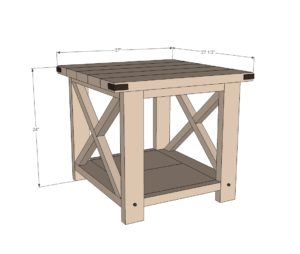
Dimensions are shown above.
PREPARATION
- 2 – 2×4 @ 8 feet long
- 1 – 1×12 @ 3 feet long
- 2 – 2×2 @ 8 feet long
- 2 – 2×6 @ 8 feet long corner bracket hardware decorative bolts
- 2 1/2″ and 1 1/4″ Pocket Hole screws
- wood glue
- 8 – 2X4 @ 22 1/2″ – Legs
- 4 – 2X2 @ 16″ – Trim
- 2 – 1X12 @ 16″ – Bottom shelf
- 2 – 2X2 @ 26 1/2″ (LONG POINT TO SHORT POINT, ENDS ARE PARALLEL, 50 DEGREES OFF SQUARE) *
- 4 – 2×2 @ 13 1/4″ (Longest edge, one end cut at 50 degrees off square, other end cut at 10 degrees off square, see diagram) *
- 5 – 2×6 @ 27″ – Top
*You may wish to trace and cut these in place
INSTRUCTIONS
STEP 1
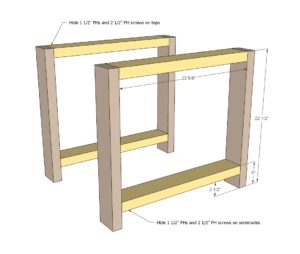
Start by building two ends as depicted in diagrams. You can also attach with countersunk 2 1/2″ screws and glue.
NOTE: Yellow board width should be 22 1/2″.
STEP 2
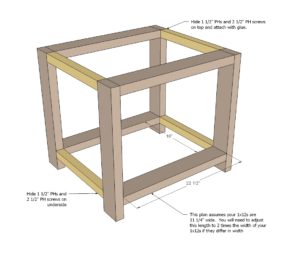
Next, attach the 2×2 sides.
STEP 3
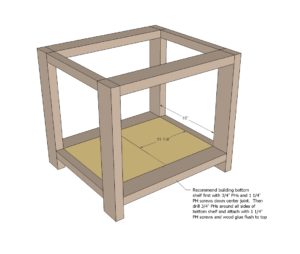
And then build your bottom shelf and attach to bottom of console.
STEP 4
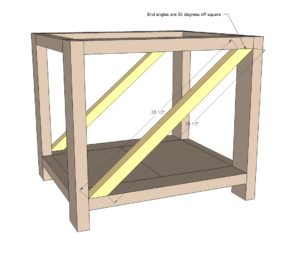
Now it’s time to fit your cross braces. A standard miter saw should cut a 50 degree angle off square. If not, you will need to mark it with a square (remember 50 degrees is off square, so that means the angle off the board edge would be 40 degrees.
Another trick is to just hold the board in place, mark the angles, and cut. These aren’t support boards or anything like that, so some glue and a few nails or countersunk screws from top/bottom will do the trick.
TIP: We recommend building the entire X first, the attaching the complete X inside the end table.
STEP 5
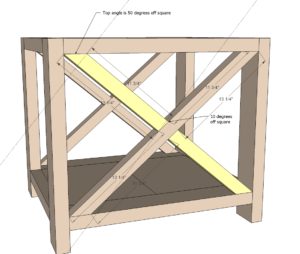
The smaller X pieces can be cut to fit. Attach with a 1-1/2″ pocket hole and 2-1/2″ pocket hole screw, one screw per joint.
STEP 6
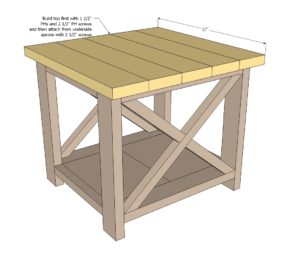
Next, build your top … and attach in place with countersunk 2 1/2″ screws. If you have the PH screws on hand, I just use a few of those!
STEP 7
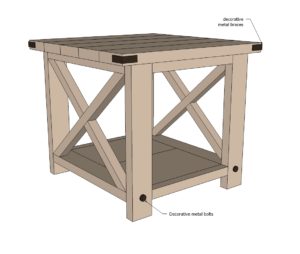
And then add the decorative hardware!
FINISHING INSTRUCTIONS
Fill all holes with wood filler and let dry. Apply additional coats of wood filler as needed. When wood filler is completely dry, sand the project in the direction of the wood grain with 120 grit sandpaper. Vacuum sanded project to remove sanding residue. Remove all sanding residue on work surfaces as well. Wipe project clean with a damp cloth.
It is always recommended to apply a test coat on a hidden area or scrap piece to ensure color evenness and adhesion. Use primer or wood conditioner as needed.
CREDIT ANA WHITE
