DIMENSIONS
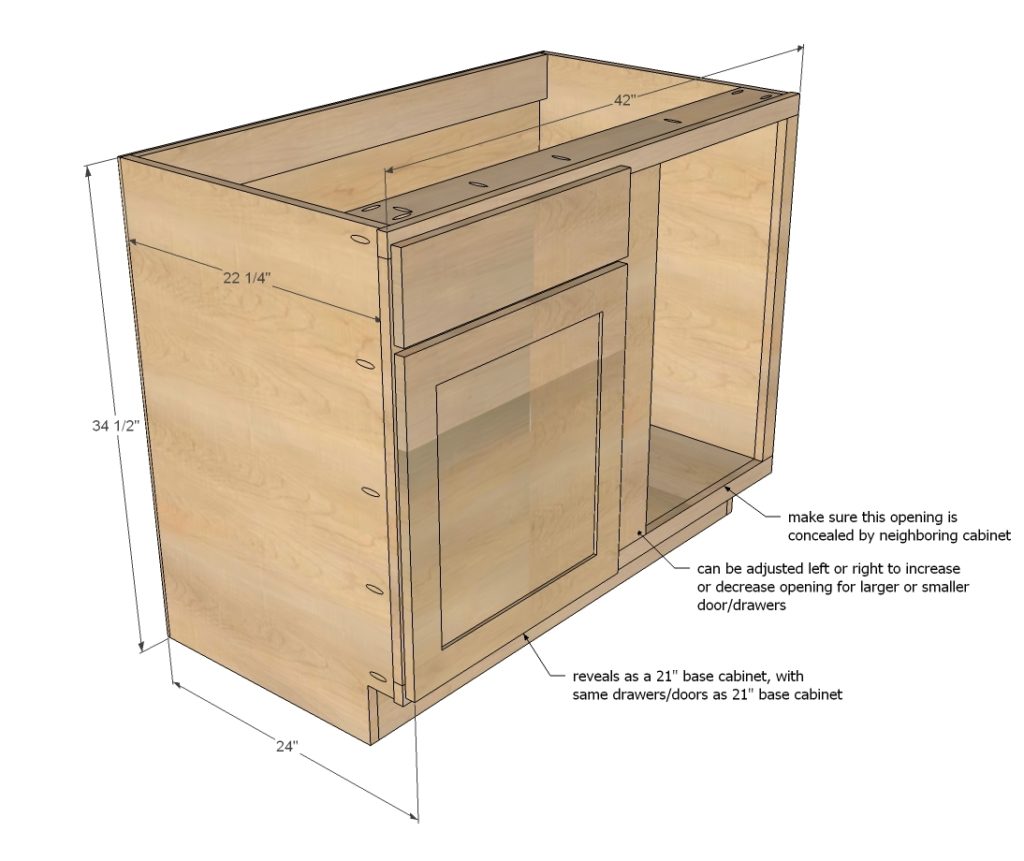
Dimensions shown above.
PREPARATION
3/4″ plywood ripped into strips 22 1/4″ long (for sides and shelves) 3/4″ plywood scrap from ripping sides and shelves (for top supports) 3/4″ plywood ripped into strips 5″ long (for base supports – use cheaper plywood here) 1x2s for face frames 1×6 (or other wide width board) for the center stile (27″ length) 1/4″ plywood (for backs) 1-1/4″ pocket hole screws 3/4″ finish nails edge banding for shelves.
- 3/4 inch finish nails
-
1-1/4″ Pocket Hole Screws
-
Elmer’s Wood Glue
CARCASS 2 – 3/4″ plywood @ 22-1/4″ x 34 1/2″ (side panels – same on ALL BASES) 1 – 3/4″ plywood @ 22-1/4″ x 40″ (bottom shelf) 2 – 3/4″ plywood @ 5″ x 40″ (bottom supports) 2 – 3/4″ plywood @ 3-1/2″ (can vary in rip width) x 40″ (top supports) 1 – 1/4″ plywood @ 32″ x 41-1/2″ (back) FACE FRAME 2 – 1×2 @ 27″ (side stile – same on ALL BASES) 1 – 1×6 @ 27″ (center stile) 2 – 1×2 @ 42″ (top/bottom rails – always overall width of cabinet) 1 – 1×2 @ 18″ (drawer/door rail) SHELVES 3/4″ plywood @ 22″ x 39-3/4″ (measure and adjust to fit shelf pins) DOOR/DRAWER FACE for FULL OVERLAY (1-1/4″) 5 1/2″ x 20-1/2″ (drawer face) 22-1/2″ x 20-1/2″ (door)
INSTRUCTIONS
STEP 1
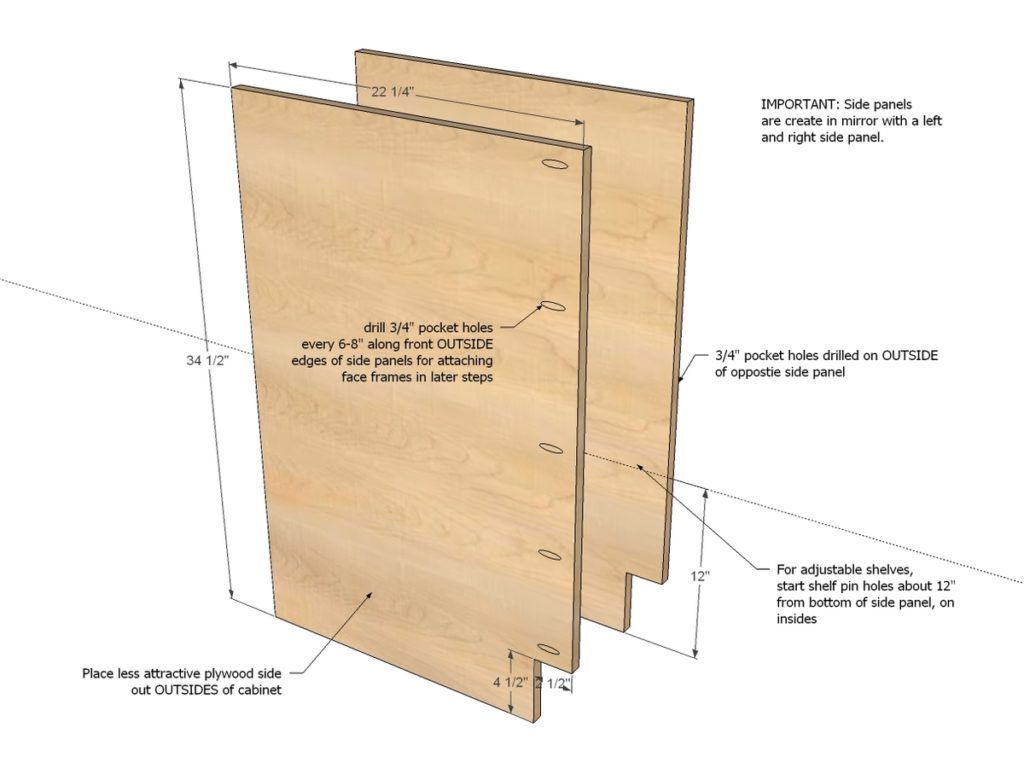
For all the base cabinets, make sure the side panels are cut exactly the same as the other cabinets. Make sure you create the two sides for each cabinet in mirror – meaning the toekicks are on the bottoms, pocket holes for attaching face frames are on the outsides, and shelf pin holes are on the inside for adjustable shelves.
STEP 2
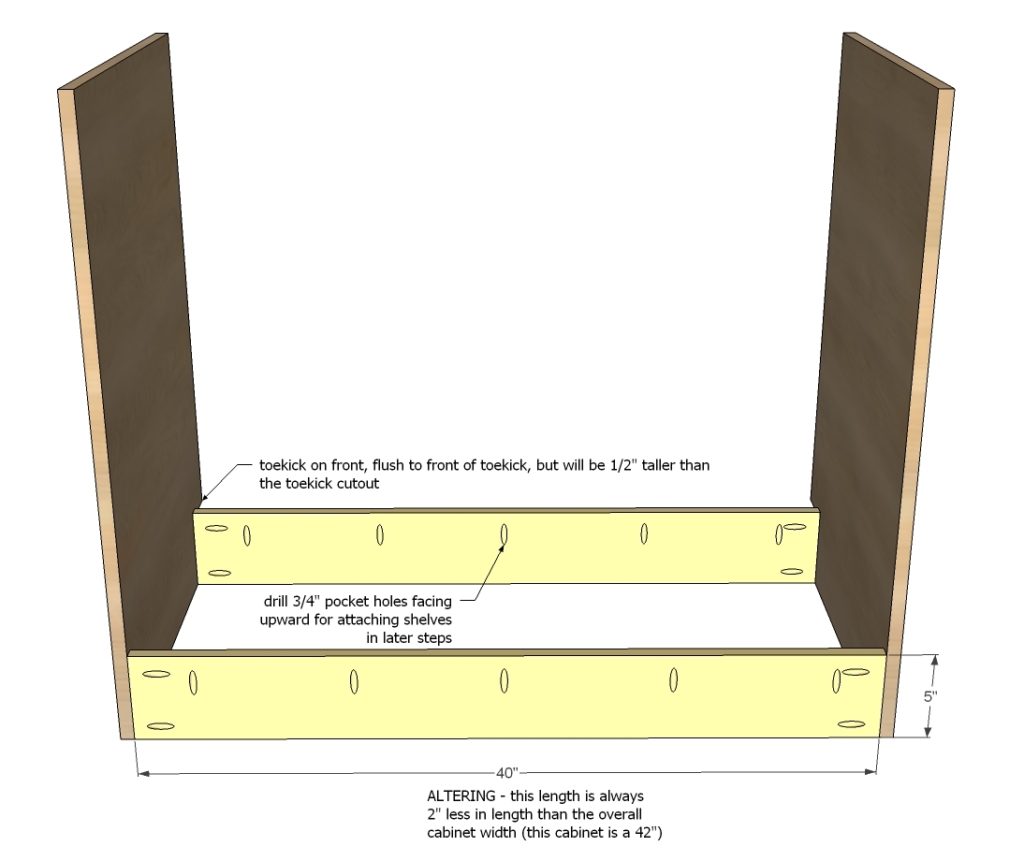
We used cheaper plywood (unfinished off the shelf oak) for these pieces because they are hidden underneath the cabinet. We ripped a bunch at 5″ widths. All pocket holes are drilled on the 3/4″ setting, and we used fine threaded pocket hole screws. Note that the toekick is cut 1/2″ less than the front – see next diagram.
STEP 3
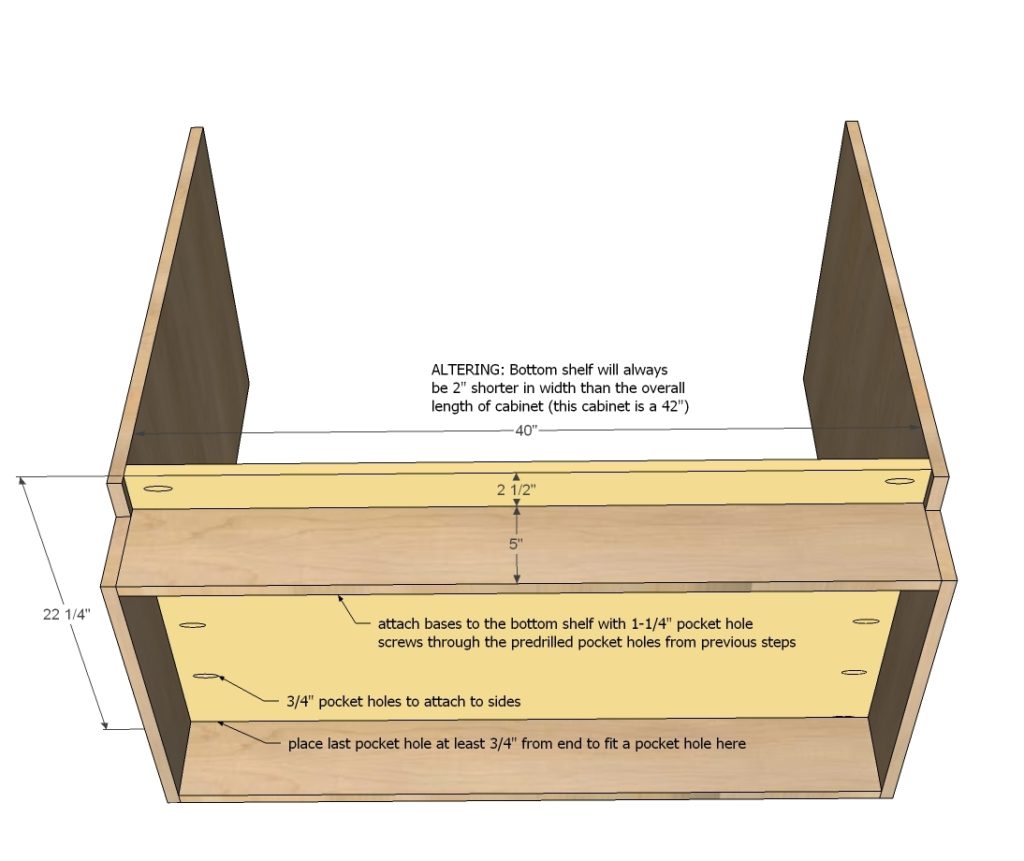
On top of the base supports, attach the bottom shelf.
STEP 4
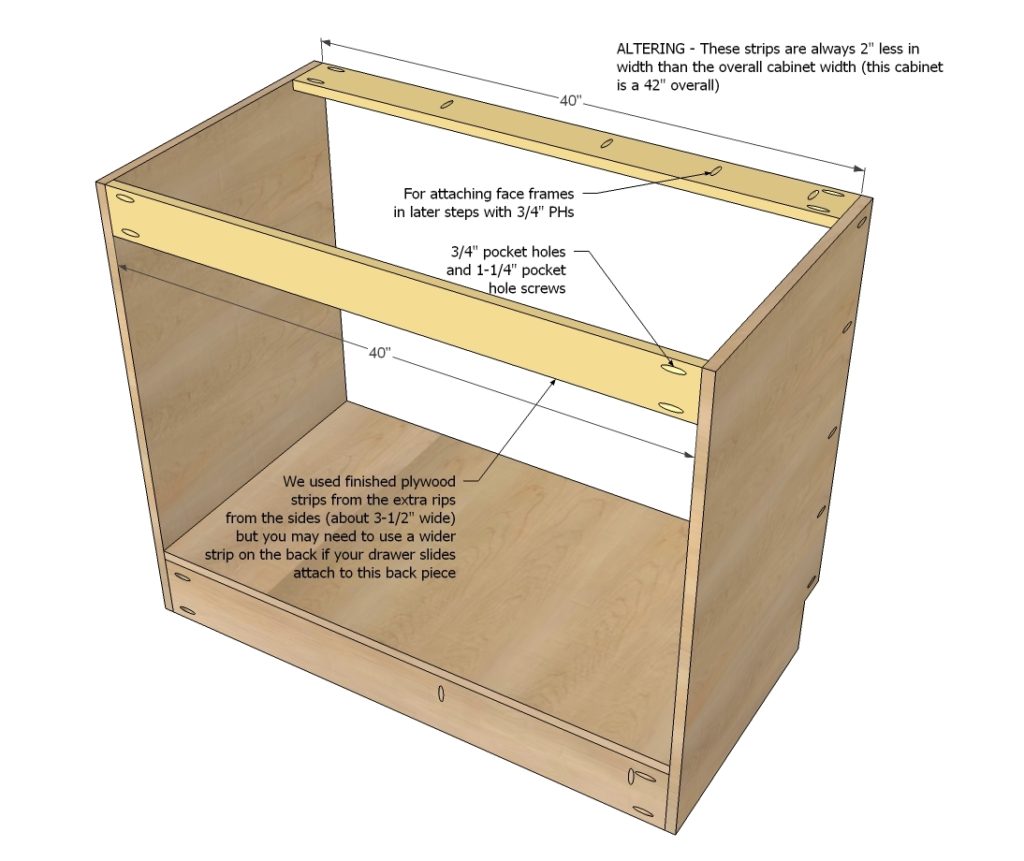
For the top, we supported the front and back with strips of plywood leftover from ripping the sides. The width doesn’t really matter of the boards, just getting the length right on. NOTE: Depending on how you mount your drawers, you may wish to add extra support to the back.
STEP 5
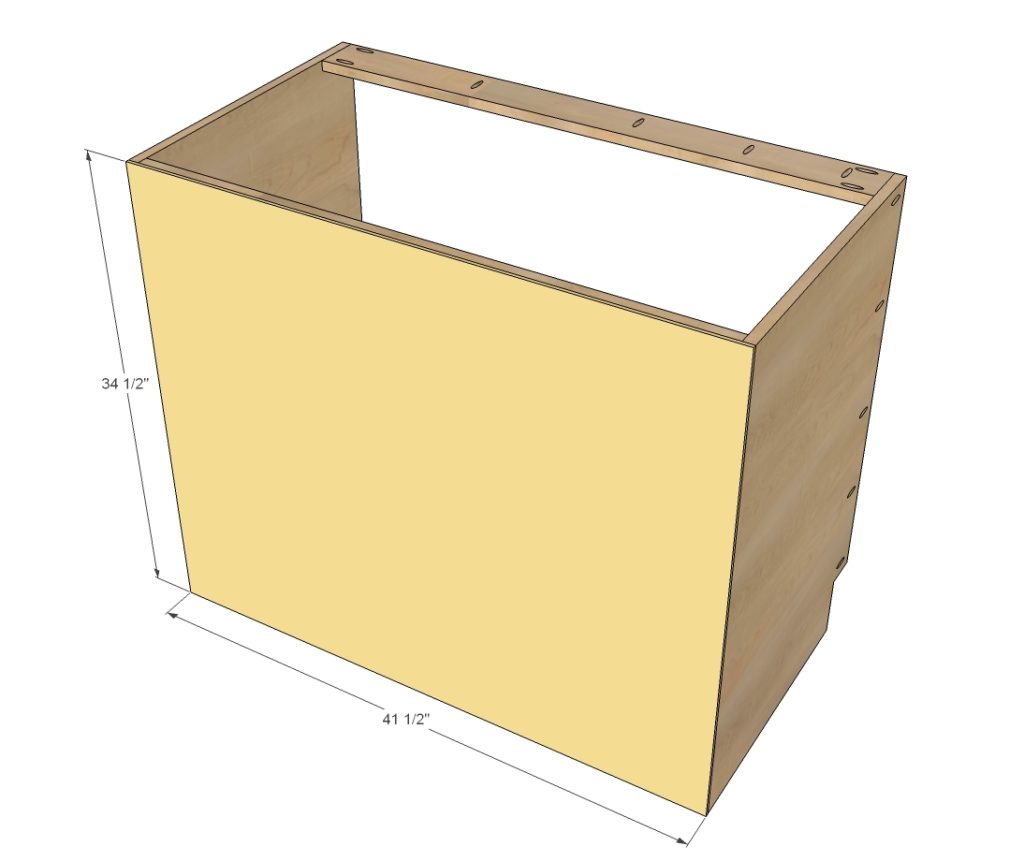
STEP 6
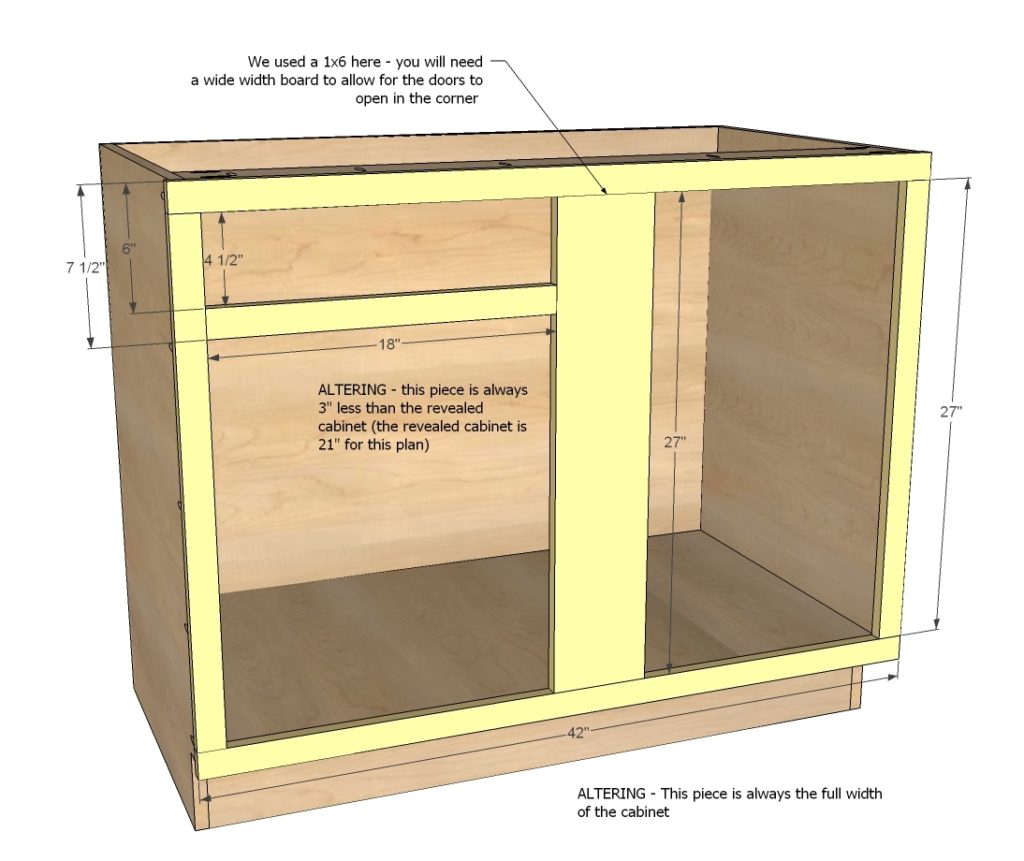
The face frame overextends the sides by 1/4″, but is flush to top and bottom (of toekick cutout) but overextends bottom shelf by 1/2″. This leaves a 1/4″ lip on inside of cabinet. I recommend building the face frame first with 3/4″ pocket holes and 1-1/4″ pocket hole screws, and then attaching the whole face frame to front with 1-1/4″ pocket hole screws through holes predrilled on outsides of sides and top. On the bottom, you won’t be able to get a drill in between the face frame and the bottom support board, so we nailed on the bottom with glue.
STEP 7
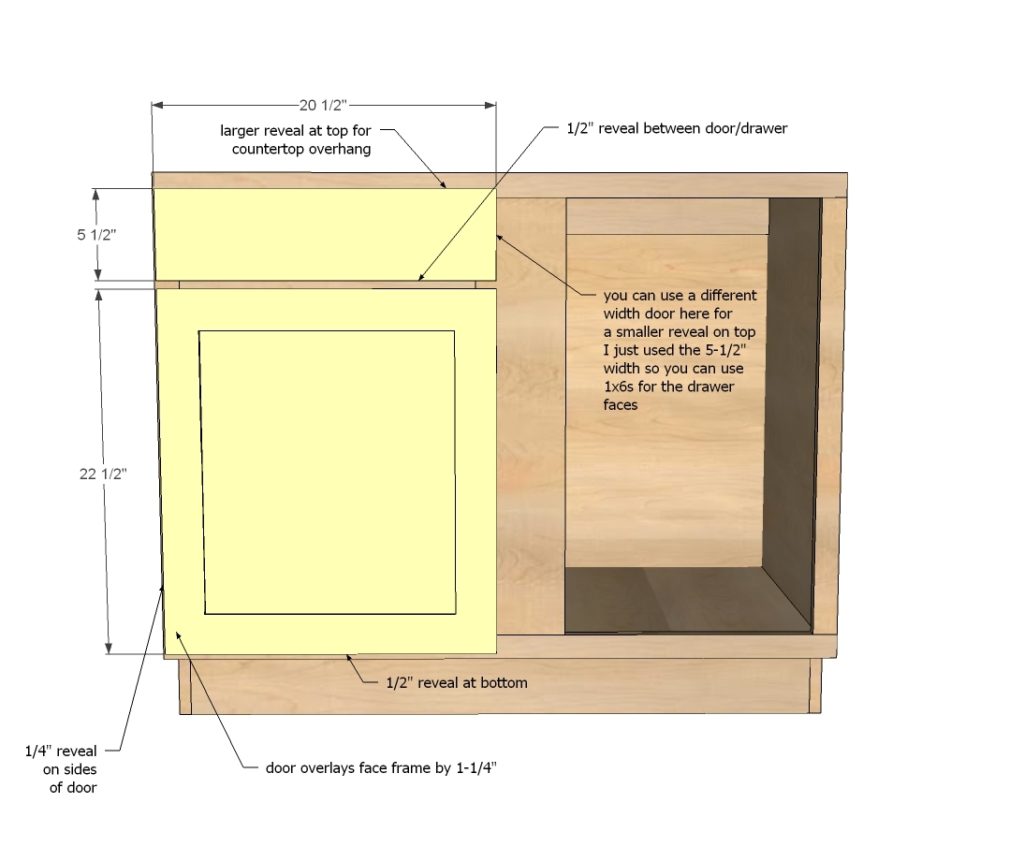
These are the size drawers/doors we ordered from Cabinet Now using 1-1/4″ overlay concealed hinges (will do a post on hinges soon).
FINISHING INSTRUCTIONS
Fill all holes with wood filler and let dry. Apply additional coats of wood filler as needed. When wood filler is completely dry, sand the project in the direction of the wood grain with 120 grit sandpaper. Vacuum sanded project to remove sanding residue. Remove all sanding residue on work surfaces as well. Wipe project clean with damp cloth.
It is always recommended to apply a test coat on a hidden area or scrap piece to ensure color evenness and adhesion. Use primer or wood conditioner as needed.
CREDIT ANA WHITE
