DIMENSIONS
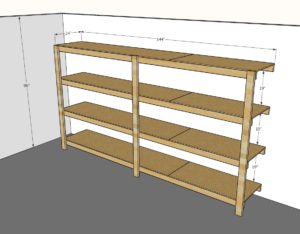
PREPARATIONS
SHOPPING LIST
- 8 – 2×4 @ 12 feet long
- 6 – 2×4 @ 8 feet long or 92-5/8 stud length
- 3 sheets of 1/2″ plywood, OSB or similar, ripped in half, two strips 24″ wide x 8 feet long
- 3″ self-tapping wood screws (about 150)
- 2″ self-tapping wood screws (about 100)
CUT LIST
- 8 – 2×4 @ 12 feet long
- 3 – 2×4 @ 76-1/2″
- 12 – 2×4 @ 21″
- 4 – 1/2″ plywood @ 24″ x 96″
- 4 – 1/2″ plywood @ 24″ x 48″
Instructions
STEP 1
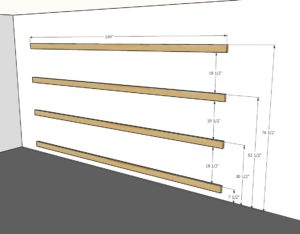
Locate studs in the wall and mark.
Use a level to mark the entire stud, vertically, on the surface of the drywall with a pencil.
Mark heights of shelves.
Attach 2x4s to the wall where the shelves will be placed with 3″ screws into studs in the wall, two screws per stud in the wall.
STEP 2
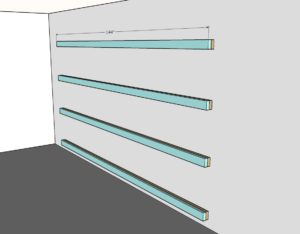
Tack the second 2×4 on top of the first in two places, using 3″ screws, avoid the ends and the middle where the legs will get attached in the next step.
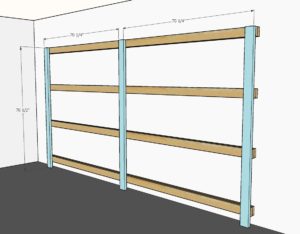
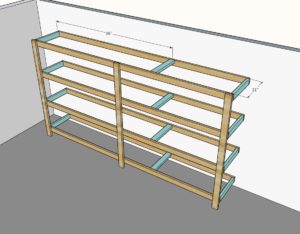
Untack the front of the shelving from the back 2×4.
Attach 21″ long 2x4s in between the front of the shelving and the back. Use a Kreg Jig if you have one, or screw at an angle to attach.
Place flat 2x4s where there will be seams in the 8′ long plywood shelving strips.
STEP 5
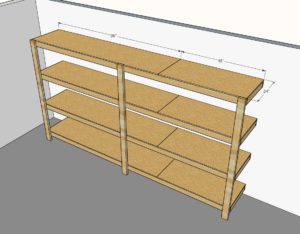
Lay plywood shelf tops on the framing.
Screw down with 2″ screws, screws about every foot is fine.
CREDIT ANA WHITE
