Want to start building projects but space is limited? This folding workstation only takes up 4 square feet and has lots of storage. It folds out to create a good-sized workspace.
DIMENSIONS
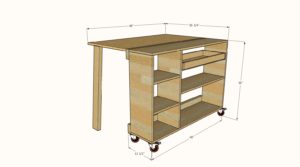
Work Surface is 4′ x 3′, when folded, about 1′ deep x 4′ wide x 3′ tall.
PREPARATIONS
- 2 – 1×12 @ 8 feet long
- 1 – 1×12 @ 6 feet long (use for the shelves)
- 2 – 2×4 @ 8 feet long
- 1 – 3/4″ plywood @ 4′ x 2′
- 1 – 48″ piano hinge
- 4 – 4″ caster wheels with locks
- 16 – 3/4″ long wood screws for caster wheels, make sure the screw head won’t pull through the caster wheel holes
- 2 – 3″ hinges with screws
- 2 – magnetic clasps
- 1 – hook and eye closure
- 2″ self-tapping cabinet screws (about 50)
- 2-1/2″ self-tapping cabinet screws (about 20)
Optional Drawer
- 1 – 1×3 @ 8 feet long
- 1/4″ plywood for the drawer bottom
- 1 – 12″ full extension drawer slide
- 3/4″ brad nails and wood glue for attaching the 1/4″ plywood to the bottom
- 2 – 1×12 @ 48″
- 3 – 1×12 @ 30-1/2″
- 2 – 2×4 @ 48″
- 1 – 1×12 @ 31-3/4″
- 2 – 1×12 @ 14″
- 1 – 3/4″ plywood @ 48″ x 36″
- 2×4 legs are cut at 5-degree bevel to fit the height of the casters
The drawer should be cut to fit as follows –
- 2 – 1×3 @ 12″
- 2 – 1×3 @ about 29″ – measure the smallest part of the opening, subtract 1″ for drawer slides, 1-1/2″ for the drawer sides, and then an additional 1/4″ for play
- Drawer bottom is 12″ x about 30-1/2″ or 1-1/2″ larger than the drawer front and back 1×3
INSTRUCTIONS
STEP 1
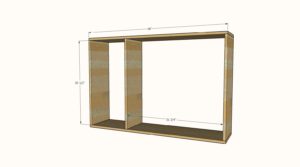
Attach the top and bottom to the dividers and sides with 2″ screws, use three screws per joint.
STEP 2
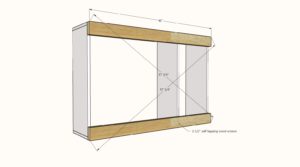
Check the project for square by taking opposite diagonals and making sure the opposite diagonals match. Adjust if necessary.
Attach 2x4s to the back with 2-1/2″ screws into the top, bottom, and sides and dividers.
STEP 3
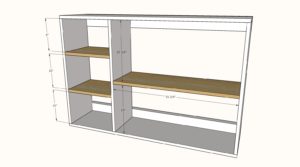
Attach a longer shelf first with 2″ screws, three screws per joint.
Then add the smaller shelves.
Shelf height can be placed at any height, more shelves can be added.
STEP 4
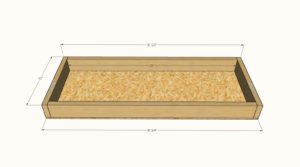
Optional Drawer:
Measure the inside with of where you want the drawer placed. Measure at the front, back and middle to find the smallest spot.
Cut the drawer to fit, most drawer slides need 1/2″ clearance per drawer slide. You’ll also need to factor in the thickness of your 1×3 drawer sides. I like to also leave about 1/4″ less just to make sure the drawer can fit – you can always shim the drawer slides later if the drawer is too small, but a too big drawer is tough to fix.
Use 2″ screws to build the drawer, and 3/4″ brad nails to attach the bottom on the drawer.
STEP 5
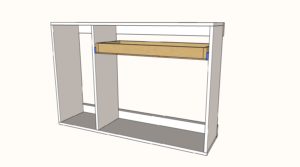
Install the drawer on the slide so it is below the back 2×4.
The video has alot of tips on installing this drawer, so please watch – it will save you time.
STEP 6
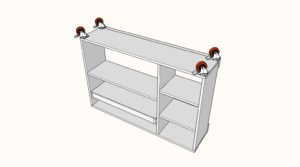
Screw caster wheels to the base of the project.
STEP 7
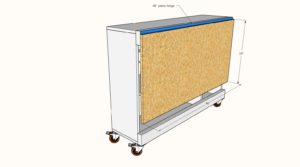
Attach the 3/4″ plywood panel to the workbench 2×4 with the piano hinge. When hinged down, the piano hinge will be fully exposed.
STEP 8
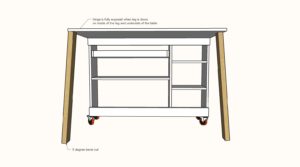
Cut one end of the remaining 2×4 at a 5 degree bevel.
Hold the work table up so it is level to the ground.
Place the 2×4 with the 5 degree bevel on the ground alongside the tabletop, and trace where it meets the underside of the tabletop.
Cut the line with a 5 degree bevel.
Install the leg with the 3″ hinge.
Repeat for second leg.
Install magnetic closure so the flat magnetic piece is on the underside of the tabletop, and the larger magnetic piece is on the side of the legs, magnetic pointing toward the underside of the tabletop.
Also install a hook and eye closure on the side of the 1×12 to keep the project closed when not in use.
CREDIT ANA WHITE
