Is your child to old for a high chair, but too short for a standard chair?
For the cost of a cheapo plastic booster seat, you can build your child a modern higher chair. This simple sturdy plan is easy to build, features a footrest, and is easy for youngsters to climb upon. This chair is not meant to replace a high chair and does not offer the security and safety of a high chair.
DIMENSIONS
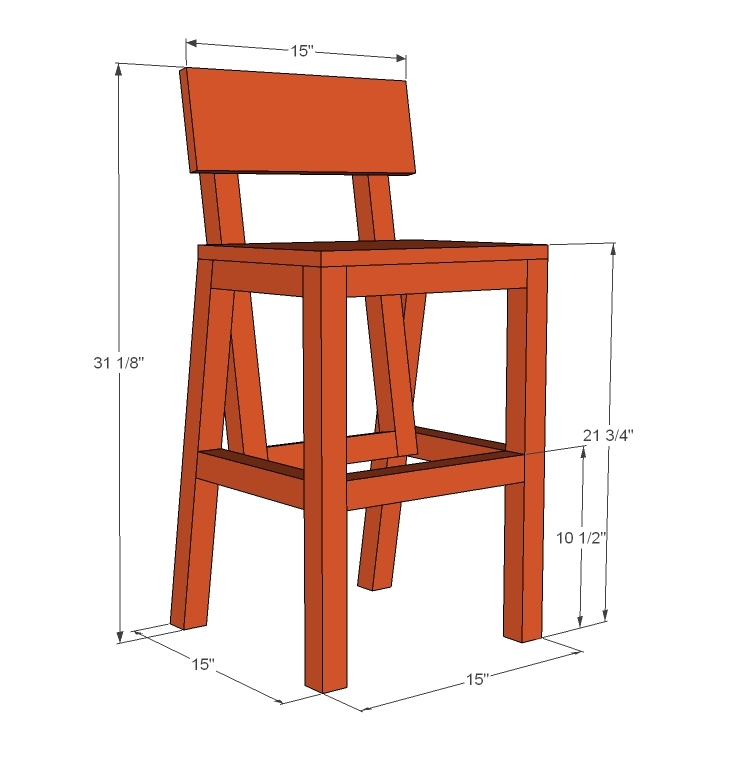
- 2 – 2×2 @ 8 feet long
- 1 – 1×12 @ 15″ long
- 1 – 1×6 @ 15″ long
- 2-inch screws
- 2 1/2 inch screws
- 2-1/2″ Pocket Hole Screws
- Elmer’s Wood Glue
- Elmer’s Wood Filler
- 120 grit sandpaper
- primer
- wood conditioner
- paint
- paint brush
- 2 – 2×2 @ 8 1/4″ – one end at 10 degrees off square, shortest point
- 2 – 2×2 @ 10 1/16″ – one end at 10 degrees off square, shortest point
- 2 – 2×2 @ 21 5/16″ – both ends at 10 degrees off square, parallel to each other
- 2- 2×2 @ 21″ (Front Legs)
- 2 – 2×2 @ 12″ (Front Support/Apron)
- 1 – 1×12 @ 15″ (Seat)
- 2 – 2×2 @ 19″ (Back Supports)
- 1 – 2×2 @ 9″ (Back Base)
- 1 – 1×6 @ 15″ (Backrest)
INSTRUCTIONS
STEP 1
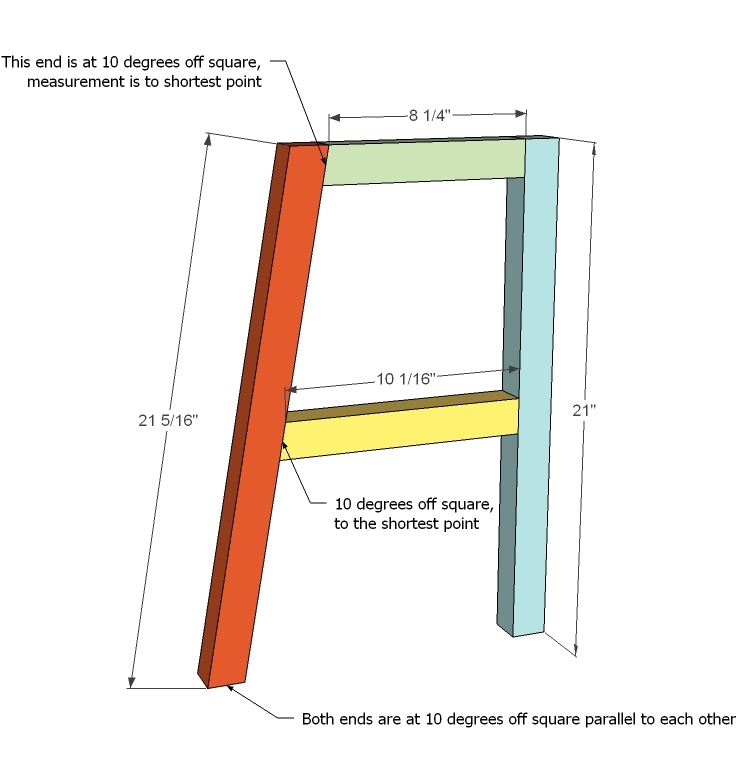
Begin by building two of the above pieces. Make sure both match exactly. Use with either 2 1/2″ screws countersunk and glue or 2 1/2″ pocket hole screws.
STEP 2
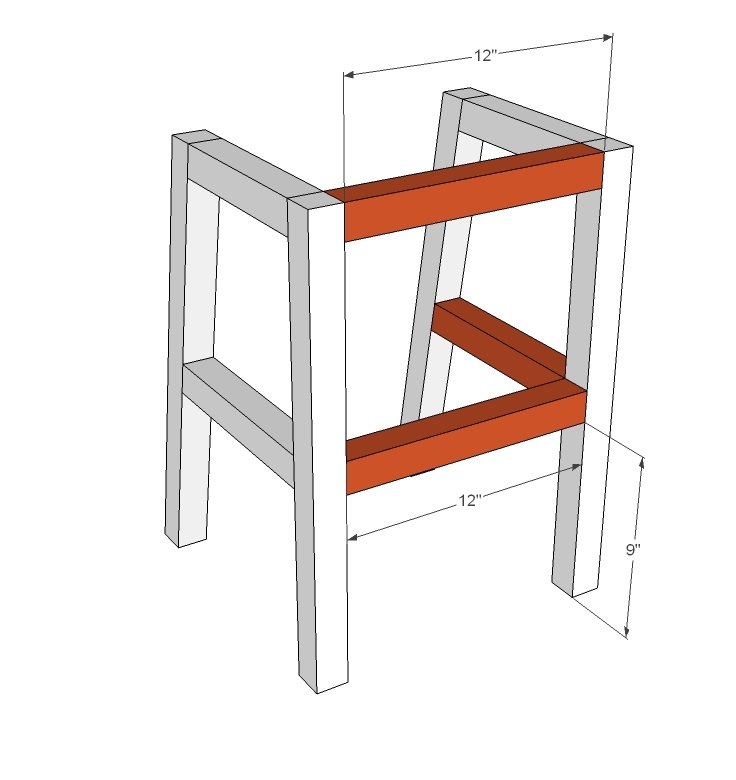
Join the two sides with the front apron/support as shown above. Use the same screws and glue.
STEP 3
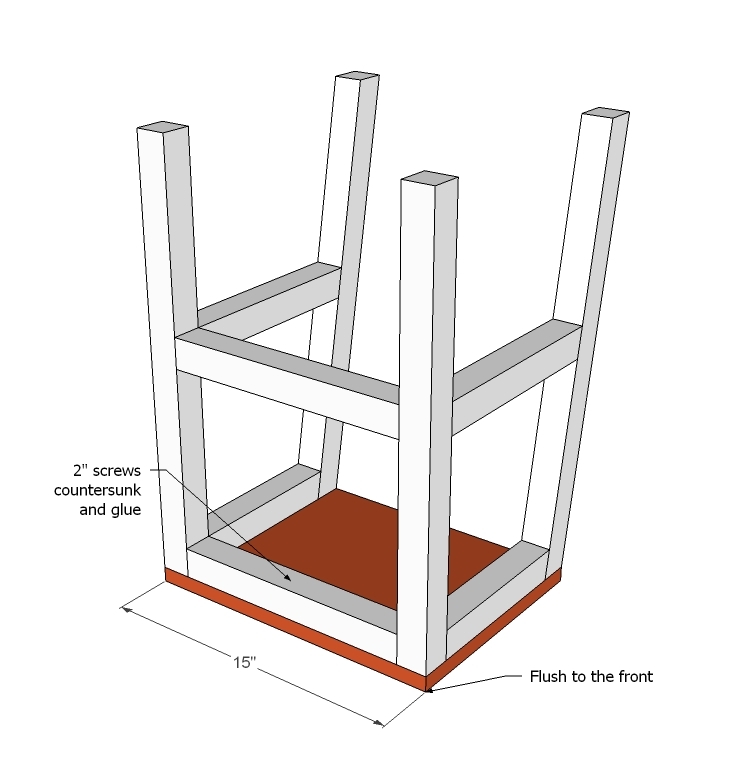
Now the top. This time you will need to use 2″ screws so the screws don’t poke through the seat. Also screw the side aprons to the seat.
STEP 4
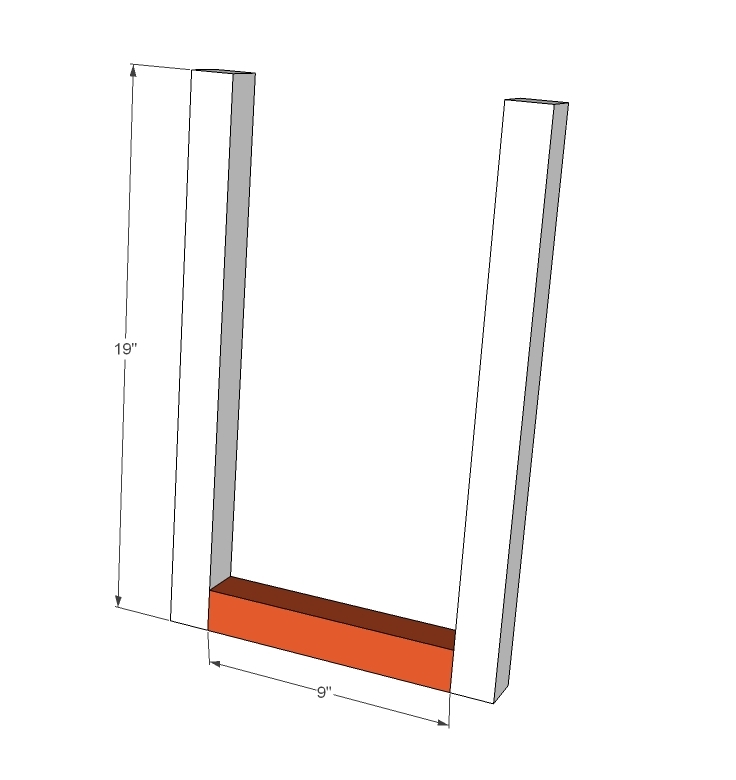
Now build the back. Go back to the 2 1/2″ fasteners. Adjust for square.
STEP 5
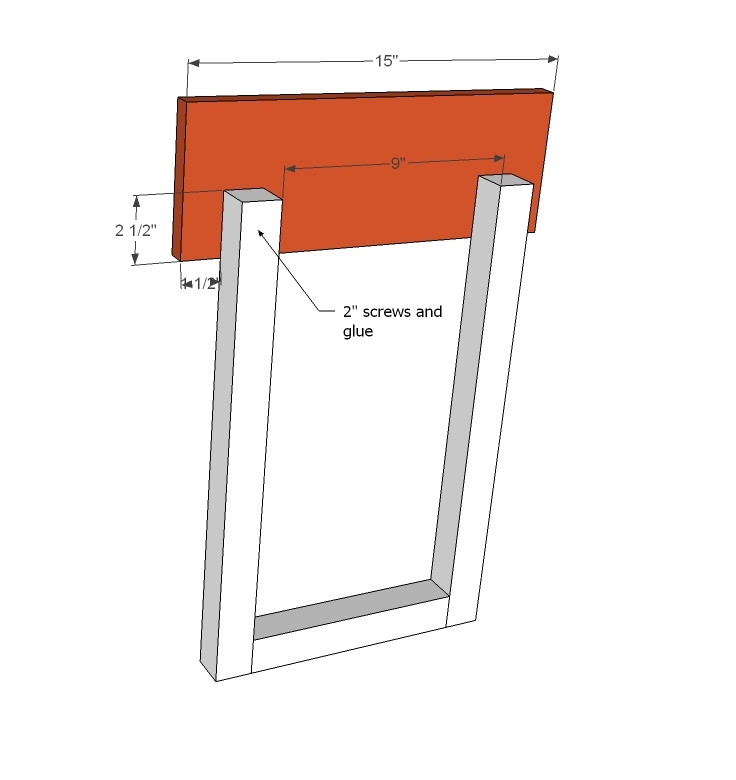
Attach back rest to the back support pieces.
STEP 6
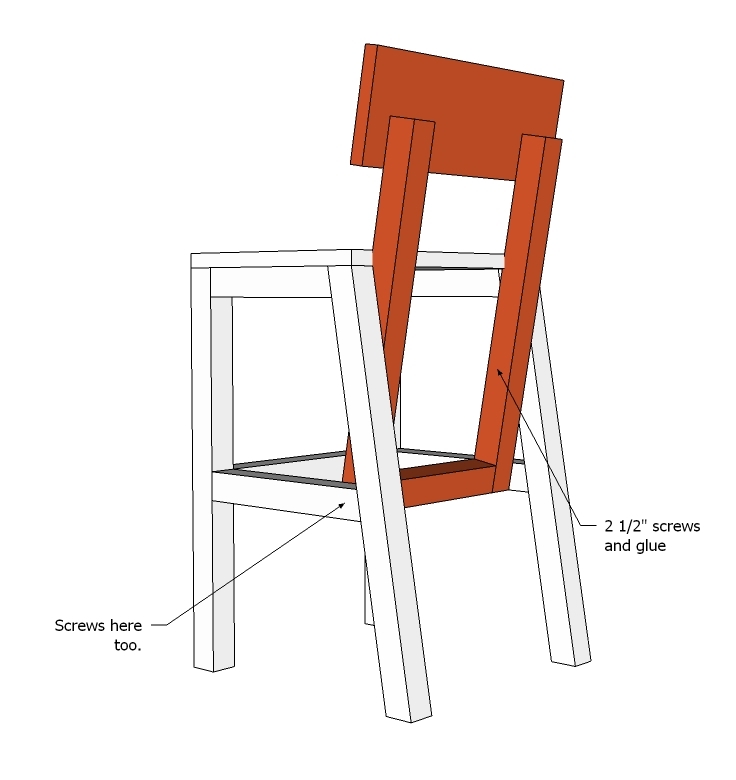
Finally, adjust the seat rest to fit in the seat back. Measure, use a level at the top, and screw in place. I actually sat my daughter in the chair to get the support just right.
FINISHING INSTRUCTIONS
Fill all holes with wood filler and let dry. Apply additional coats of wood filler as needed. When wood filler is completely dry, sand the project in the direction of the wood grain with 120 grit sandpaper. Vacuum sanded project to remove sanding residue. Remove all sanding residue on work surfaces as well. Wipe project clean with a damp cloth.
It is always recommended to apply a test coat on a hidden area or scrap piece to ensure color evenness and adhesion. Use primer or wood conditioner as needed.
CREDIT ANA WHITE
