DIMENSIONS
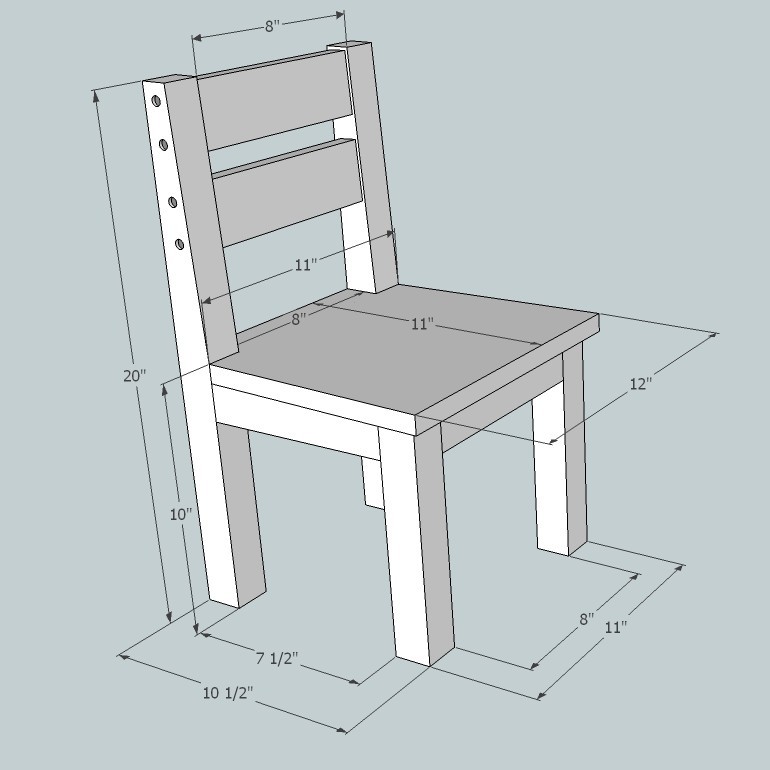
PREPARATION
- 1 – 1×3 @ 2 feet long
- 1 – 2×2 @ 8 feet long
- 1 – 3/4″ thick sheet good at least 11″x12″ (I used MDF 12″ deep shelf but i knew i was painting, You might want pine or
- other if your are staining)
- 18 – 2 1/4 inch pocket screws
- 4 – 1 1/4 inch pocket screws
- Wood glue of choice
- paint and finishing supplies
- 2 – 1×3 @ 8″ – Back Support rails
- 2 – 2×2 @ 9 1/4″ – Front Legs
- 2 – 2×2 @20″ – Back Legs
- 2 – 2×2 @ 7 1/2″ – Side aprons
- 2 – 2×2 @ 8″ – Front and Back Apron
- 1 – 3/4″ panel @ 11″ x 12″ actual – Seat Top
INSTRUCTIONS
STEP 1
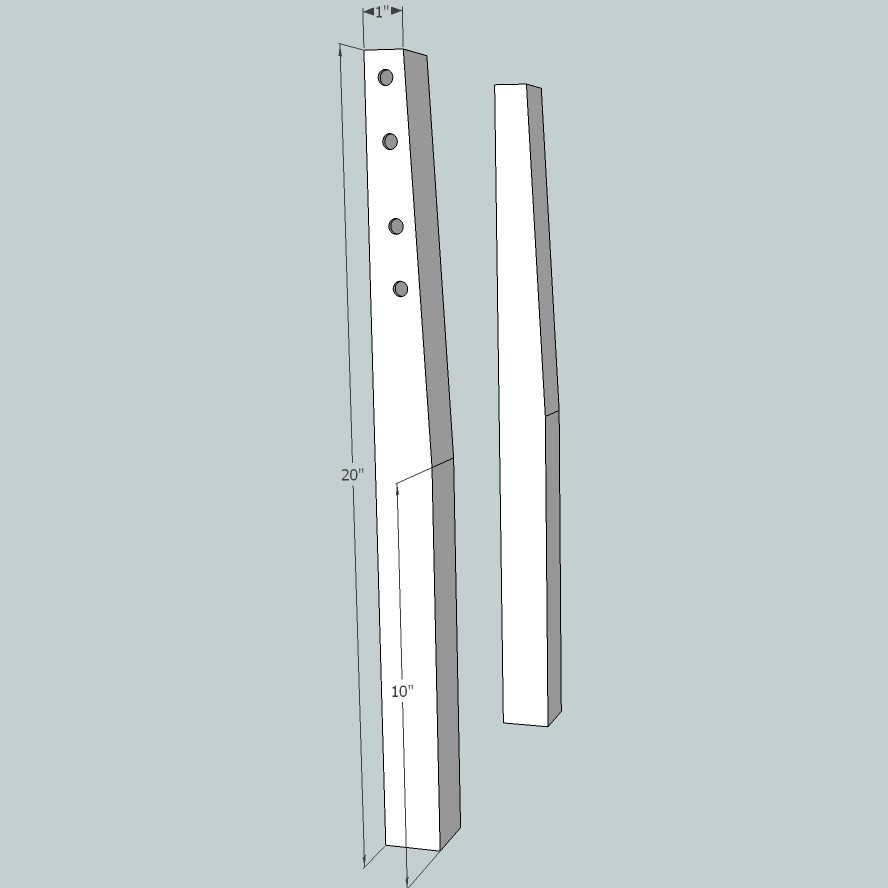
You can taper the back legs just like it’s Ana’s design for a much nicer look. Although if you don’t have a table saw and don’t want to do it by hand you don’t need to! The top of the taper should be 1″
STEP 2
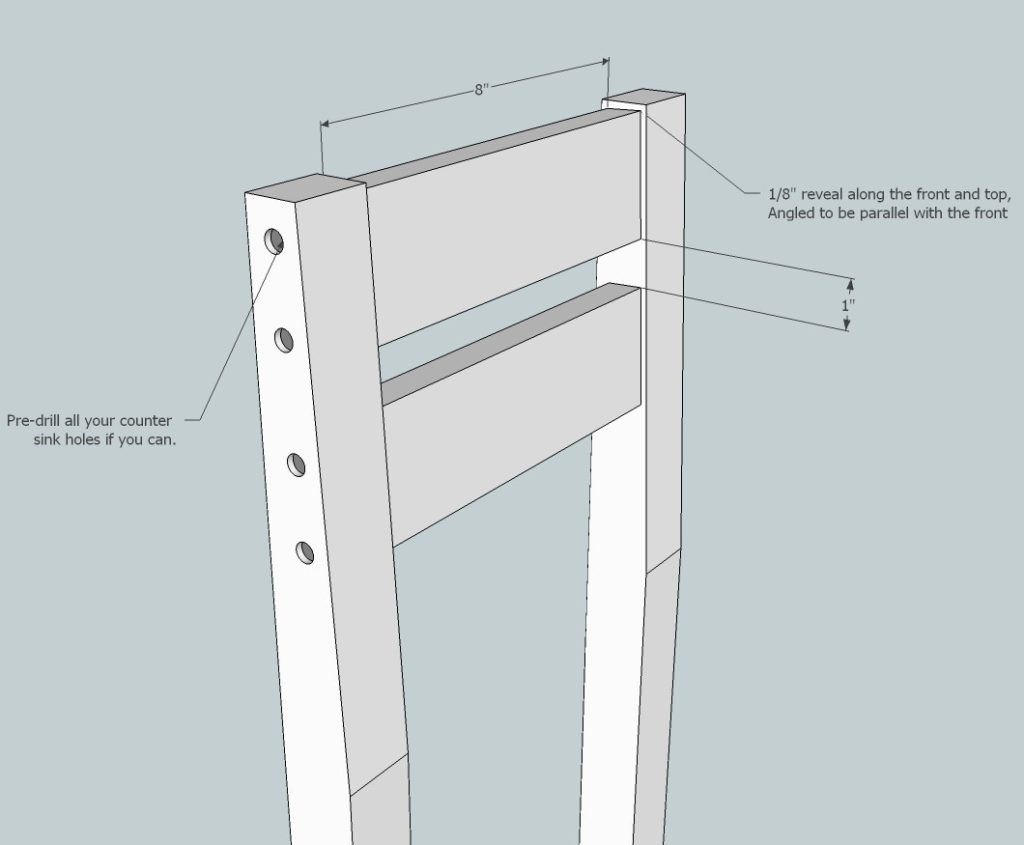
Add the back rails. I left 1/8″ reveal at the front and top with a 1″ spacing between. I pre drilled my counter sinks to 7/8″ deep with the standart Kreg drill bit. This allowed be to fill the hole with wood dowel later. Use the 2 1/4″ Pocket Screws and glue.
STEP 3
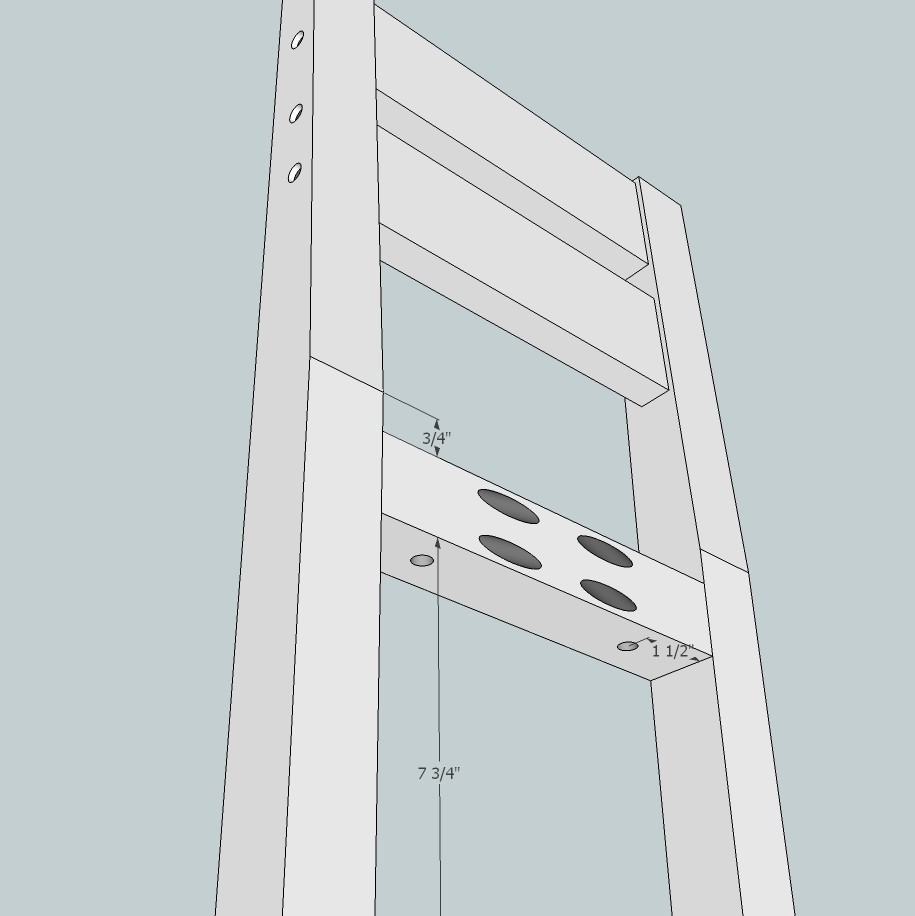
Add the back Apron. Drill your 1 1/2″ Pocket holes all on one side. Then Counter sink two holes 7/8″ deep on the bottom 1 1/2″ from the end. This will ensure they won’t hit the other pocket screws. Measure 7 3/4″ up from the foot of the leg and place the Apron there. This will leave 3/4″ space for the seat top. Glue and Screw with 2 1/4″ Pocket screws. Make sure the pocket hole face in! they will be hidden once the seat is in place.
STEP 4
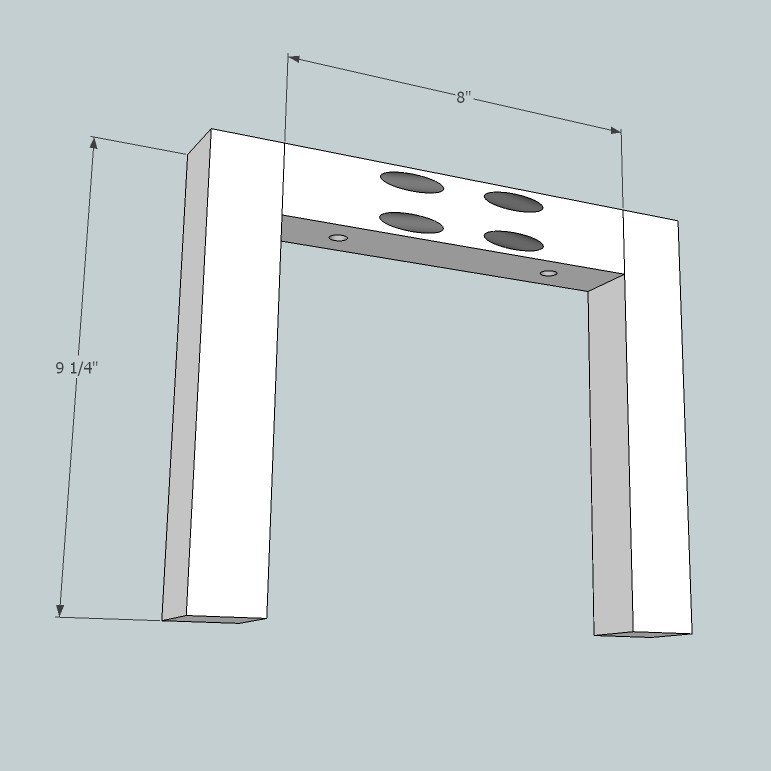
Now assemble the front legs to the front apron. Drill your 1 1/2″ pocket holes and again countersink from the bottom up two holes 1 1/2″ from the ends. counter sink 7/8″. Attach legs to apron with pocket screws and glue
STEP 5
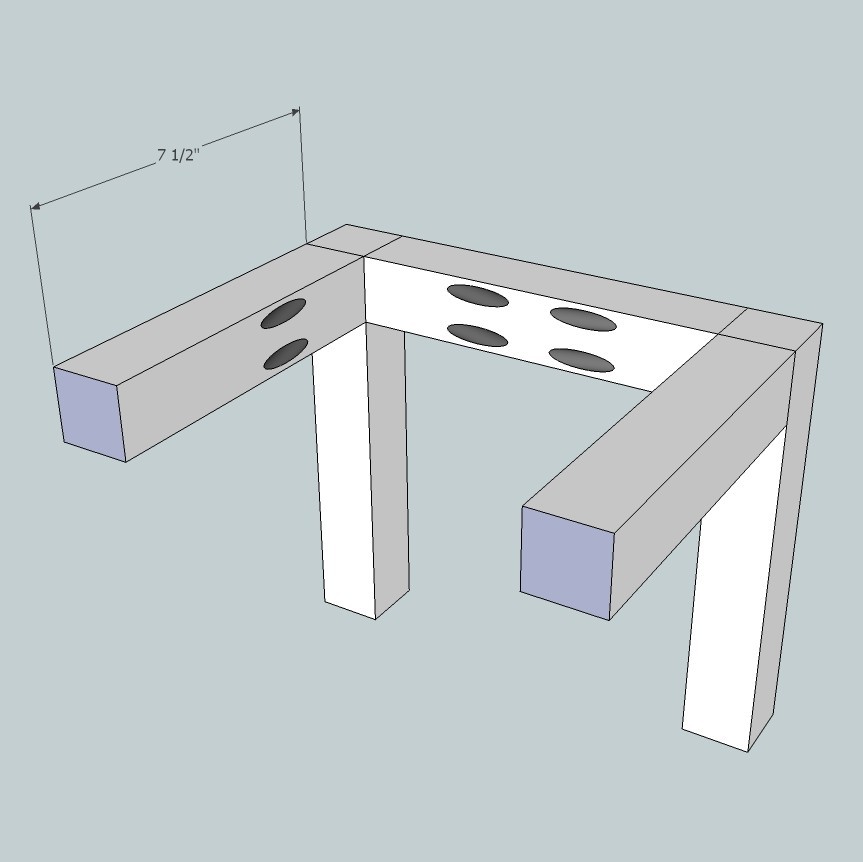
STEP 6
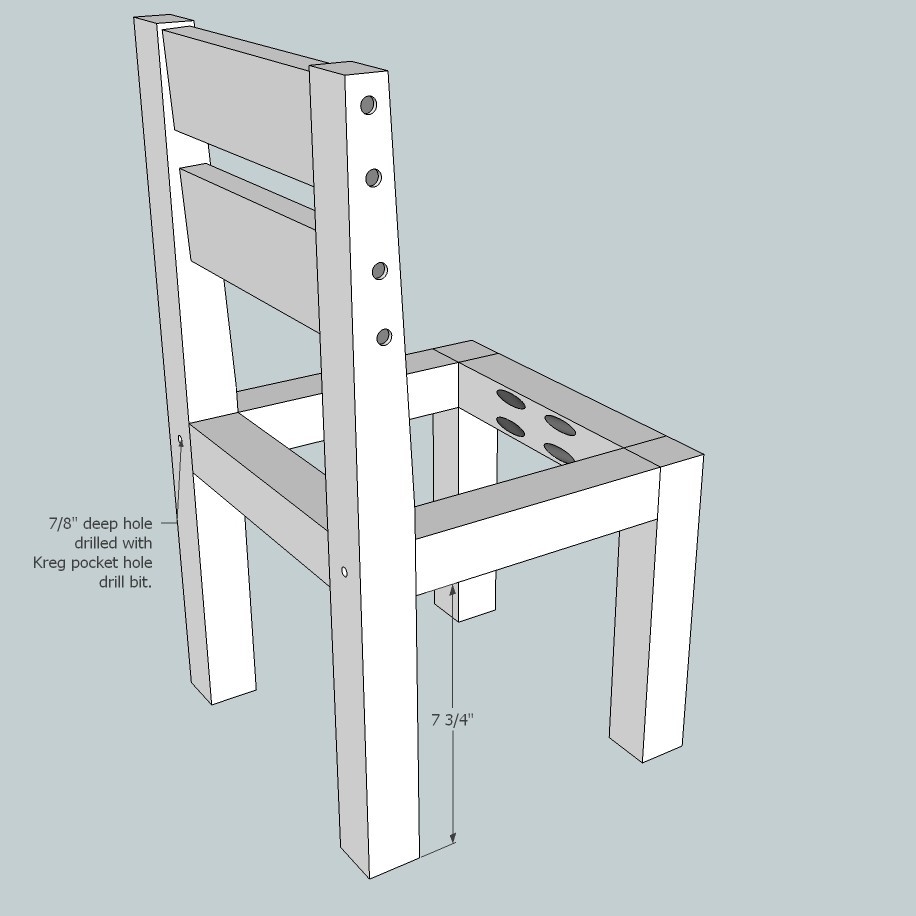
Now attach the front legs with the back legs. Make sure everything is nice and square. Pre-drill two hcountersink hole on the back of the back legs right in the middle of the back apron centred on the legs. Attach glue and two pocket hole screws.
STEP 7
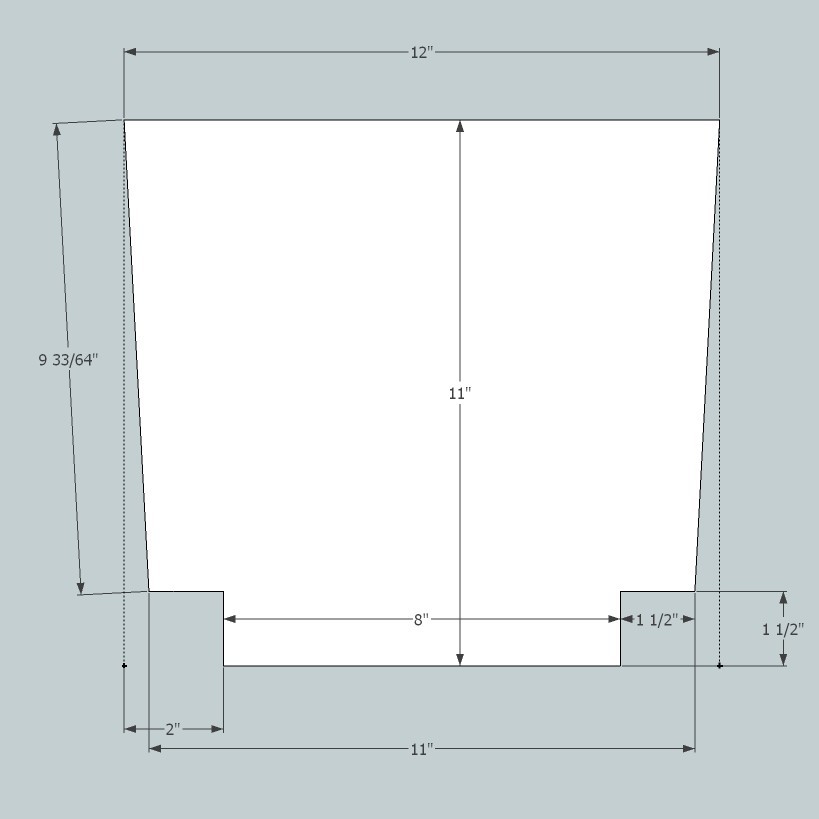
Now we need to cut out the seat. Again this can be from any material you want i suggest it be 3/4″ think. I used MDF because i knew it was going to be painted. Mark one of your 12″ sides as the front then on the opposite end draw out the a rectangle in each corn that is 2″ wide and 1-1/2″ high. then measure in along the top of those rectangles 1/2″ from the side. Draw a line from that point to the front corners of your seat. Use a circular saw to cut out the lines (or table saw 3 Deg) then a hand saw or band saw for the back corners.
STEP 8
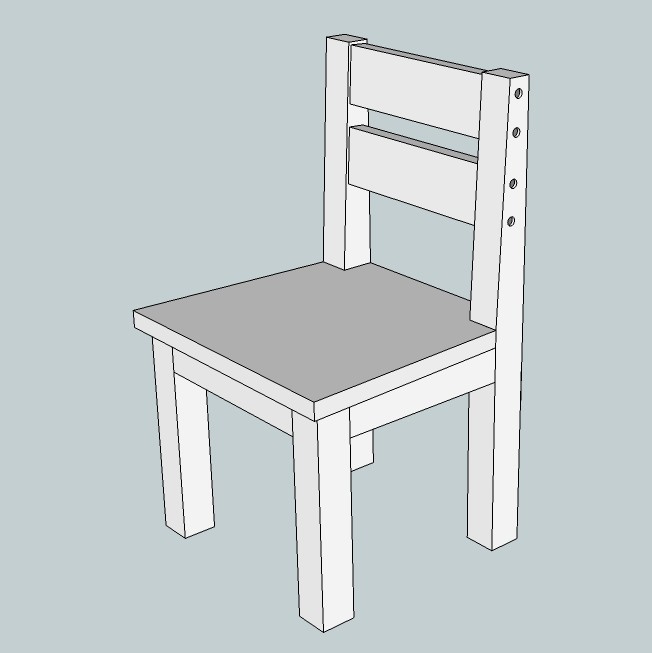
Place the seat in the frame. If its a little tight thats ok just sand the tight areas. Then use four 1-1/4″ pocket hole screws from the bottom to hold it down.
FINISHING INSTRUCTIONS
If you like you can plug all the screw holes with 3/8″ wood dowel. Apply additional coats of wood filler as needed. When wood filler is completely dry, sand the project in the direction of the wood grain with 120 grit sandpaper. Vacuum sanded project to remove sanding residue. Remove all sanding residue on work surfaces as well. Wipe project clean with damp cloth.
It is always recommended to apply a test coat on a hidden area or scrap piece to ensure color evenness and adhesion. Use primer or wood conditioner as needed.
