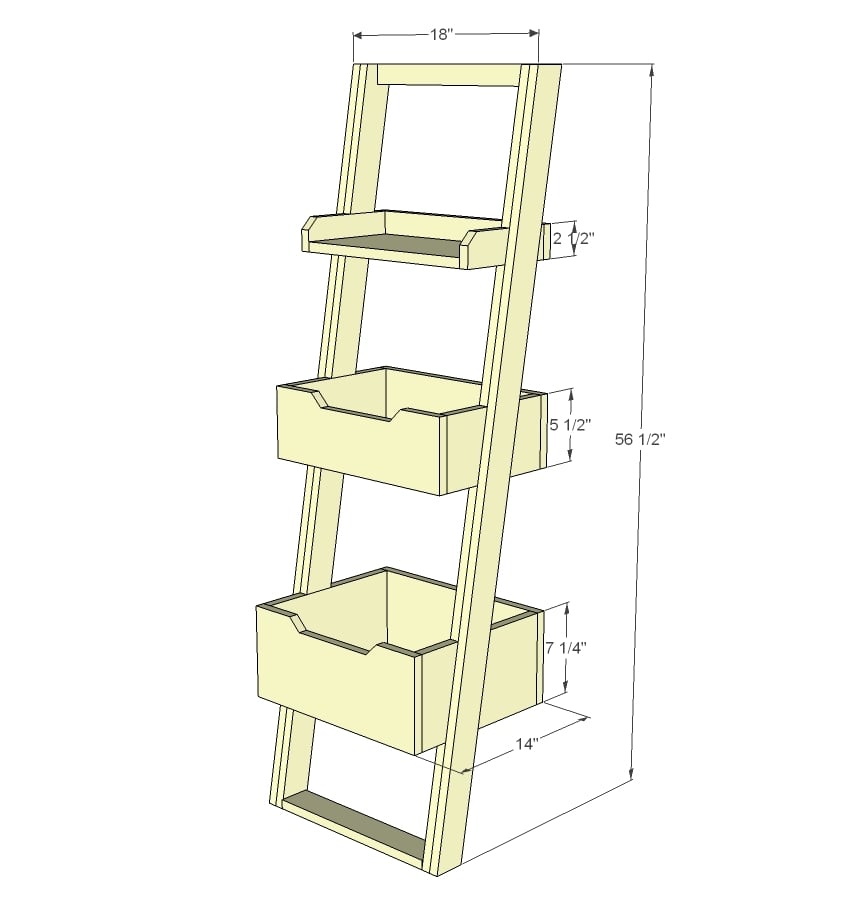
Build a little leaning bookshelf inspired by Land of Nod Little Sloan leaning bookshelf. Make your own with free step by step plans!
DIMENSIONS

- 3 – 1×3 @ 8 feet long
- 1 – 1×8 @ 6 feet long
- 1 – 1×6 @ 6 feet long
- 1 – 2×2@ 15″ long
- 3/4″ plywood piece at least 15 1/2″ x 31″
- (can use MDF, project panel etc)
- 3″ or longer screws (2 or more) for attaching frame to wall
- 1 1/4″ finish nails
- Recommend 1 1/4″ pocket hole screws
FRAME
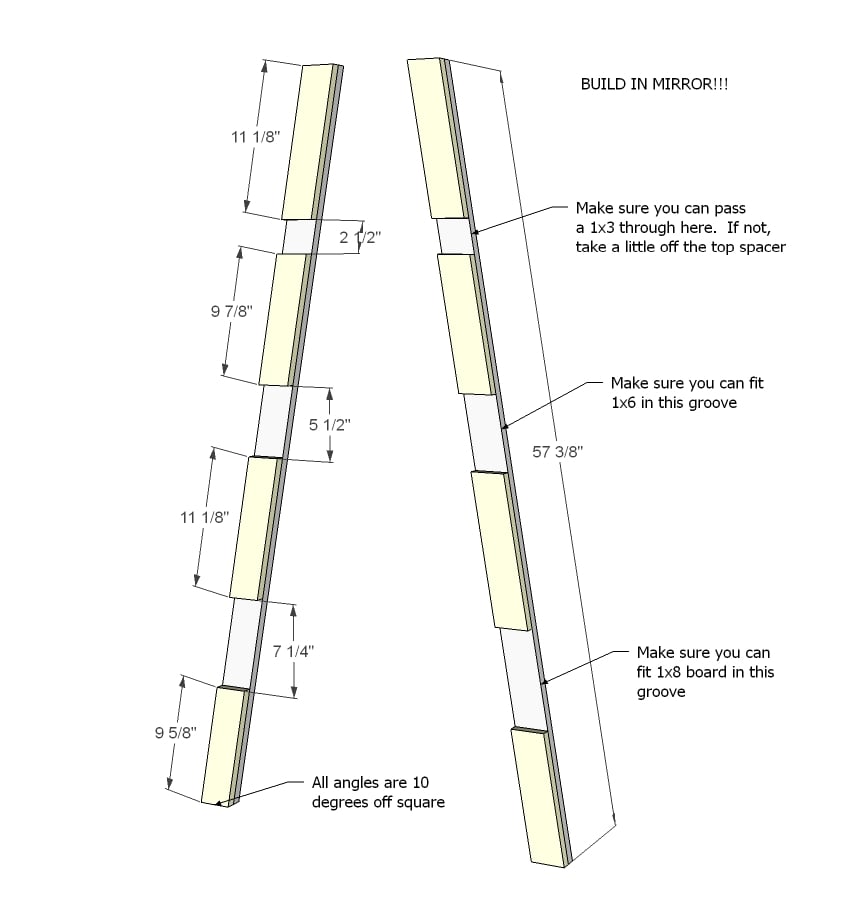
- 2 – 1×3 @ 57 3/8″ (both ends are cut at 10 degrees off square, ends ARE parallel, long point to short point measurement)
- 2 – 1×3 @ 29 3/4 (both ends are cut at 10 degrees off square, ends ARE parallel, long point to short point measurement)
- 2 – 1×3 @ 11 3/8″ (both ends are cut at 10 degrees off square, ends ARE parallel, long point to short point measurement)
- 2 – 1×3 @ 11 1/8″ (both ends are cut at 10 degrees off square, ends ARE parallel, long point to short point measurement)
- 1 – 2×2 @ 15″ top
- 1 – 1×3 @ 15″ bottom
TOP SHELF
- 1 – 3/4″ plywood @ 15″ x 8″
- 1 – 1×3 @ 16 1/2″
- 2 – 1×3 @ 8″
MEDIUM BOX
- 1 – 3/4″ plywood @ 15″ x 10″
- 2 – 1×6 @ 10″
- 2 – 1×6 @ 16 1/2″
LARGE BOX
- 1 – 3/4″ plywood @ 15″ x 12 1/2″
- 2 – 1×8 @ 12 1/2″
- 2 – 1×8 @ 16 1/2″
INSTRUCTIONS
Start by building the two leg sets IN MIRROR by attaching the spacers to the full leg boards. Make sure the gaps are wide enough to fit your boards easily in between – it will be easier to adjust now instead of later on.
STEP 2
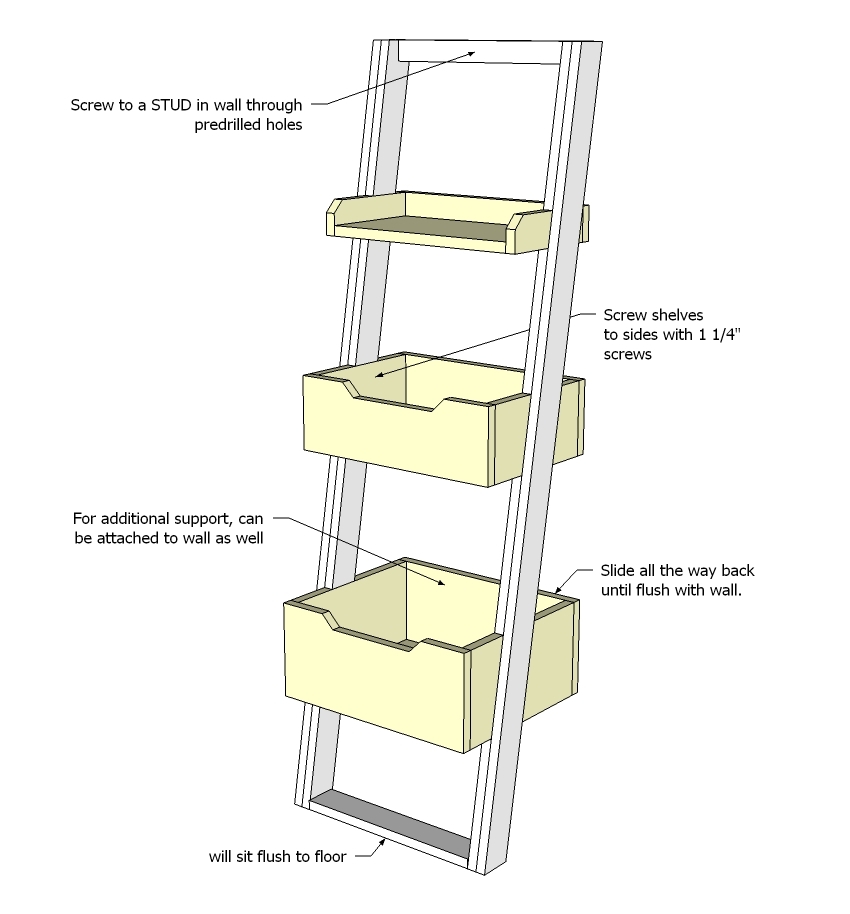
Then attach top and bottom to sides as shown above.
STEP 3
Build your shelf and boxes either with 2″ nails or 3/4″ pocket holes/ 1 1/4″ pocket hole screws and glue.
STEP 4
Mount the frame to the wall attaching to studs in the wall. Then slide the boxes and shelf in place, screwing to sides.
FINISHING INSTRUCTIONS
Fill all holes with wood filler and let dry. Apply additional coats of wood filler as needed. When wood filler is completely dry, sand the project in the direction of the wood grain with 120 grit sandpaper. Vacuum sanded project to remove sanding residue. Remove all sanding residue on work surfaces as well. Wipe project clean with damp cloth.
It is always recommended to apply a test coat on a hidden area or scrap piece to ensure color evenness and adhesion. Use primer or wood conditioner as needed.
CREDIT ANA WHITE


