Build your own farmhouse style nightstands for about $50 each! Features a large, roomy drawer and planked wood top. You just need a few basic power tools and our easy, beginner plans with step by step diagrams, video tutorial, detailed shopping list, and cut list.
DIMENSIONS
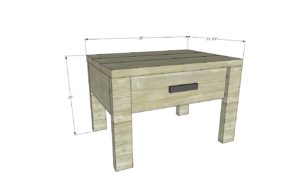
Dimensions shown above – this is a good sized nightstand, but it is easy to modify the height and width.
PREPARATIONS
- 1 – 2×4 @ 104-5/8″ long (or longer
- 1 – 1×8 @ 8 feet long
- 1 – 2×8 @ 8 feet long
- 1 – 1×4 @ 8 feet long
- 1 – 1/4″ plywood @ 20-1/2″ x 19″
- 18 white euro style drawer slides
- 3/4 inch finish nails
- 1 1/4 inch finish nails
- 2 inch finish nails
- 4 – 2×4 @ ~7-1/4″ – cut to match the width of the 1×8 boards
- 2 – 1×8 @ 18-1/4″ – sides
- 4 – 2×4 @ 18-1/2″ – legs
- 1 – 1×8 @ 23″ – back
- 1 – 1×8 @ 22-3/4″ – drawer face
- 3 – 2×8 @ 30″ – top
DRAWER – Do not cut until you can measure the opening and adjust to fit if needed
- 2 – 1×4 @ 18″
- 2 – 1×4 @ 19″
- 1 – 1/4″ plywood @ 20-1/2″ x 19″
INSTRUCTIONS
STEP 1
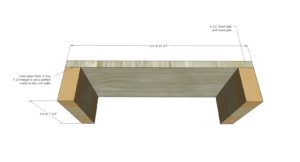
Use glue and the 1-1/4″ or 1-1/2″ brad nails to attach the 1×8 sides to the shorter 2x4s.
Line outside edges up carefully.
Hold flush to top, leave any discrepancies at the bottom.
Repeat to build two of the same.
STEP 2
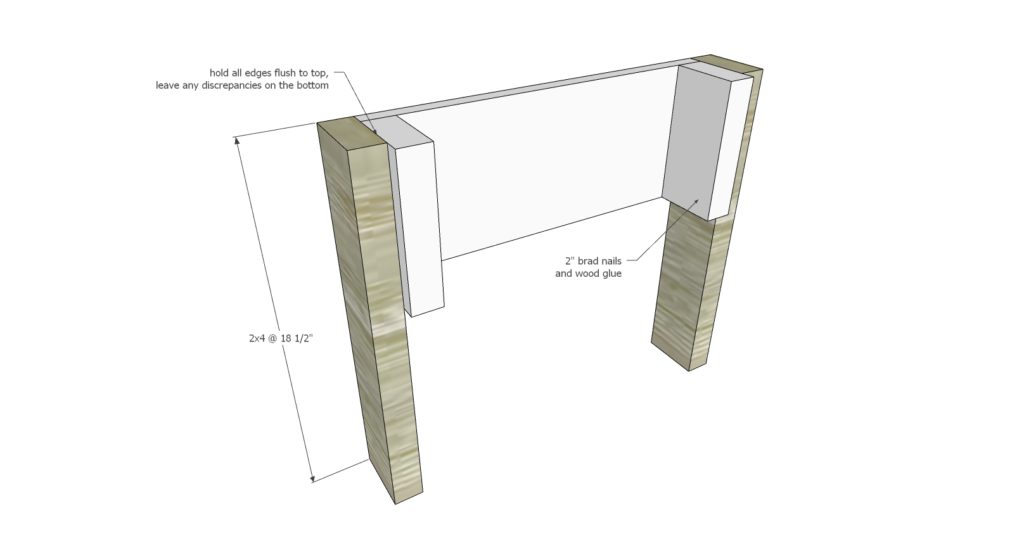
Apply glue where legs overlap the sides.
Attach with 2″ brad nails and glue, keeping outside edges and top edges flush.
STEP 3
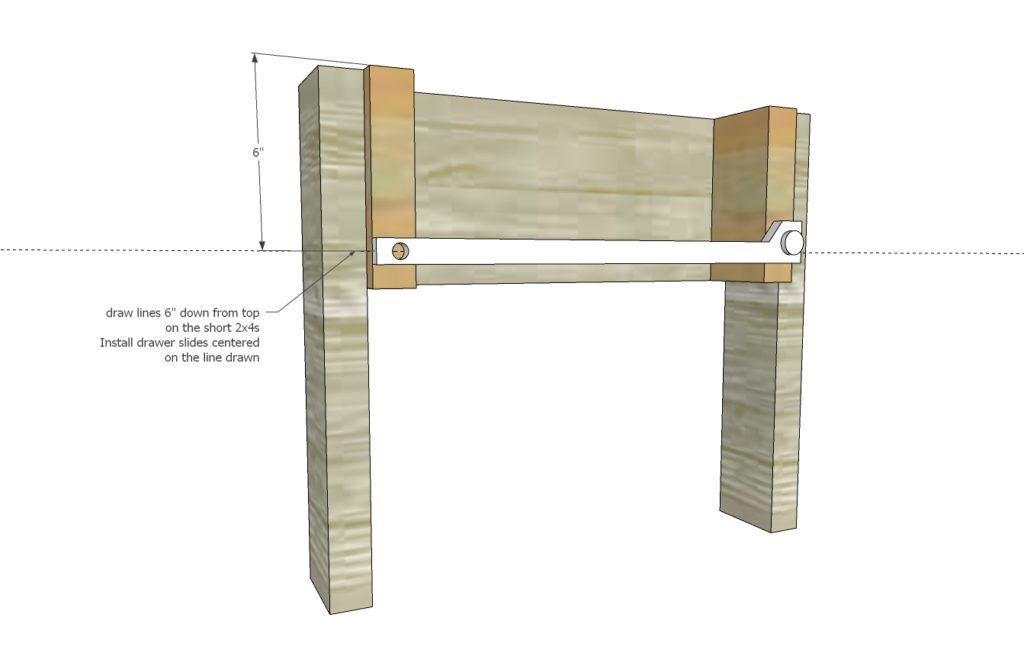
Install drawer slide cabinet member on the shorter 2x4s.
Make sure the two drawer slides are installed exactly the same location so your drawer slides evenly.
The front of the drawer slide (wheel side) is flush to the front edge of the shorter 2×4. The back edge may end short of the back shorter 2×4 depending on your drawer slides.
Repeat for opposite side (but in mirror).
STEP 4
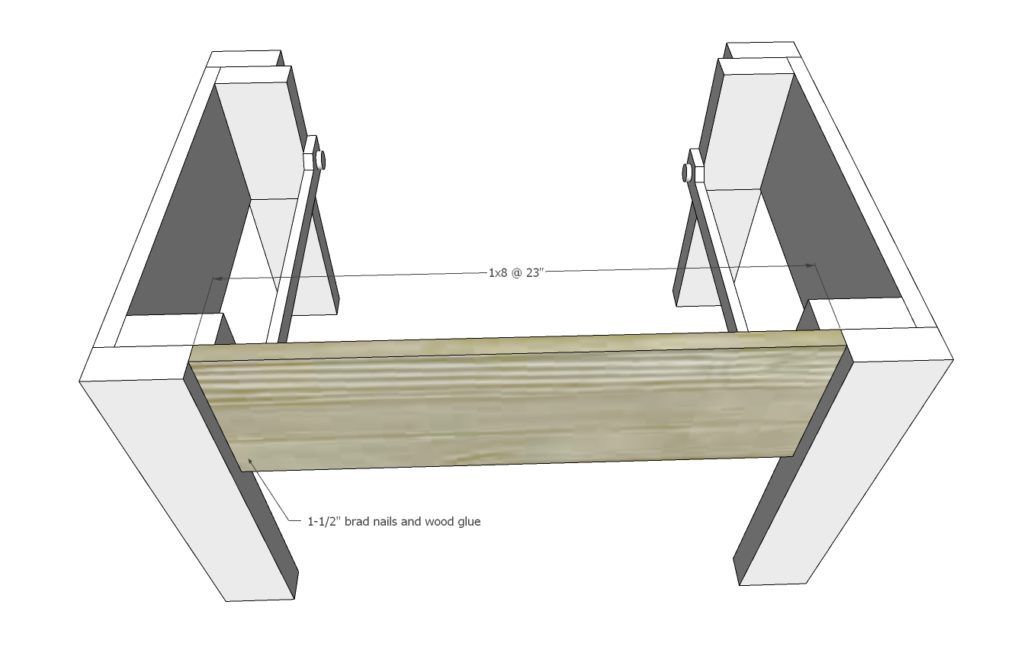
Attach back with 1-1/4″ or 1-1/2″ brad nails and glue.
STEP 5
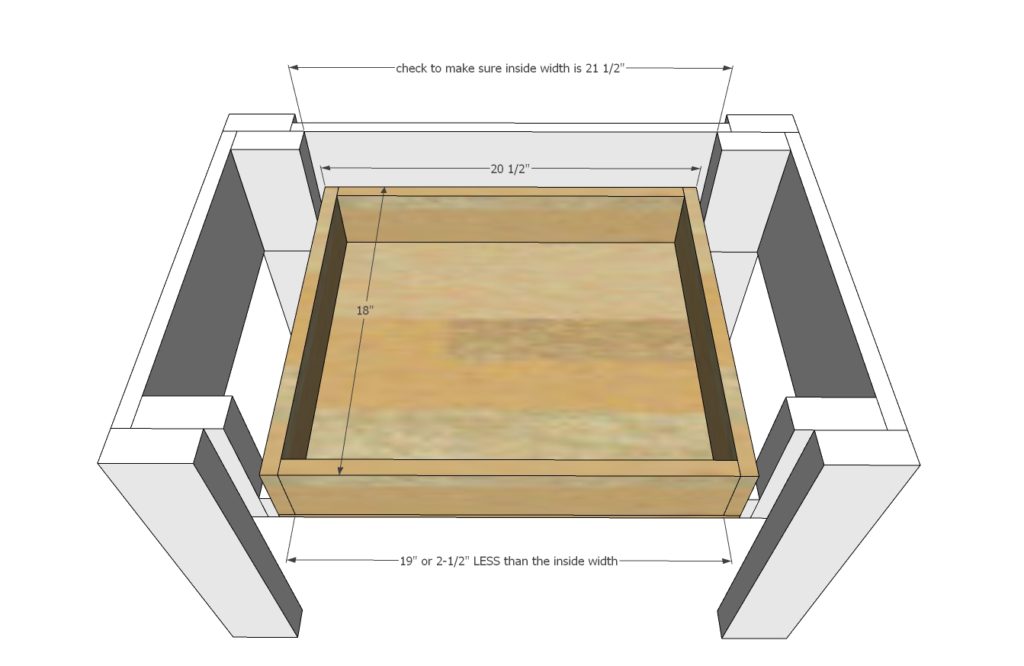
Measure the opening for the drawer cavity.
Read the instructions with your drawer slides. Common drawer slide clearance is 1″ overall (1/2″ on each side).
Figure your drawer size and build to fit.
If ALL of the following are TRUE, you can proceed with measurements shown in diagram and given in cut list –
- Inside width is 21-1/2″
- 1×4 thickness is 3/4″
- Drawer slide clearance is 1/2″ per side (1″ overall)
Cut bottom plywood and nail and glue to bottom with 3/4″ brad nails.
Install drawer members on the finished drawer.
Test drawer inside the nightstand.
STEP 6
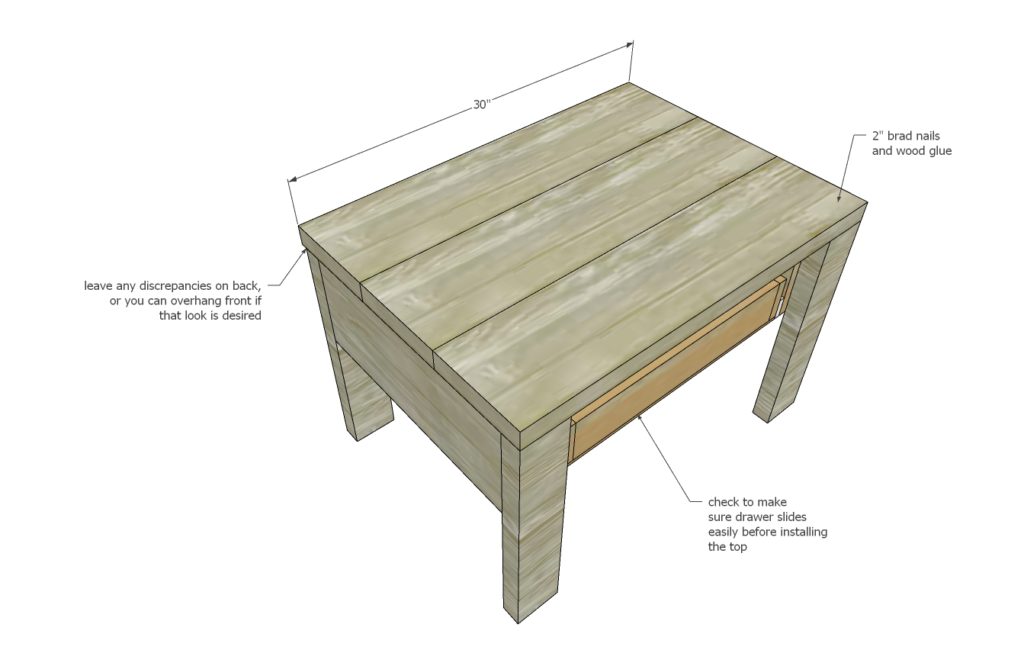
With drawer opening and closing smoothly, nail top boards to the top of the nightstand.
I kept everything flush to the front to match the look of our modern farmhouse bed, but you can overhang the front (or even cut longer to overhang on the sides) if trying to match our classic farmhouse bed.
STEP 7
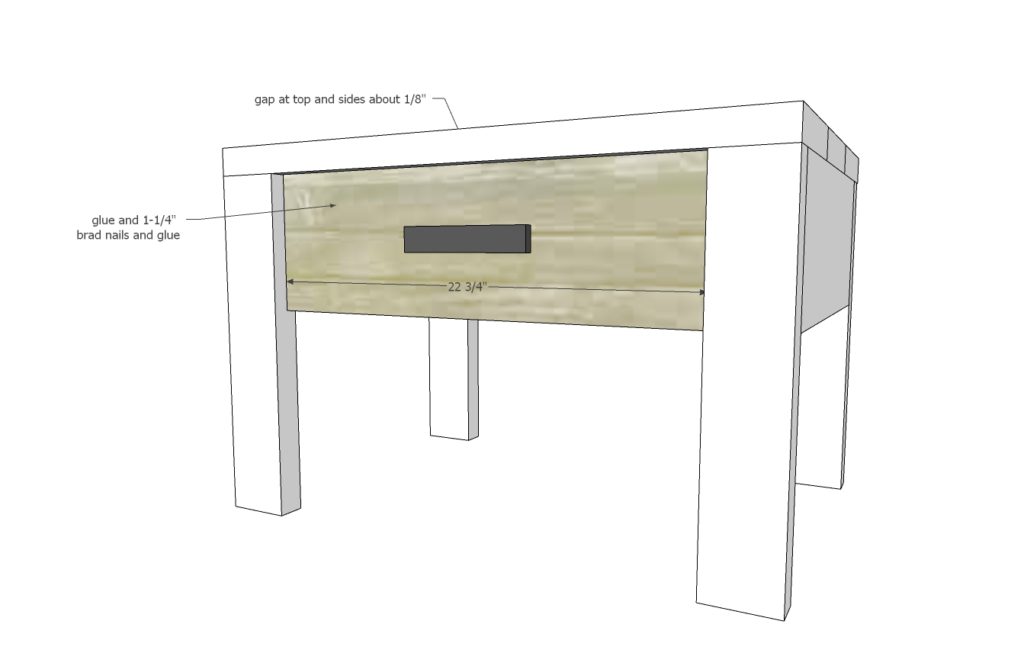
Cut the drawer face about 1/4″ smaller than your front opening.
Apply glue and nail the drawer face to the front of the drawer, leaving an even gap at top and sides, use 1-1/4″ brad nails.
Avoid nailing where the hardware will be placed.
FINISHING INSTRUCTIONS
We used a weathered wood accelerator by Varathane.
CREDIT ANA WHITE
