A beautiful, easy to build table that features a 1x top simple legs. This table is designed to look like something one might find and treasure. Special thanks to our readers for sharing their photos with us.
DIMENSIONS
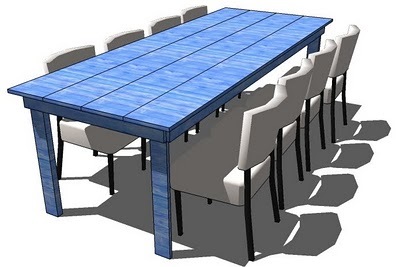
96″ x 36″ x 30″ high (approximate).
PREPARATION
- 4 – 2x2s, 8′ Long 4 – 1×4, 8′ Long 4 – 1×10, 8′ Long 1 – 2×4, stud length or 8′ length 2″ screws 1 1/4″ screws wood glue wood filler sandpaper.
- Elmer’s Wood Glue
- Elmer’s Wood Filler
- 120 grit sandpaper
- primer
- wood conditioner
- paint
- paintbrush
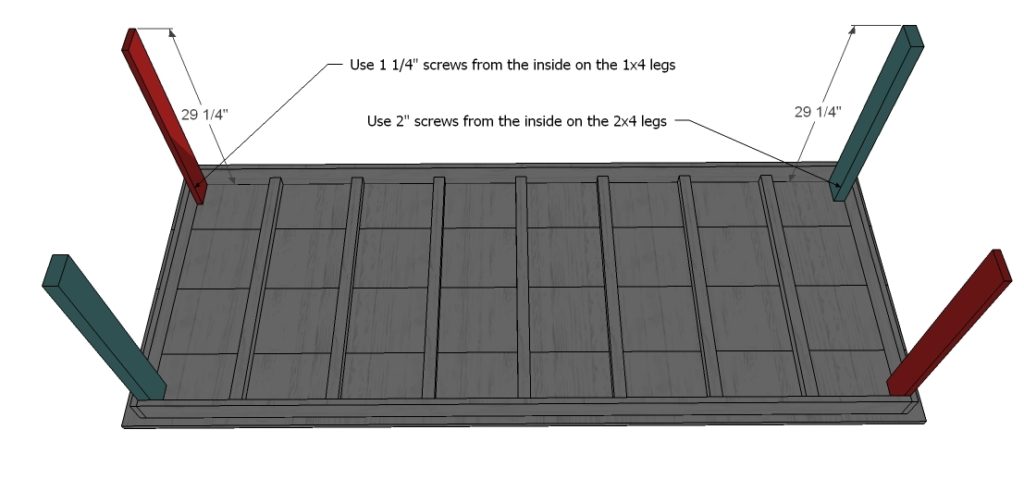
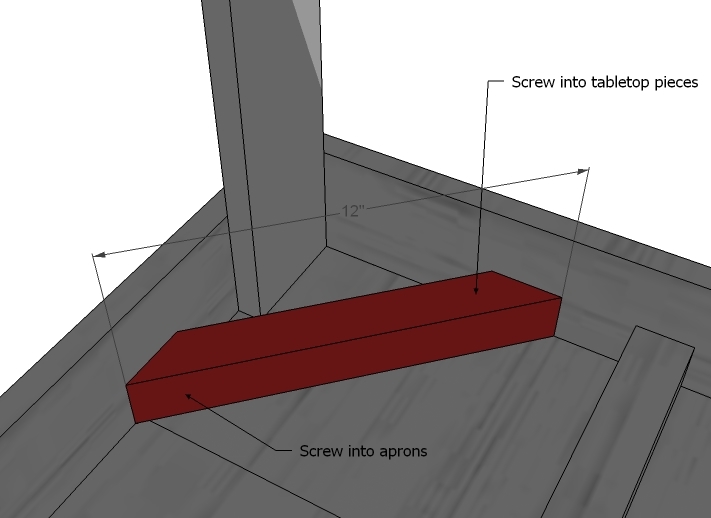
- 2 – 1×4 @ 90 1/2″ (Side Aprons) 2 – 1×4 @ 36″ (End Aprons) 8 – 2×2 @ 34 1/2″ (Under Tabletop Supports) 4 – 1×10 @ 96″ (Tabletop Pieces) 2 – 1×4 @ 29 1/4″ (Legs) 2 – 2×4 @ 29 1/4″ (Legs) 4 – 2×2 @ 12″, ends mitered at 45 degrees (cross supports)
INSTRUCTIONS
STEP 1
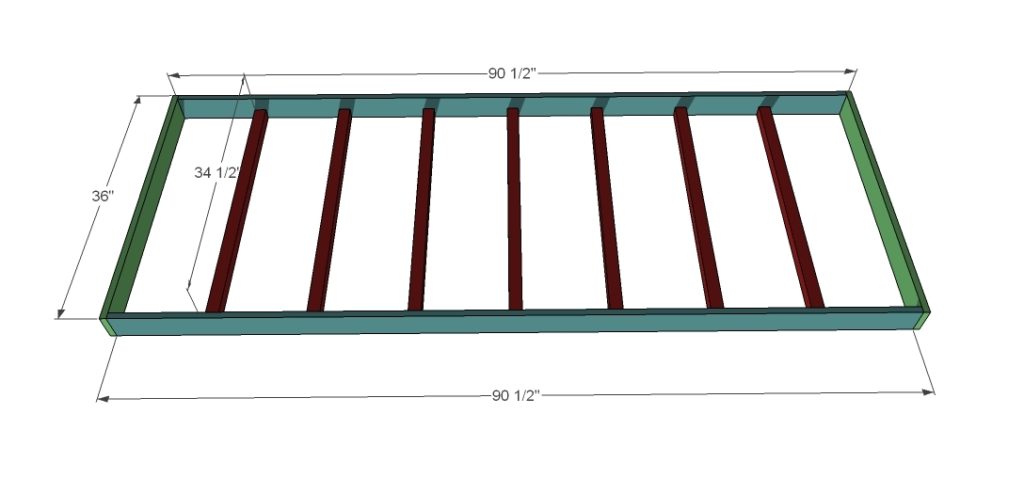
Table Top Supports and Apron. Build the tabletop supports and aprons as shown above. The supports are spaced 10″ apart. Use 2″ screws and glue, countersinking the screws.
STEP 2
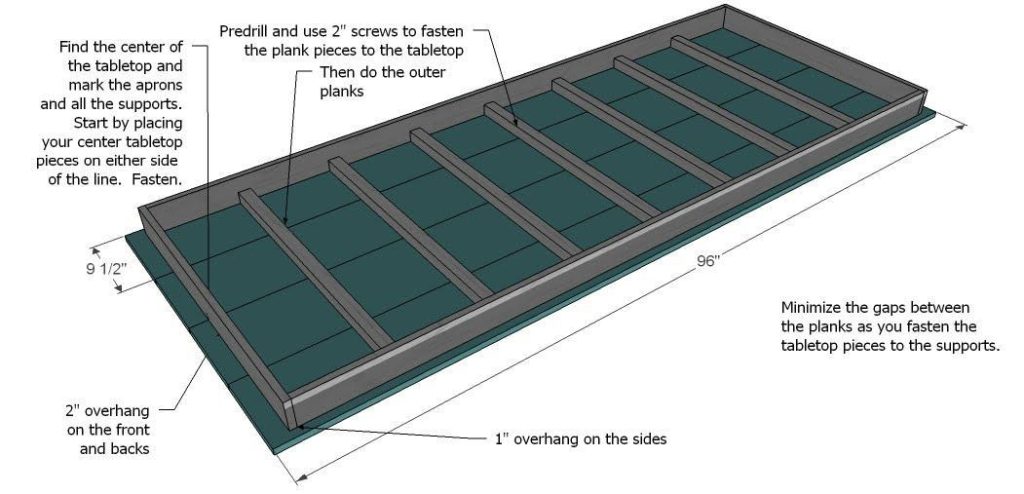
Tabletop Pieces. Take a square of the tabletop. Then find the centers of the tabletop supports and the end aprons and mark. Line up the center tabletop pieces with these marks and fasten through the bottom using 2″ screws and glue. Minimize the gap between the tabletop boards as you go.
STEP 3
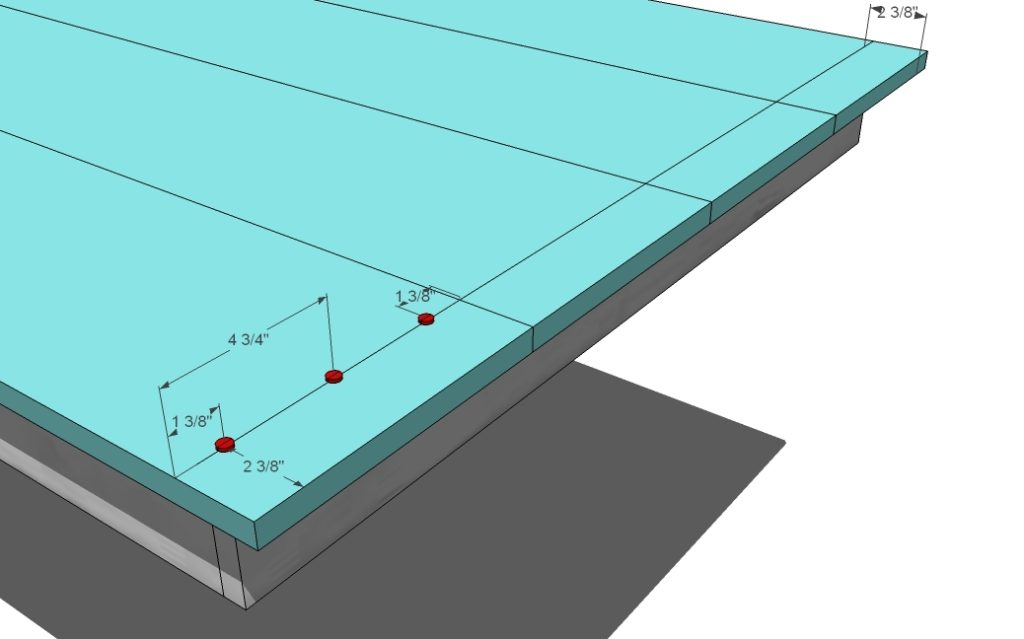
Tabletop Screw Hole Patterns. Mark out the screw holes on the tops of the table as shown above. Then predrill and screw the tabletop pieces to the end aprons. Make sure the table is square prior to doing this. Use the 2″ screws and glue.
