Make your own wood outdoor chaise lounge for a fraction of the cost to buy! Free step by step DIY plans.
DIMENSIONS
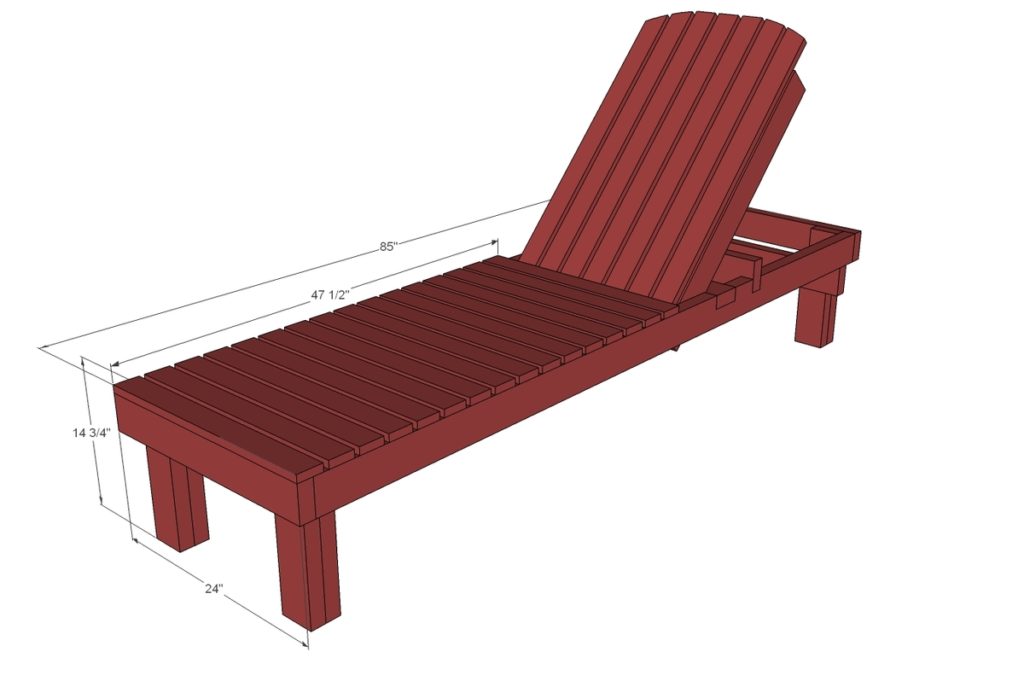
- 2 – 2×6 @ 9 feet long (can be 9 foot studs)
- 3 – 2×4 @ 8 feet long
- 8 – 1×3 @ 8 feet long
- 2 – ¼” bolts 4” long with nuts and 6 washers
- 2-3/4” self tapping exterior wood screws
- 2” exterior screws or galvanized brad nails and glue to nail slats down with
BASE
- 2 – 2×6 @ 85” – main frame sides
- 2 – 2×6 @ 21” – main frame front/back
- 16 – 1×3 @ 24” – seat slats
- 6 – 2×4 @ 14” – legs
- 2 – 2×4 @ 7” – legs
BACK
- 2 – 2×4 @ 32” – back frame
- 3 – 2×4 @ 17 ½” – back frame
- 7 – 1×3 @ 37 ½” – back slats
- 1 – 2×4 @ 24” (stop block)
INSTRUCTIONS
STEP 1
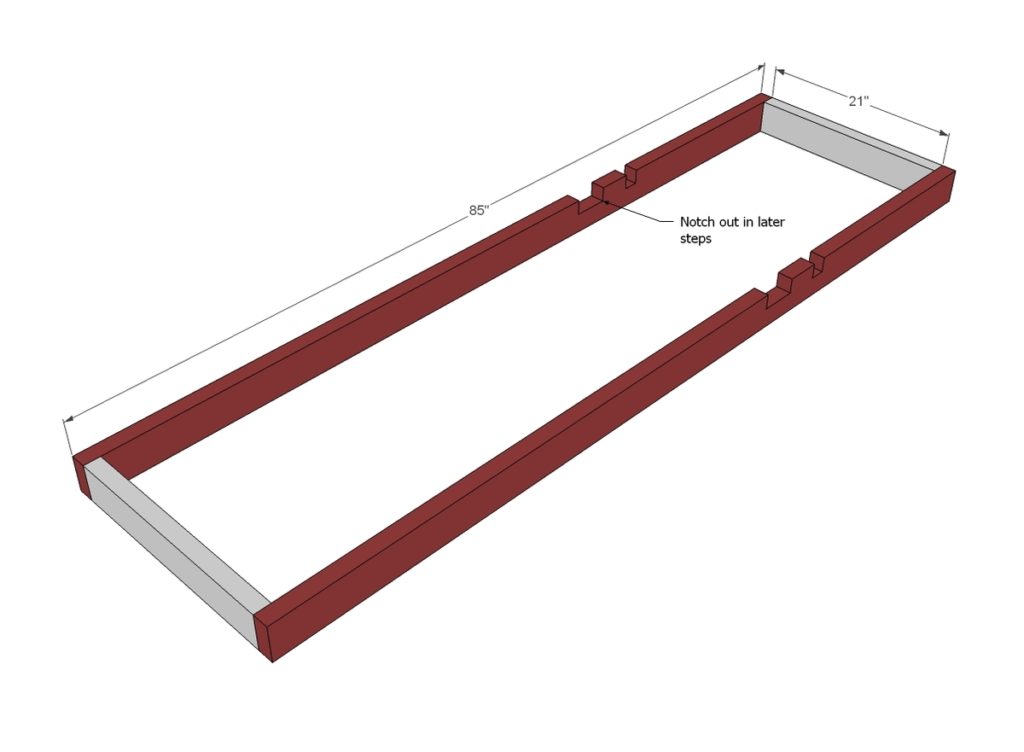
Build your frames first. You can use 1 1/2″ PHs and 2 1/2″ PH screws OR 2-3/4″ countersunk screws.
I do recommend the PHs because it will hide your screws holes, making it easier to paint the pieces, and then attach later through the PHs.
NOTE: The diagrams show 2x4s. We have updated this plan per user recommendations to use 2x6s for the frame.
Notch out for the back support with a jigsaw.
STEP 2
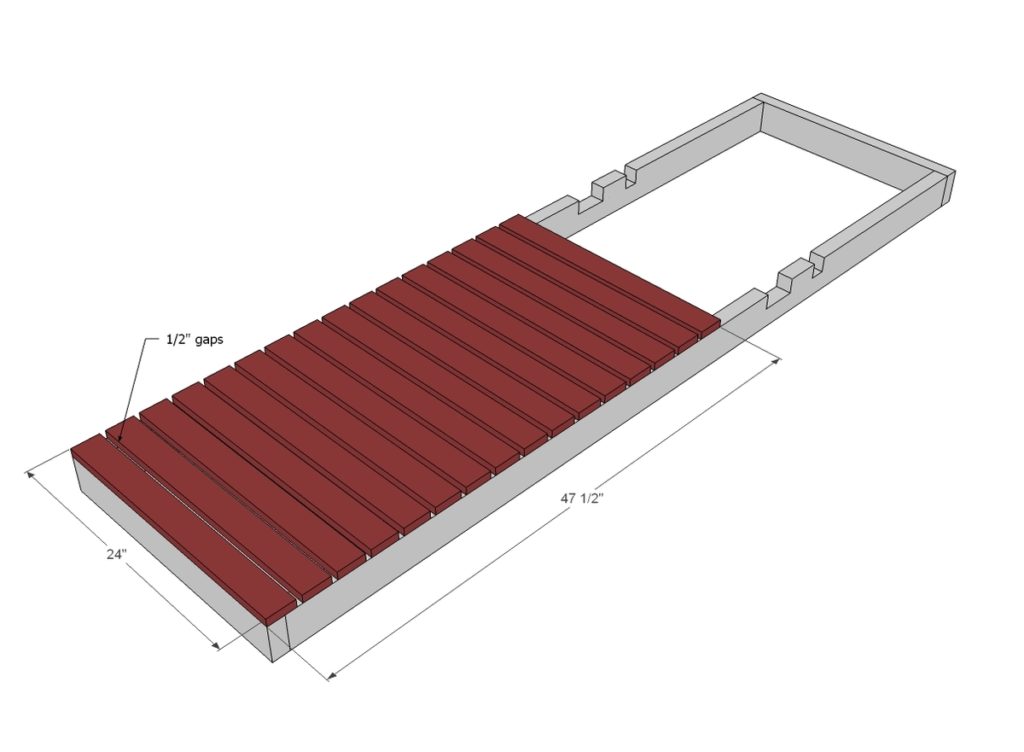
Next add your slats. You can also attach slats from underneath with PHs if desired.
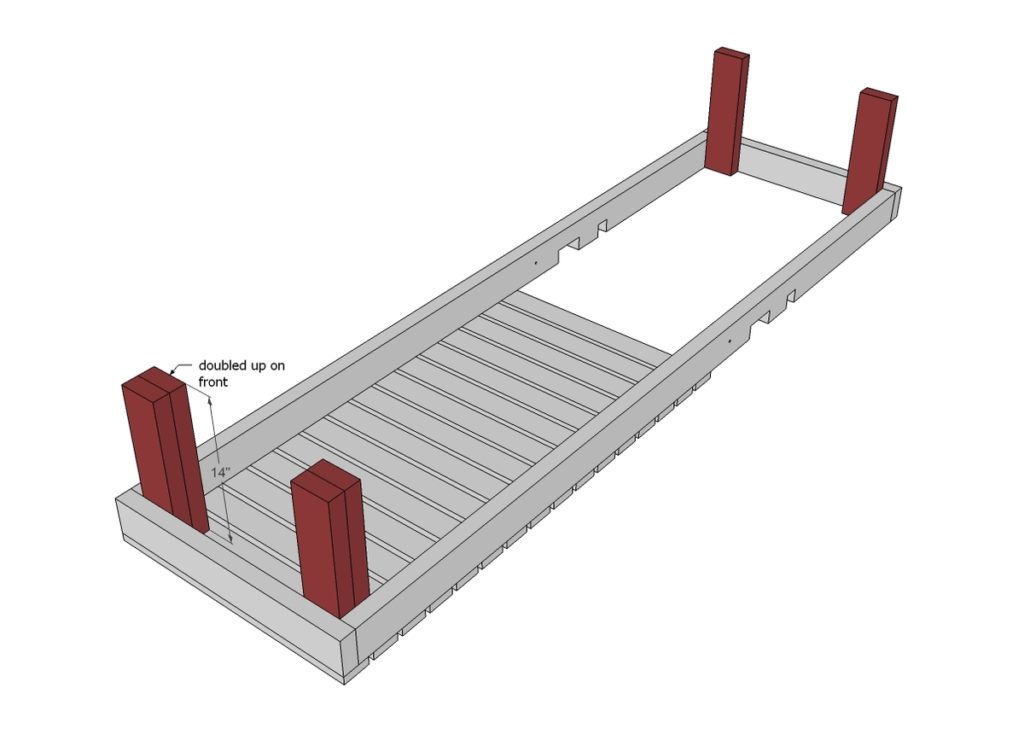
Attach legs, and then to front, attach second row of legs. Use 2 3/4″ self tapping screws and glue here.
Multiple screws are recommended to keep the leg joints solid.
STEP 4
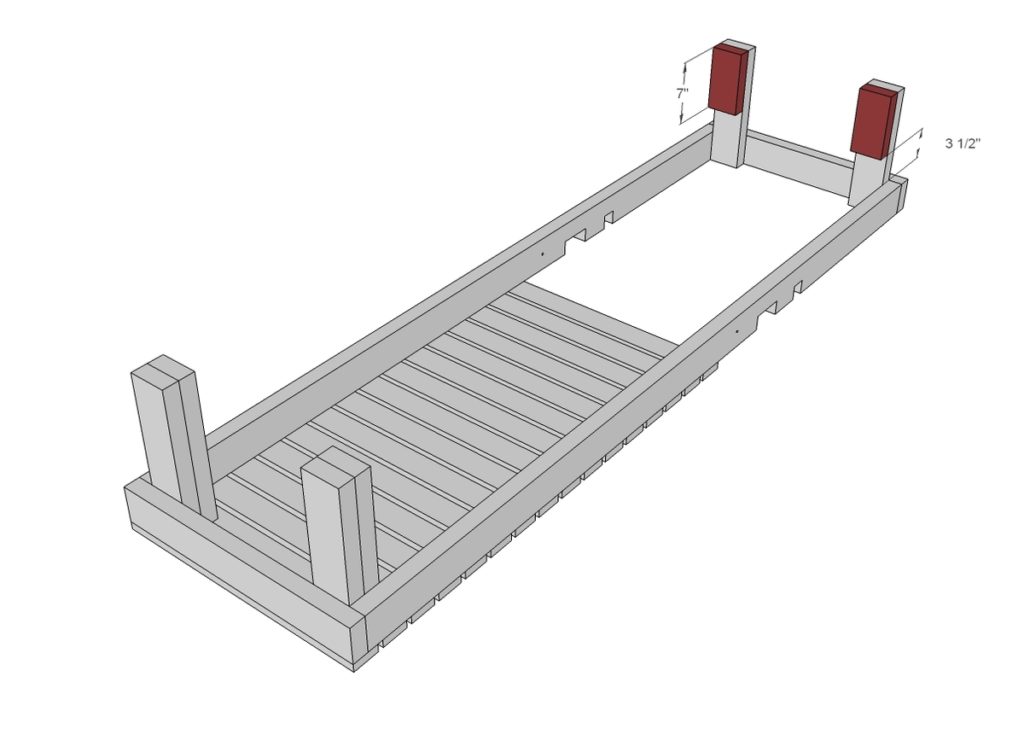
These legs are just long enough to provide you a spot to put the stop block when chaise is fully reclined.
STEP 5
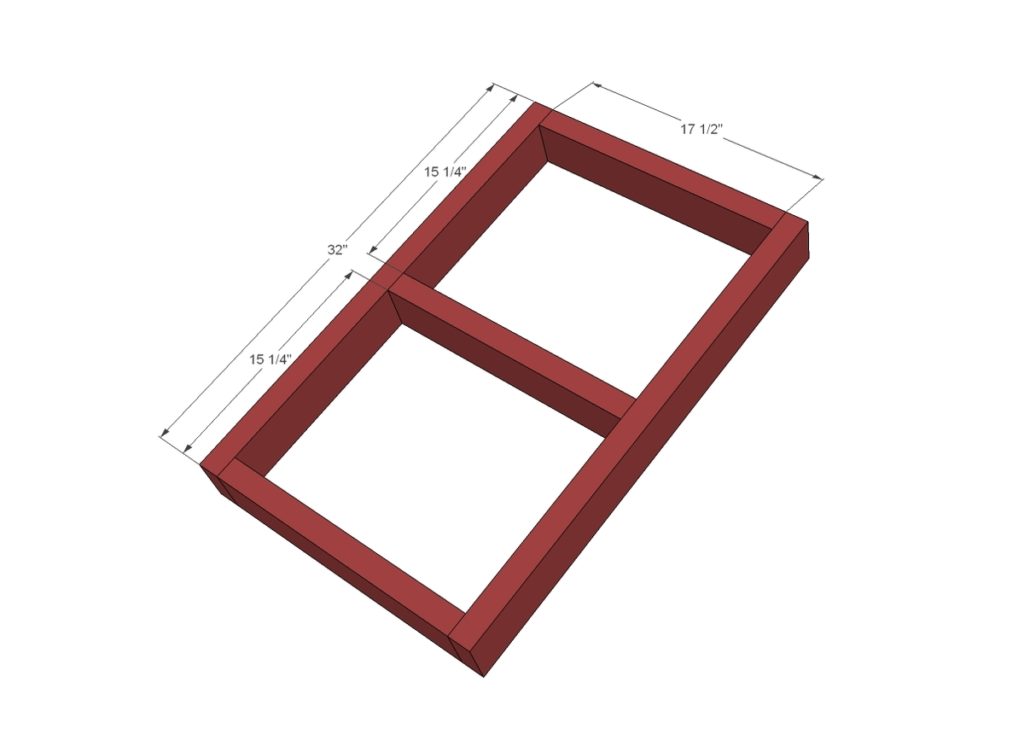
Build the frame for the seat back as you did the main frame.
STEP 6
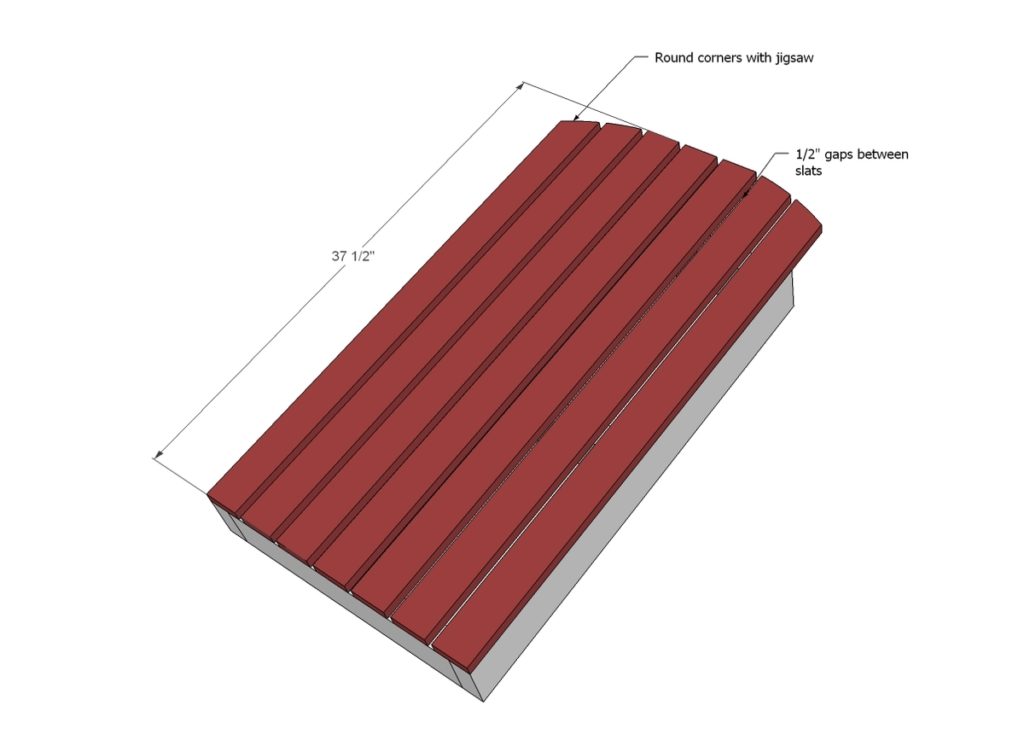
Attach back slats to the frame.
TIP: Users have commented that it is easier to install the seat frame on the pivot bolt first, then add the slats later.
STEP 7
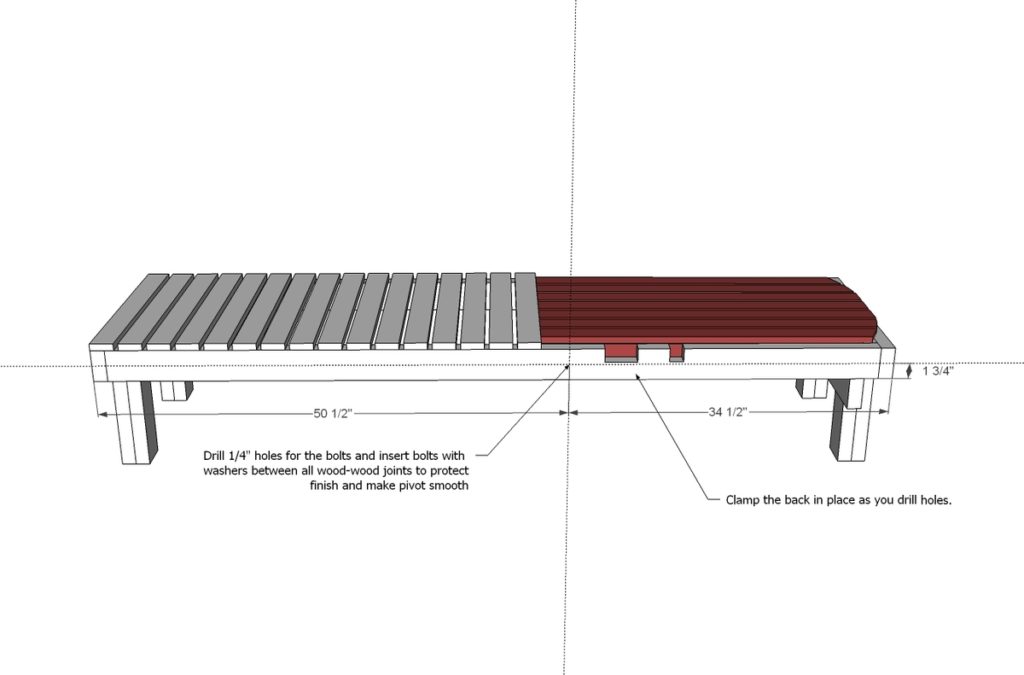
Now we attach back to chaise with the pivot bolt. The easiest way to do this for me was to clamp the pieces in place and drill through both the main frame and the seat frame.
NOTE: The diagram shows a 2×4 – we have upgraded this plan to recommend using a 2×6 instead.
STEP 8
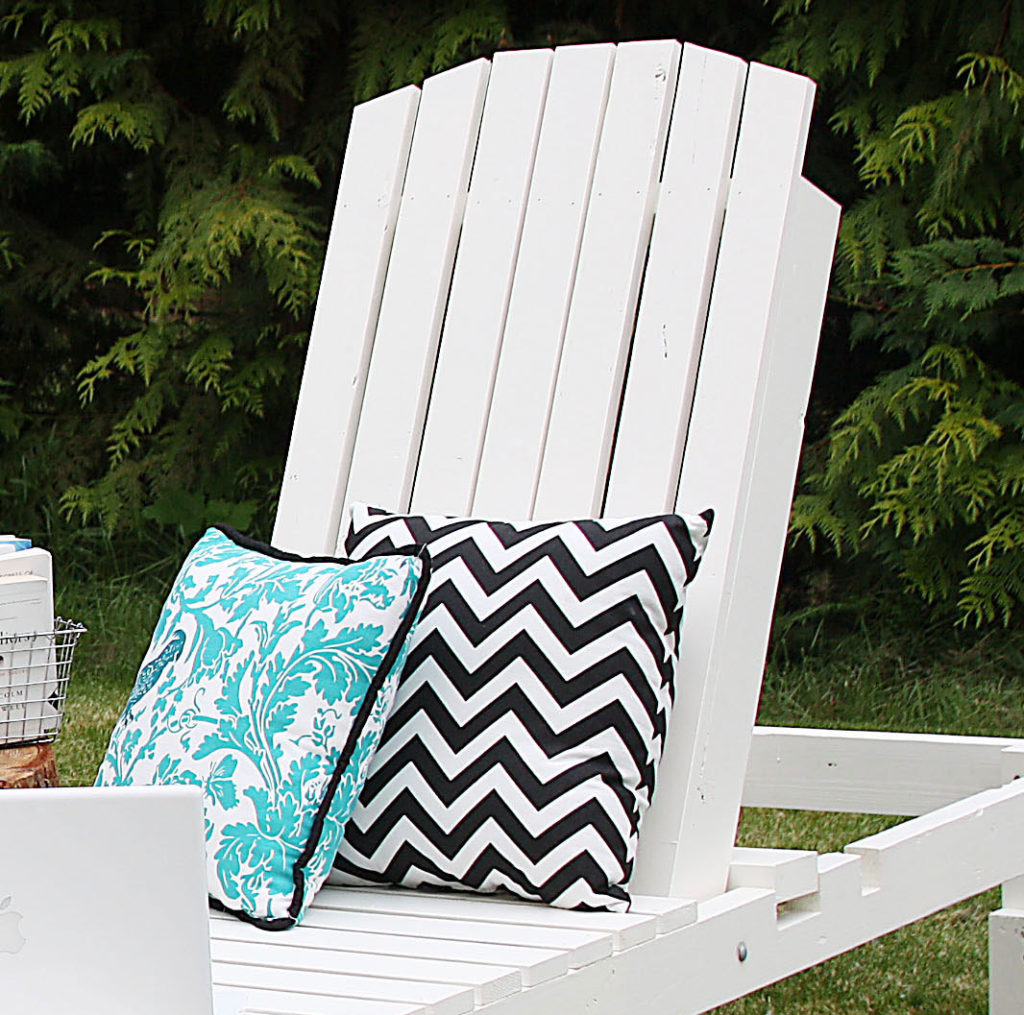
Brook is also sharing with us her step by step finishing tutorial here to get this amazing finish!
STEP 9
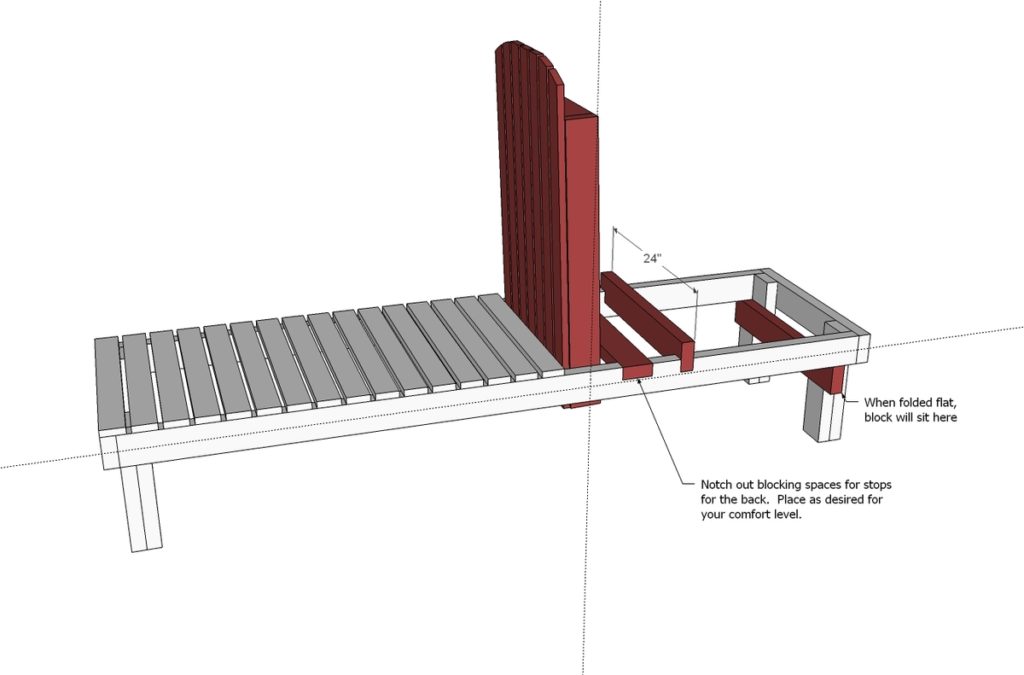
Here is the diagram for the stop block.
CREDIT ANA WHITE
